What are Contours?
Contours are lines of equal elevation relative to a certain point. The contour lines are represented as a vector file format, which means they are composed of lines rather than pixels. This is the difference between saying "the elevation at this point is 80 feet" and "everything contained within this line is 80 feet or higher than my drone."
Why should I use contours?
Elevation maps create valuable insights across industries. Some common uses include:
Construction: Most Computer Assisted Design (CAD) programs use vector maps as the file format of choice, which makes contours the best representation of the physical world.
Mining: Similar to Construction use cases, contours are heavily used in mining software for volumetric measurements.
Agriculture:
-Topographic maps are critical in variable-rate fertilization. When it rains, fertilizer/pesticides, etc flow downhill with the water, so more is needed higher up, and less downhill.
-Tiling decisions: Contour maps are required when measuring where to draw away excess moisture in the soil.
What is the elevation data relevant to?
Elevation maps within DroneDeploy are created using standard geo-referenced information embedded in your drone imagery. The elevation data displayed is the absolute elevation in WGS 84.
How are contours created on DroneDeploy?
When your drone takes an image, it automatically captures the latitude, longitude, and altitude of the drone's location. The altitude at each point is used to create a continuous surface, which is presented within DroneDeploy as the Elevation Toolbox. This map corresponds to a Digital Surface Model (DSM).
The elevation points are then subdivided into lines of equal elevation according to the interval you specify (more on that below).
How do I access the data?
There are two ways to access Contour data within DroneDeploy:
1. 3D Contours (Beta)
2. Contour Export
1. 3D Contours
**Only Available for Individual, Advanced, Teams, and Enterprise accounts at this time**
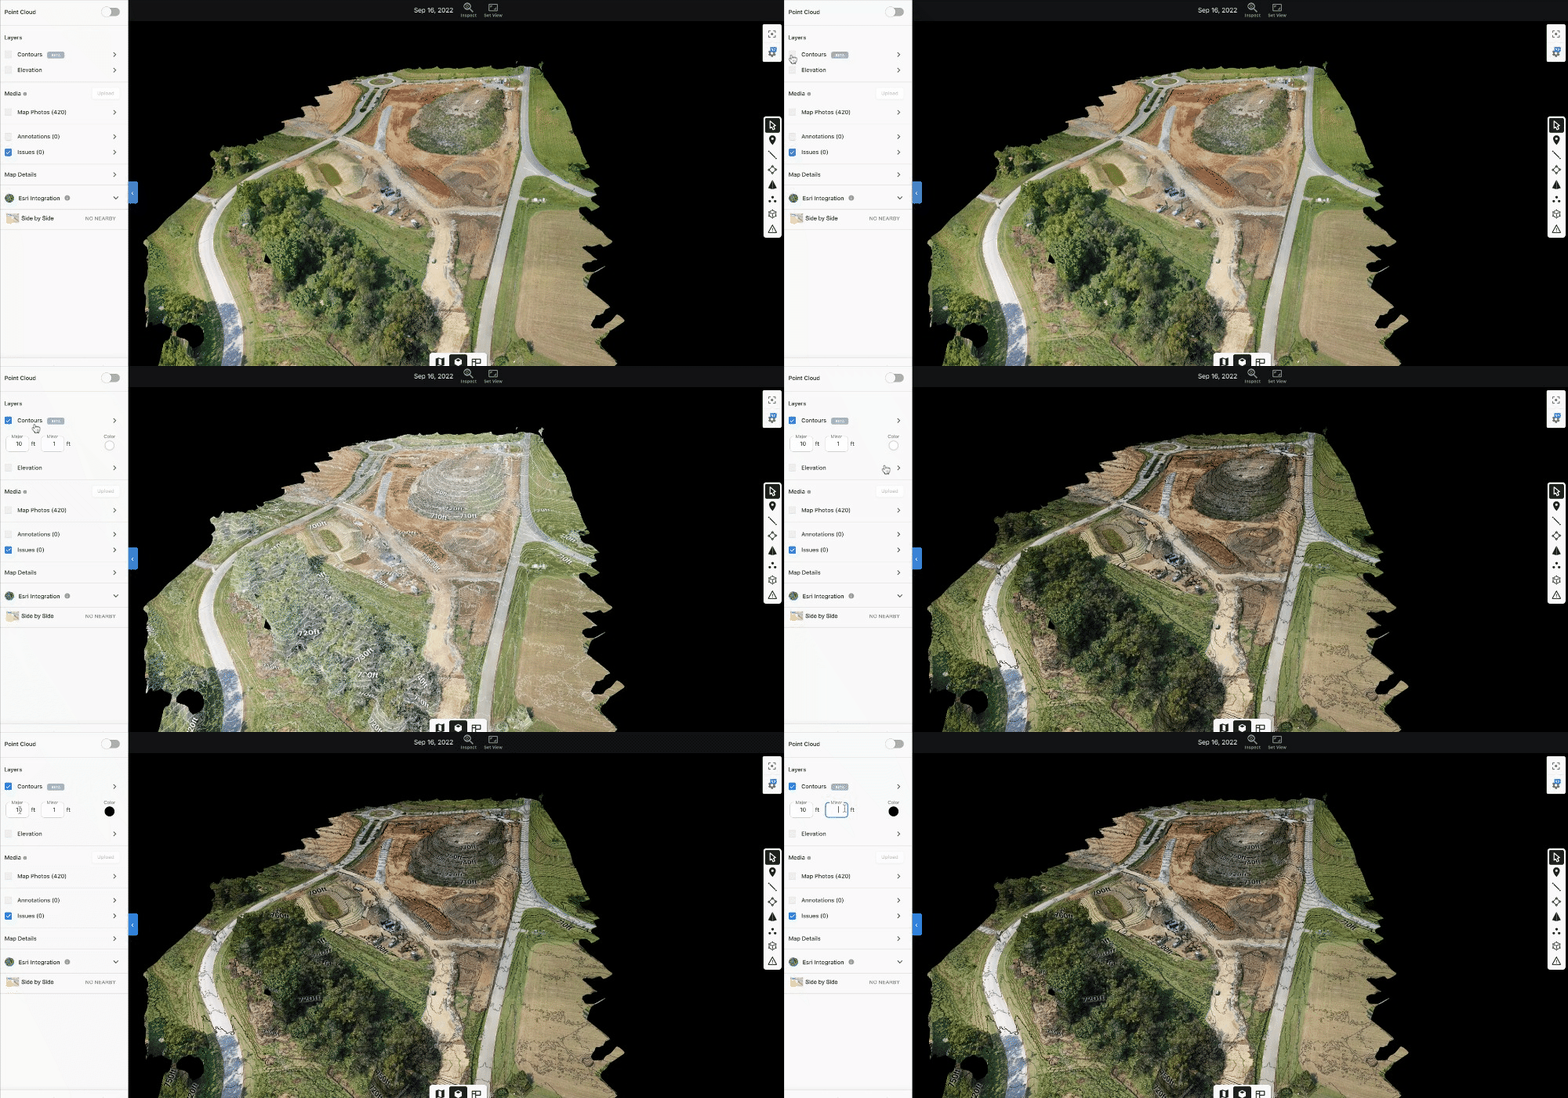
Quickly see the changes in grade across an entire site with the 3D Contour layer.
How to access the Contour layer:
- Enter Model view
- Enable contours and elevation in the left-hand sidebar
- Adjust contour major/minor interval
- Change contour colorization
- Adjust elevation histogram bounds to tune colorization
- Adjust elevation opacity
3D Contour FAQ:
Is there a Terrain only view like in elevation?
No, contours are rendered on DEM only, but users can export DTM contours from the exports tab
Did we change anything with existing contour exports?
No, exports are unchanged
Can you visualize elevation and contours in 3D simultaneously?
Yes
Can you adjust major and minor intervals?
Yes
Can you change the contour line colors?
Yes, white and black are current options.
Where did color and intensity go for elevation?
Deprecated in 2D and not built in 3D due to lack of use in 2D
2. Exporting your Contour File
In order to export your contour dataset, please be sure that:
-Your map has the Elevation Toolbox functionality
-You are on a DroneDeploy Individual, Advanced, Teams, or Enterprise plan
All good? Awesome! To receive your contour export please follow these steps:
A. Select 'Contour' File Type
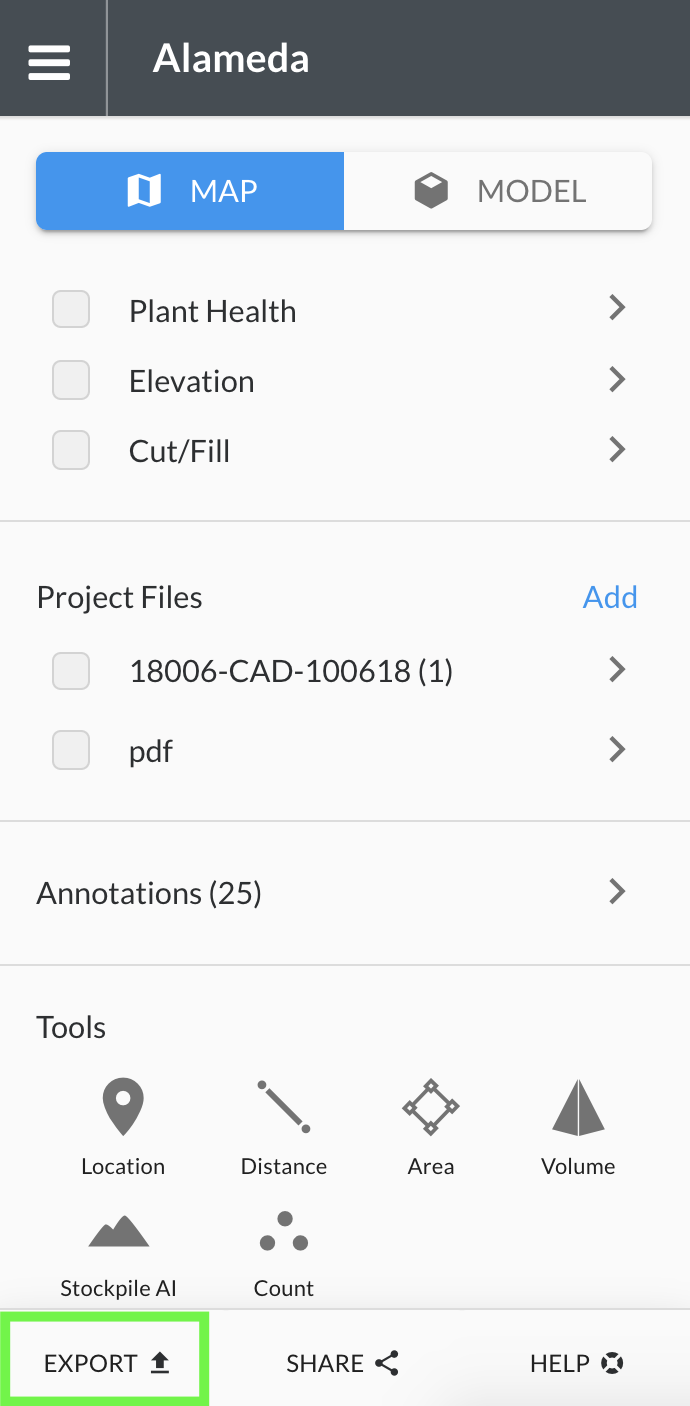
In your map, select the 'Elevation layer' and click Export on top of your side data panel.
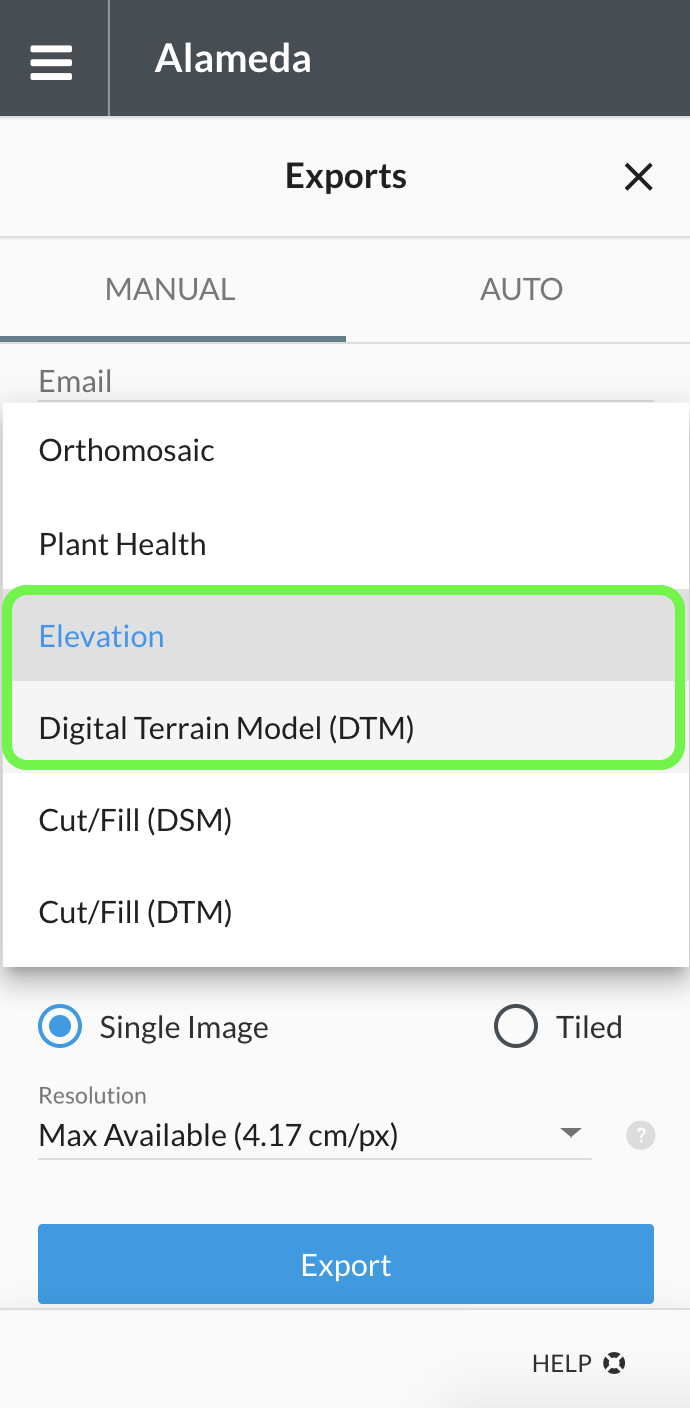
Choose between the 'Elevation' layer for a DSM contour, and the 'Digital Terrain Model' layer for a DTM contour:
Now, let's select the appropriate, file type, contour interval, and map projection:
B. Select 'File Type'
You have two file format options to export your contour lines, SHP (Shapefile) and DXF (AutoCAD - Design Exchange Format).
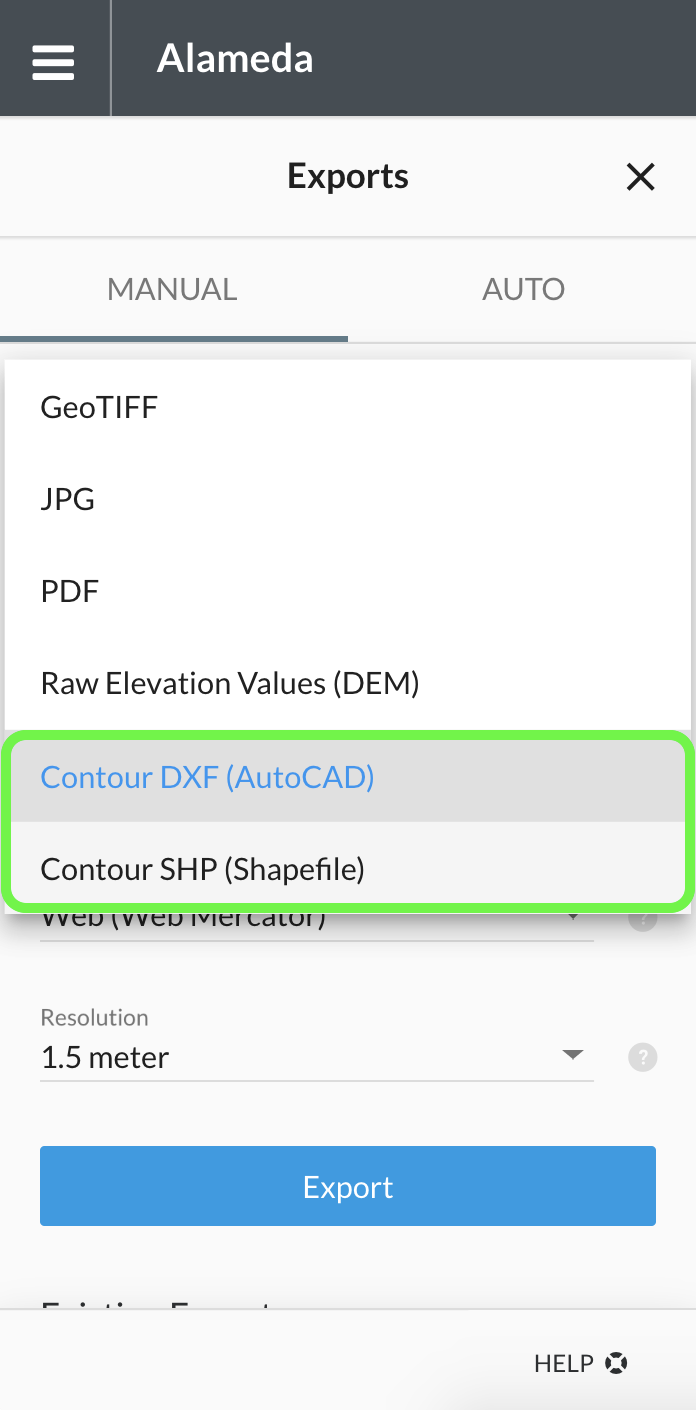
Select Contour DXF (AutoCAD) or Contour SHP (Shapefile).
C. Select 'Map Projection'
The options you have to choose the map projection for your contour lines are:
-Web (Web Mercator) EPSG: 3857 / Meter: Optimized for Google Earth or other web-based applications.
-Desktop (WGS84) EPSG: 4326 / Meter: The standard projection system for most GIS programs.
-Custom Projection / Other EPSG Codes: Relevant for customers who use the State Plane Coordinate System or Universal Transverse Mercator. Please see here for full instructions on how to get your Custom Coordinates.
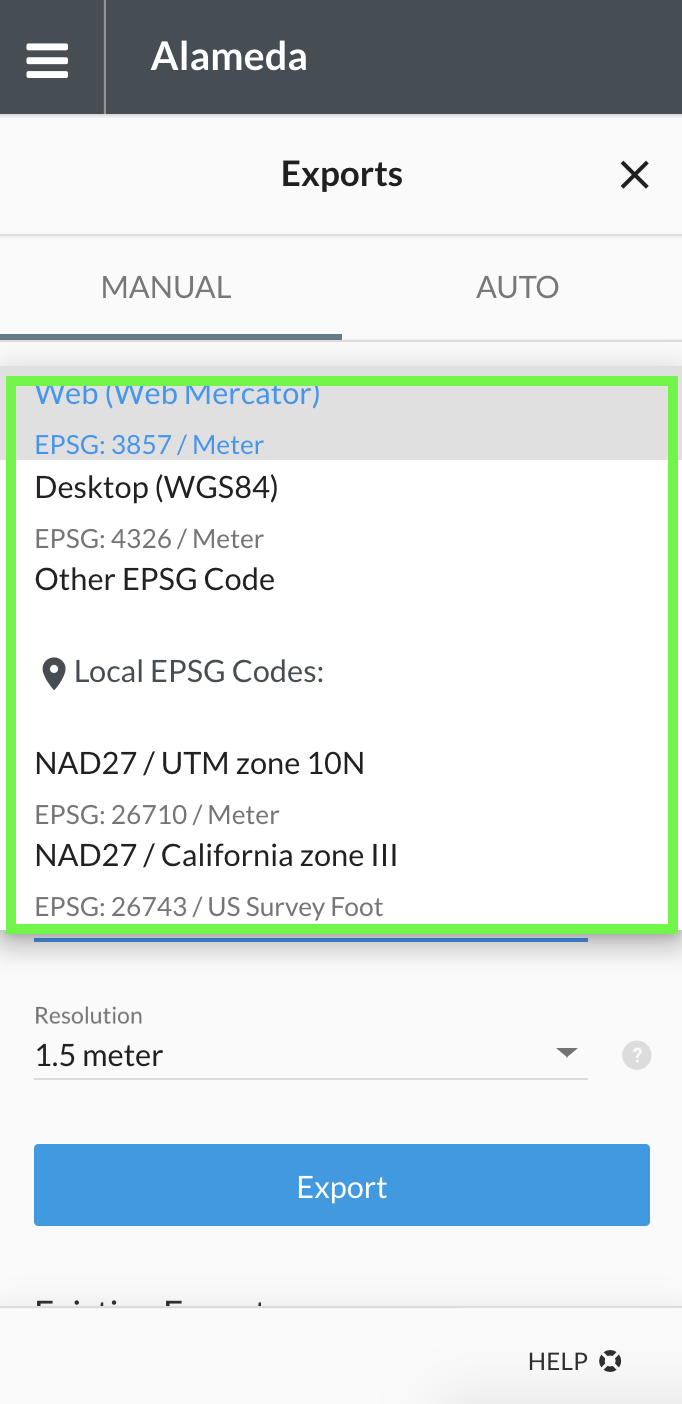
Choose the map projection that best suits your needs.
D. Select 'Resolution'
Select the appropriate spacing between the contours or contour interval. Please note that the units of your contour interval (metric vs. imperial) depend on your unit preferences and the unit of the map projection of your choice.
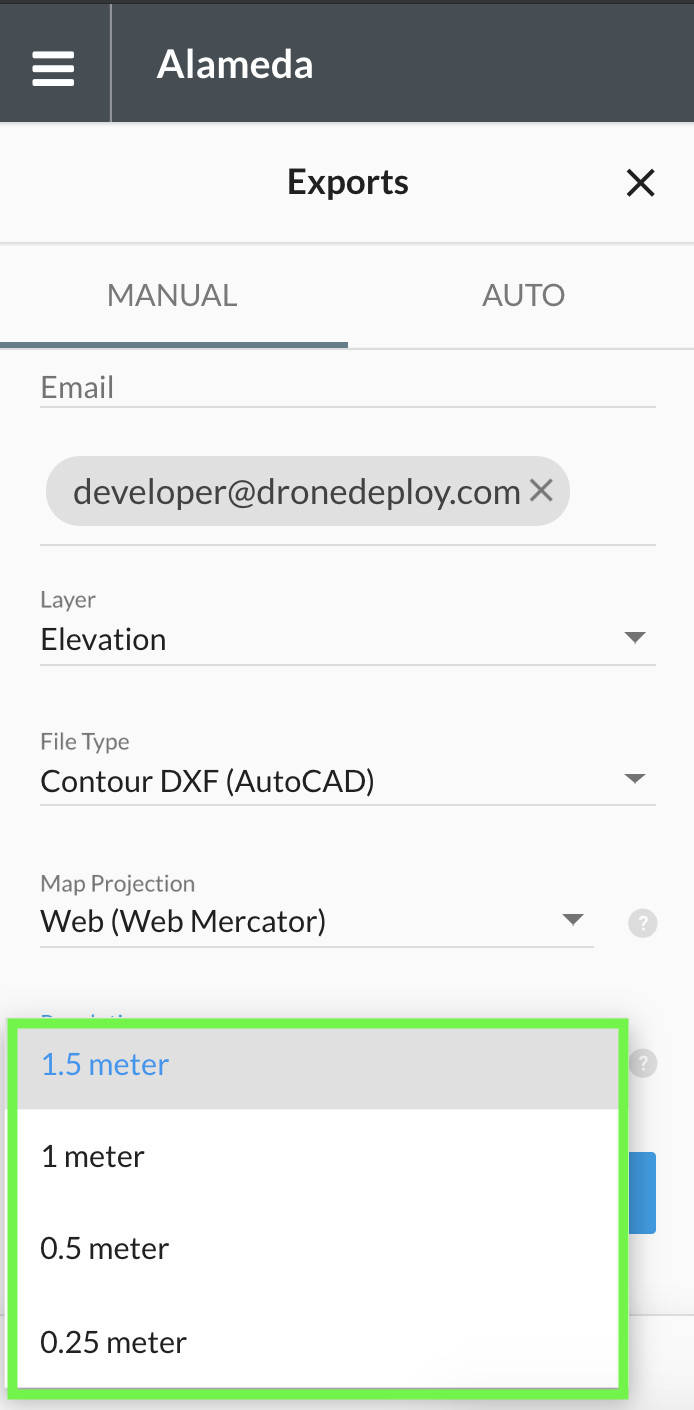
Example of the resolution options in metric system.
Did you set all the parameters? Great! Let's export the file:
E. Click 'Export' and Wait for your Email
We will send you an email when the export is ready to download. If you are on a custom domain, please be sure that you have allowed emails from exports@dronedeploy.com to be received.
If you want to learn how to import the contour files (.shp and .dxf) into a third-party software, please review our guide for Importing Data into Other Software.
