The DroneDeploy Online Web Tile Layer for use with Esri ArcGIS app generates template links for your maps that you can use as web tile layers in ArcGIS Online.
Step 1: Install the DroneDeploy Online Web Tile Layer for use with Esri ArcGIS app to your DroneDeploy account
Visit the App Market by navigating to the Apps section in the top bar on your main dashboard screen. Then, search for the DroneDeploy Online Web Tile Layer for use with Esri ArcGIS app and install it from there.
Step 2: Locate and open the DroneDeploy Online Web Tile Layer for use with Esri ArcGIS app
Navigate to the completed map from your dashboard that you'd like to use in ArcGIS Maps Online. The DroneDeploy Online Web Tile Layer for use with Esri ArcGIS app will be located at the bottom of your side-panel. Click on the little arrow to expand it.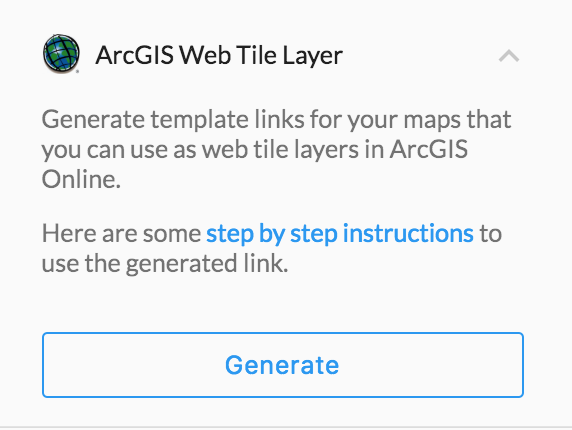
Click the Generate button to generate a unique link to your orthomosaic tiles.

Then, copy this link.
Supported Layers: Currently, only orthomosaic is supported for DroneDeploy Online Web Tile Layers for use with Esri ArcGIS and these are only available in 2D. If you are interested in uploading 3D models into ArcGIS products, you may want to manually Export an OBJ file and convert that to an ArcGIS scene layer.
Supported Exports: Our tile layer only supports EPSG 3857 = Web Mercator.
Step 3: Log in to your ArcGIS Map Online Account and add layer from web
Once you are logged in, select the Map tab at the top of your ArcGIS Online dashboard. It should redirect you to your maps page. Then, click on the Add option with the folder icon and select Add Layer from Web.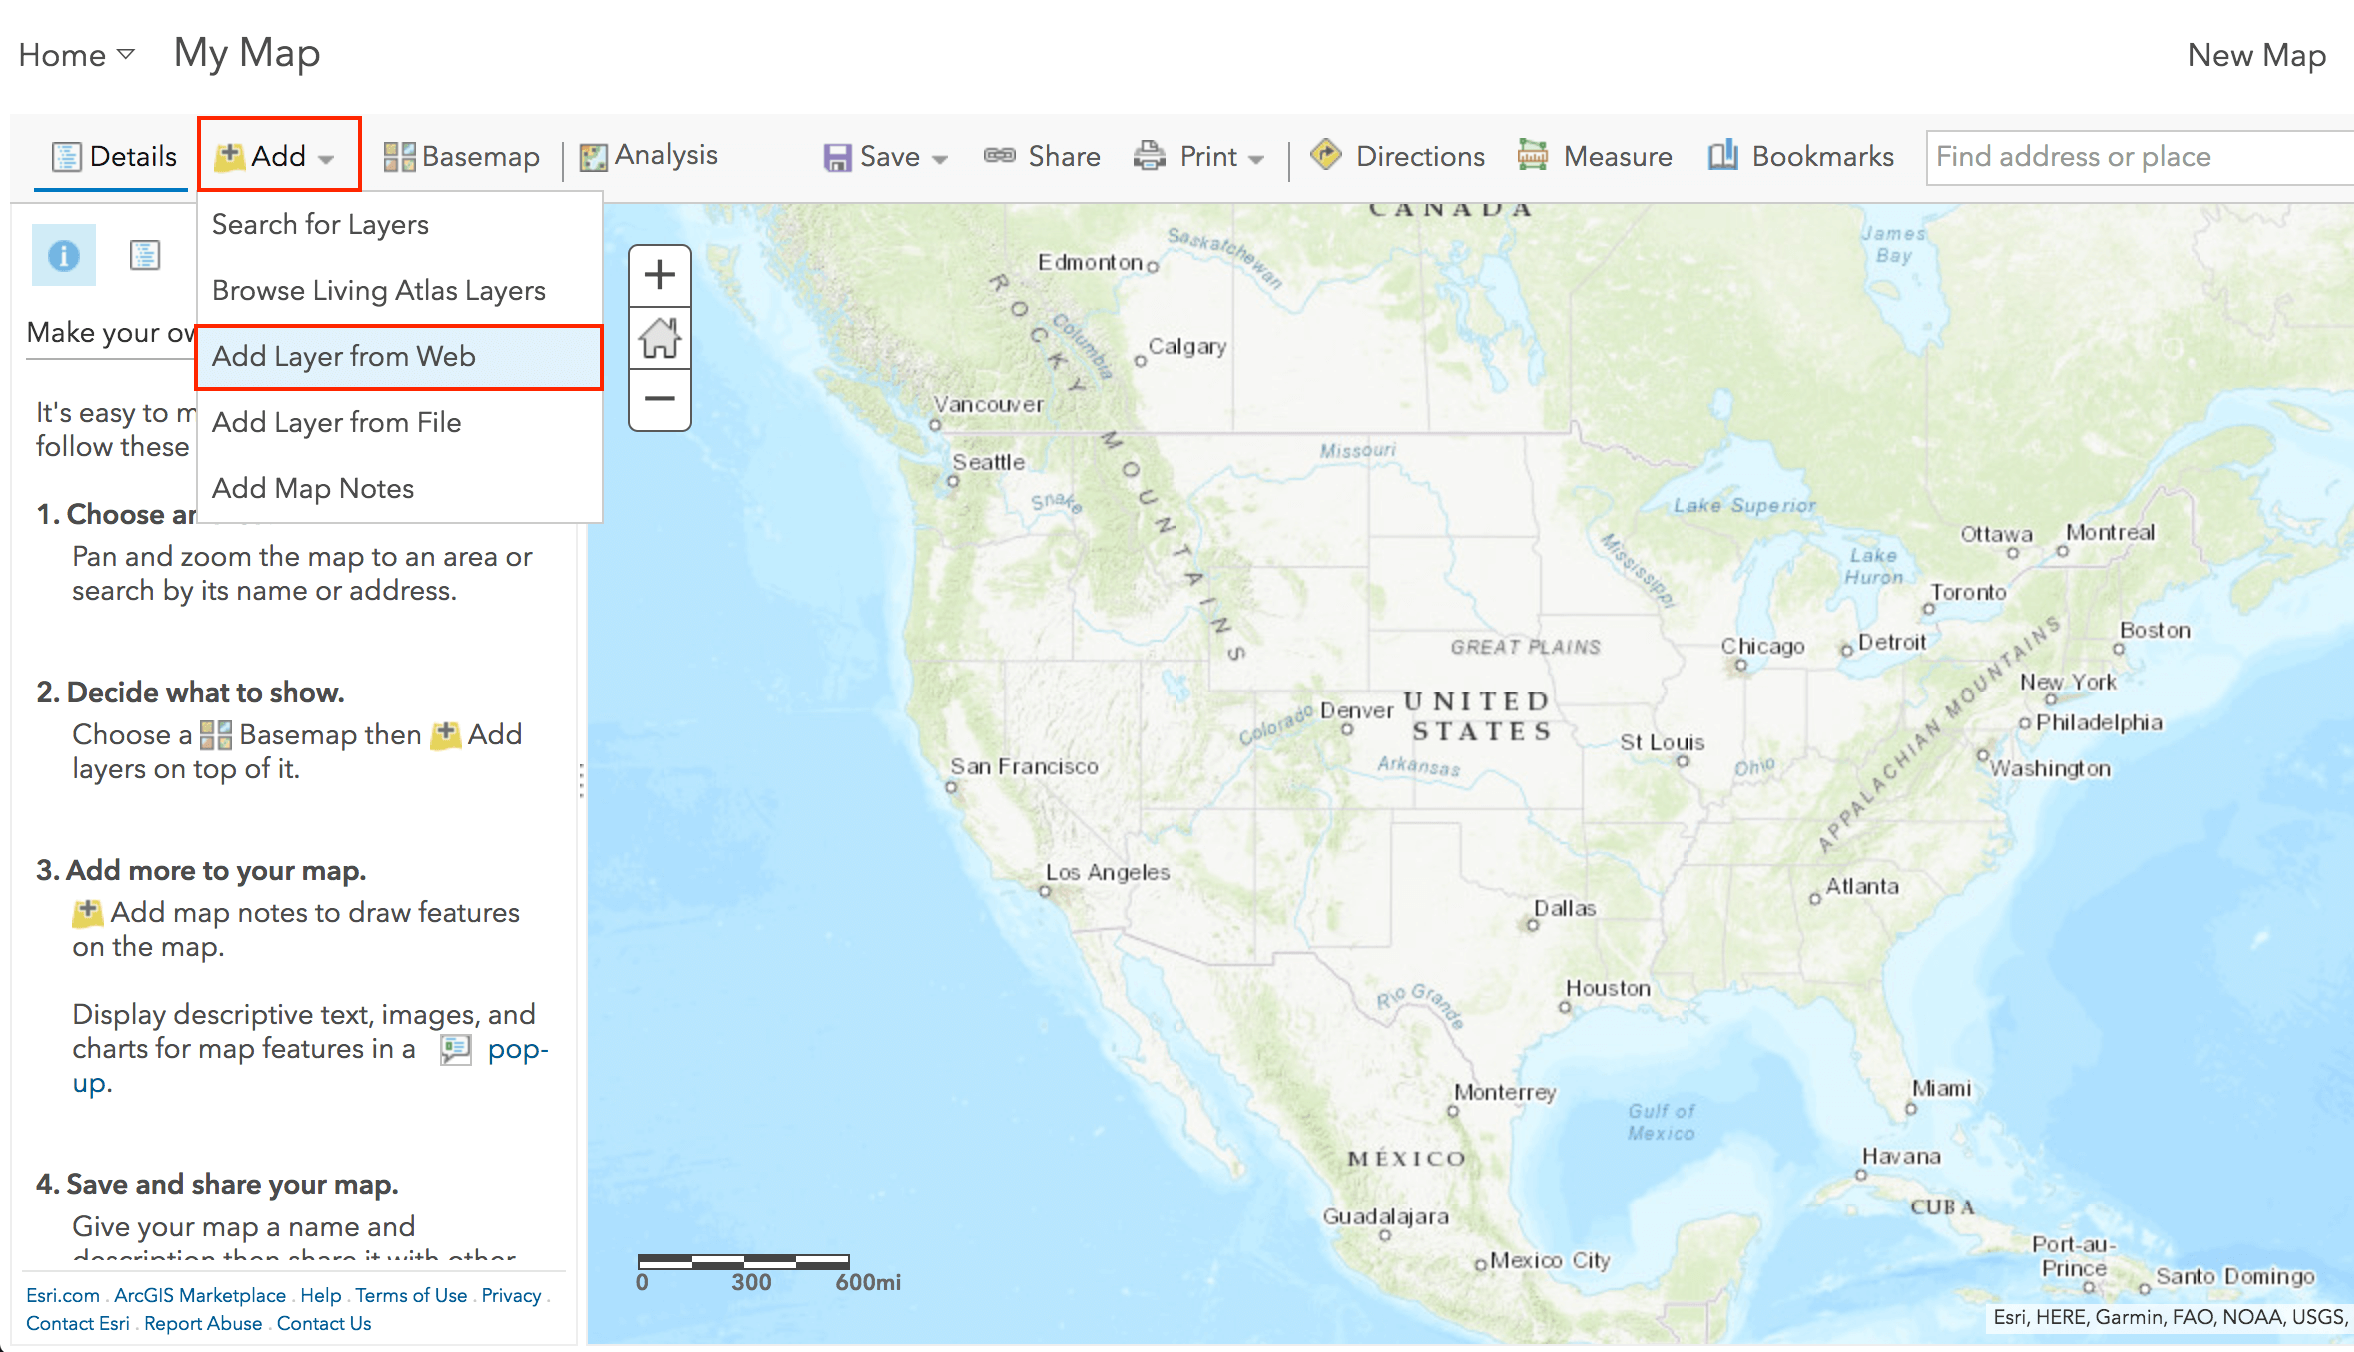
Step 4: Add a tile layer and link the URL generated from the app
You will want to reference your data to a Tile Layer. Select A Tile Layer from the drop-down. Once you have selected the tile layer option, copy and paste the unique URL link generated in Step 2 of the DroneDeploy Online Web Tile Layer for use with Esri ArcGIS app into the box.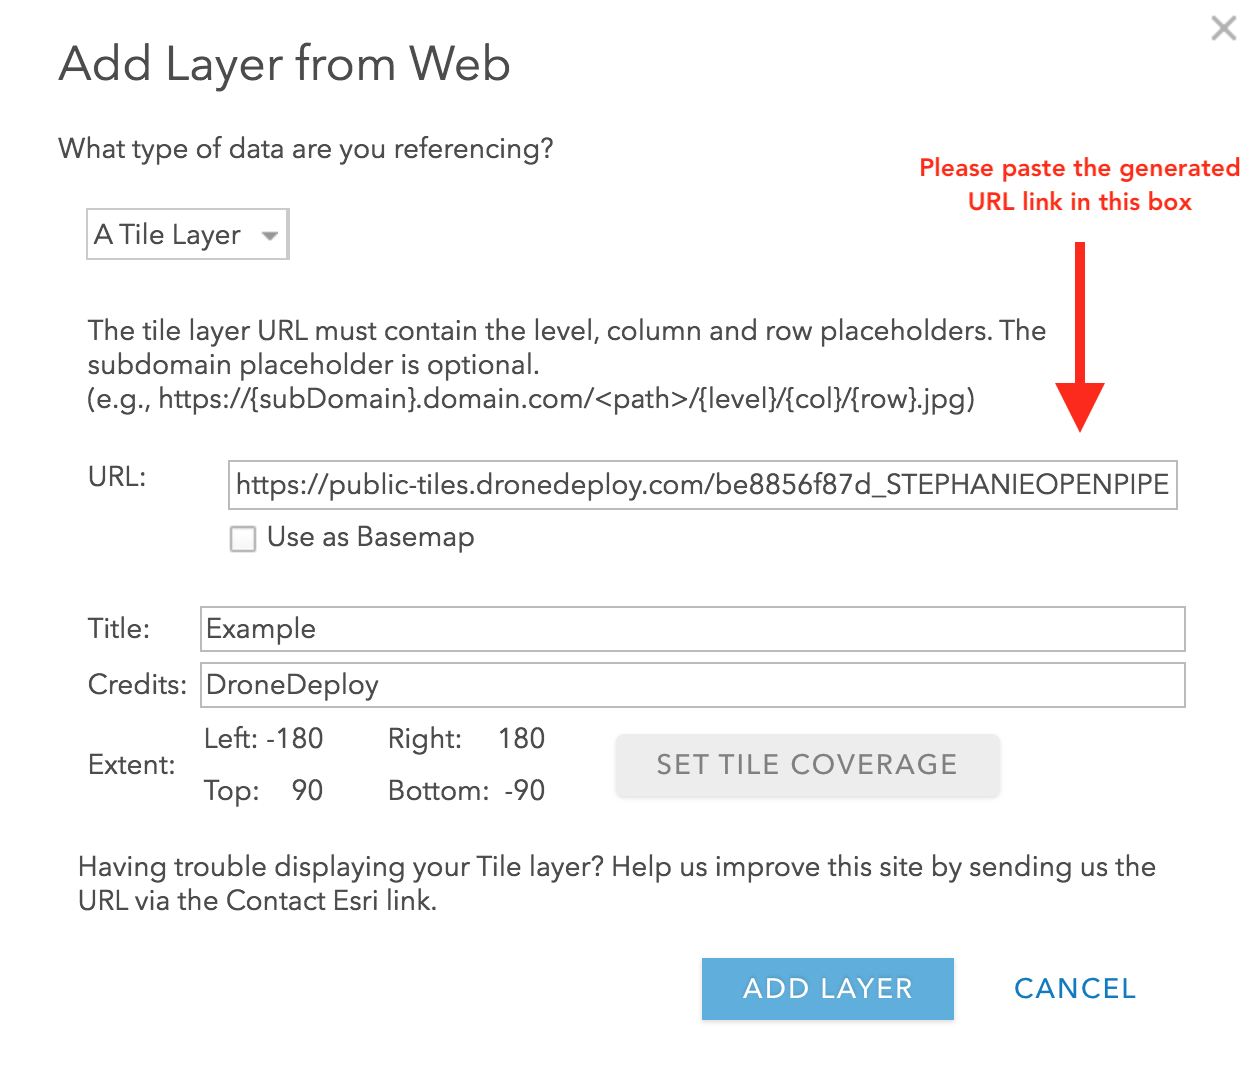
Please paste the generated URL link from the DroneDeploy app.
Then, add a Title and Credits.
You can click Add Layer when you have added a Title and Credits, and set tile coverage to the area of interest.
Step 5: View your web tile layer
You have completed adding your web tile layer to ArcGIS Online! You should see the web tile layer displayed on the page.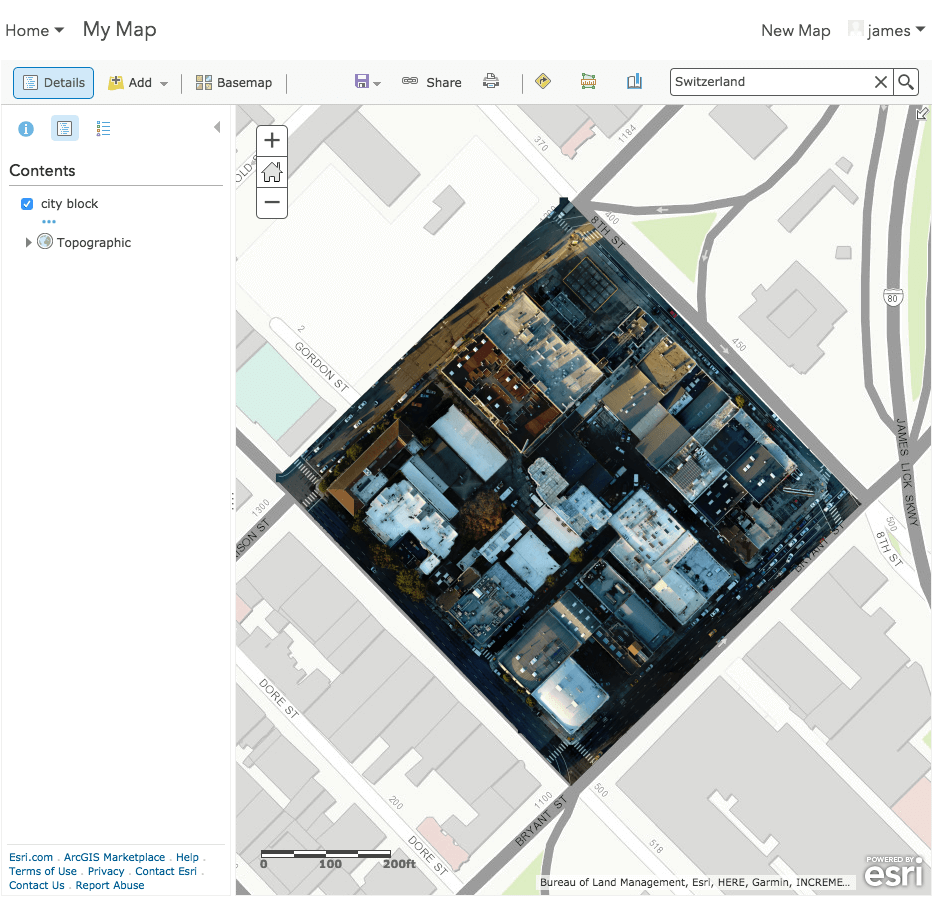
Note: Tile Layers do not provide metadata describing their extent. Search for your project location by latitude/longitude to zoom to your map layer.
V2.2