DroneDeploy allows you to export your map data for use in third-party software like AutoCAD . This guide explains how to import the GeoTIFF, contours DXF, and point cloud LAS files exported from DroneDeploy into AutoCAD. It also covers how to overlay the DXF contour file on top of the GeoTIFF image for a data-rich visual display.
Export data from DroneDeploy
Select the map you want to export from the DroneDeploy dashboard and follow the steps in our Exporting Your Data guide. For this workflow, you need to download the elevation GeoTIFF, the contours DXF file, and the point cloud LAS file.
Note: Visit our Data Export Formats support documentation to check which file formats are available with your DroneDeploy subscription.
Import data into AutoCAD
Once you have saved your data and extracted the files from the zipped folder, open AutoCAD.
Open the DXF contour file
-
Click the Open icon at the top, or go to the File menu and select the Open > Drawing option.
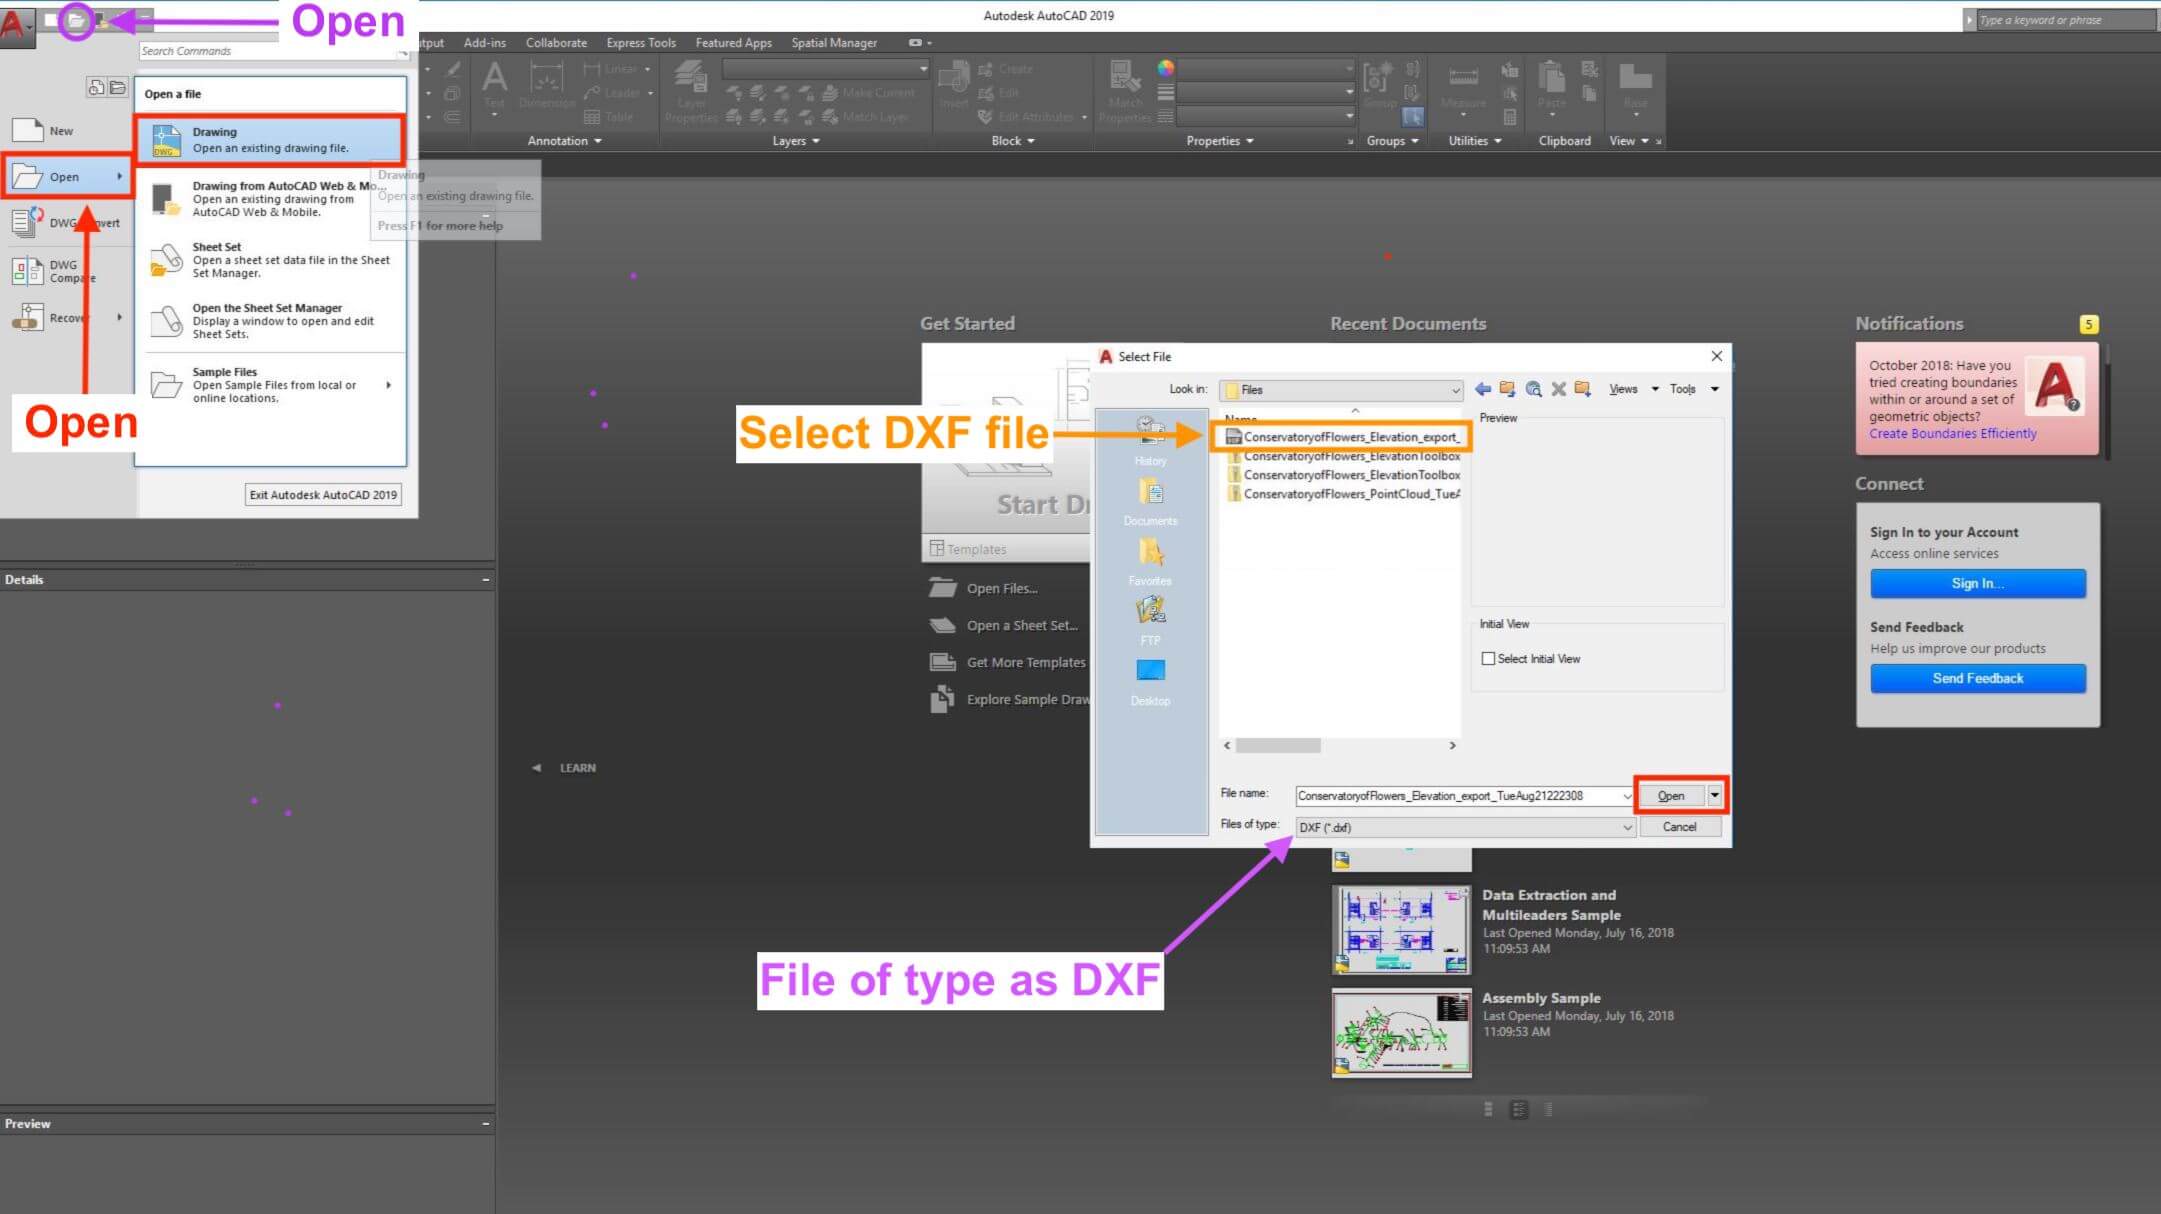
In the "Files of type" box, select the DXF (*.dxf) option.
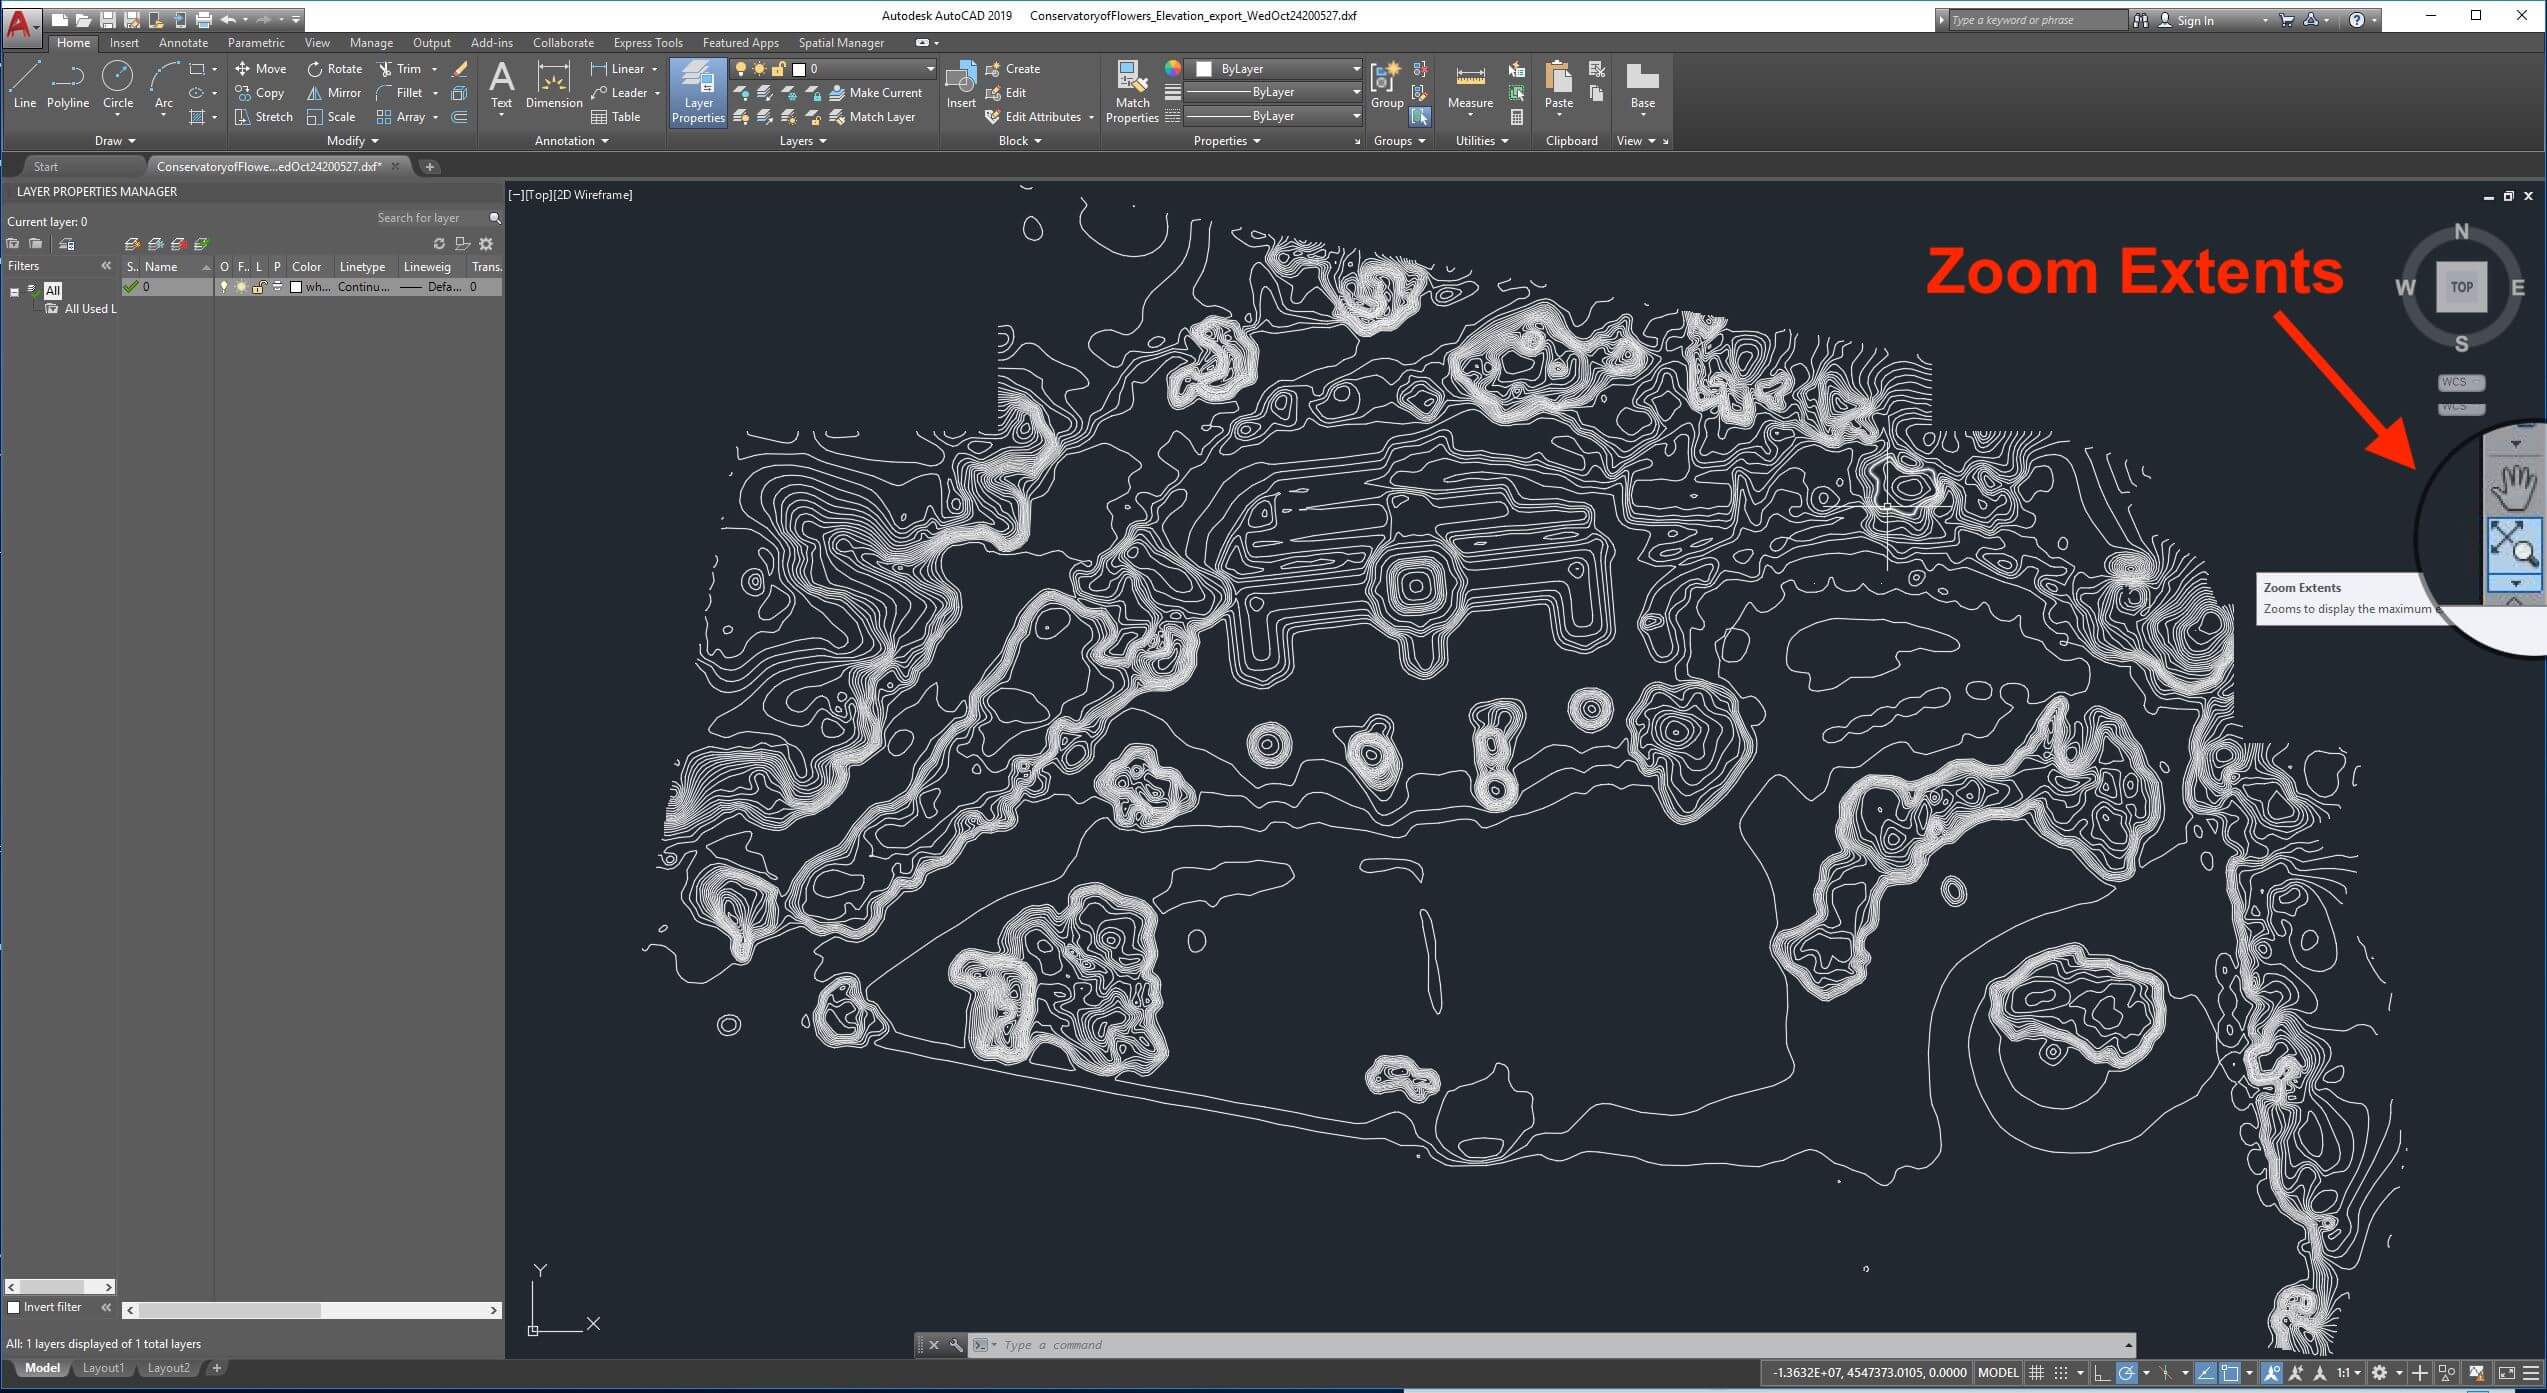
To zoom to the opened DXF, go to the View tab.
Turn the Navigate Bar option ON.
-
In the Navigation Bar, click the Zoom Extents icon.
View elevation information
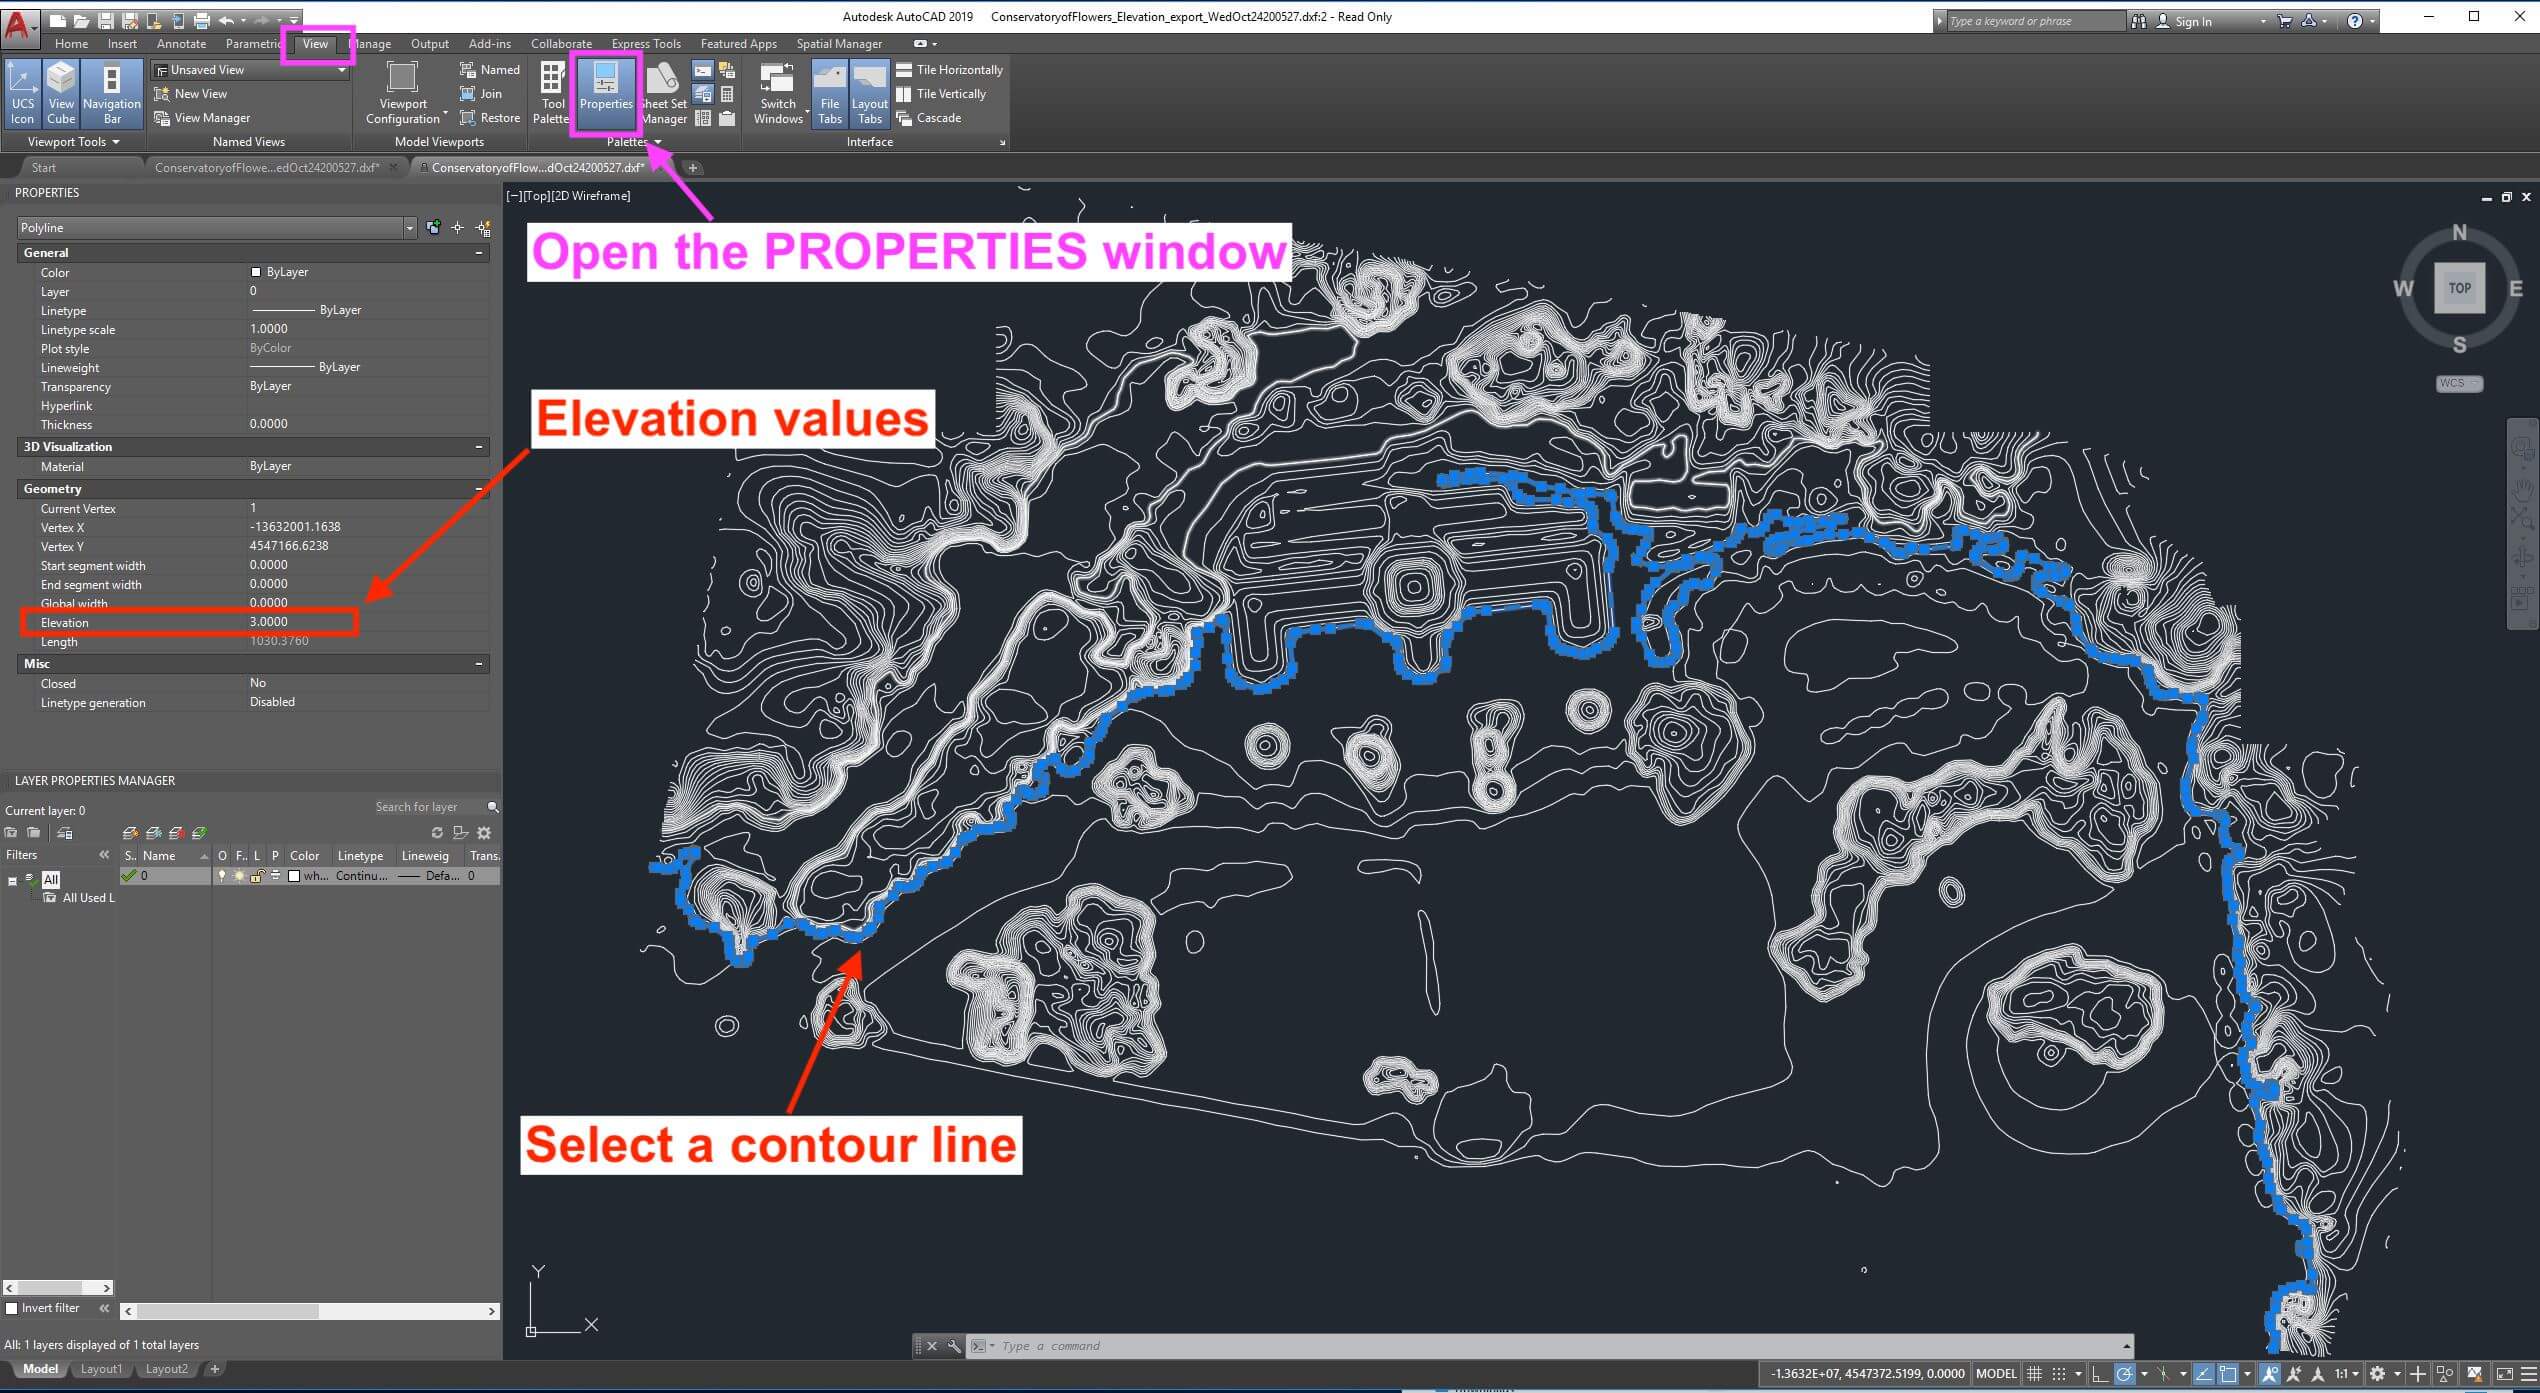
To view the elevation information associated with every line of your contour DXF file, open the Properties window.
Type PROPERTIES in the command line or go to the View tab and click on the Properties option.
Once the Properties window is active, select one of the contour lines.
-
Read the Elevation information in the Properties window.
Define drawing units
You can define the units of the drawing space to match the units of your DroneDeploy file. The drawing space units are in Meters when using the Web Mercator Projection.
Type UNITS in the command line or select the User Preferences tab within the User Preferences option.
Select the desired units to match your DroneDeploy file.
Import the TIFF file
Go to the Insert tab.
-
Select the Attach option within the Reference Panel section.

Select the GeoTIFF file to import.
Coordinate system note: The raster within AutoCAD does not account for any coordinate system. Users must scale and adjust it manually to line up with the DXF file.
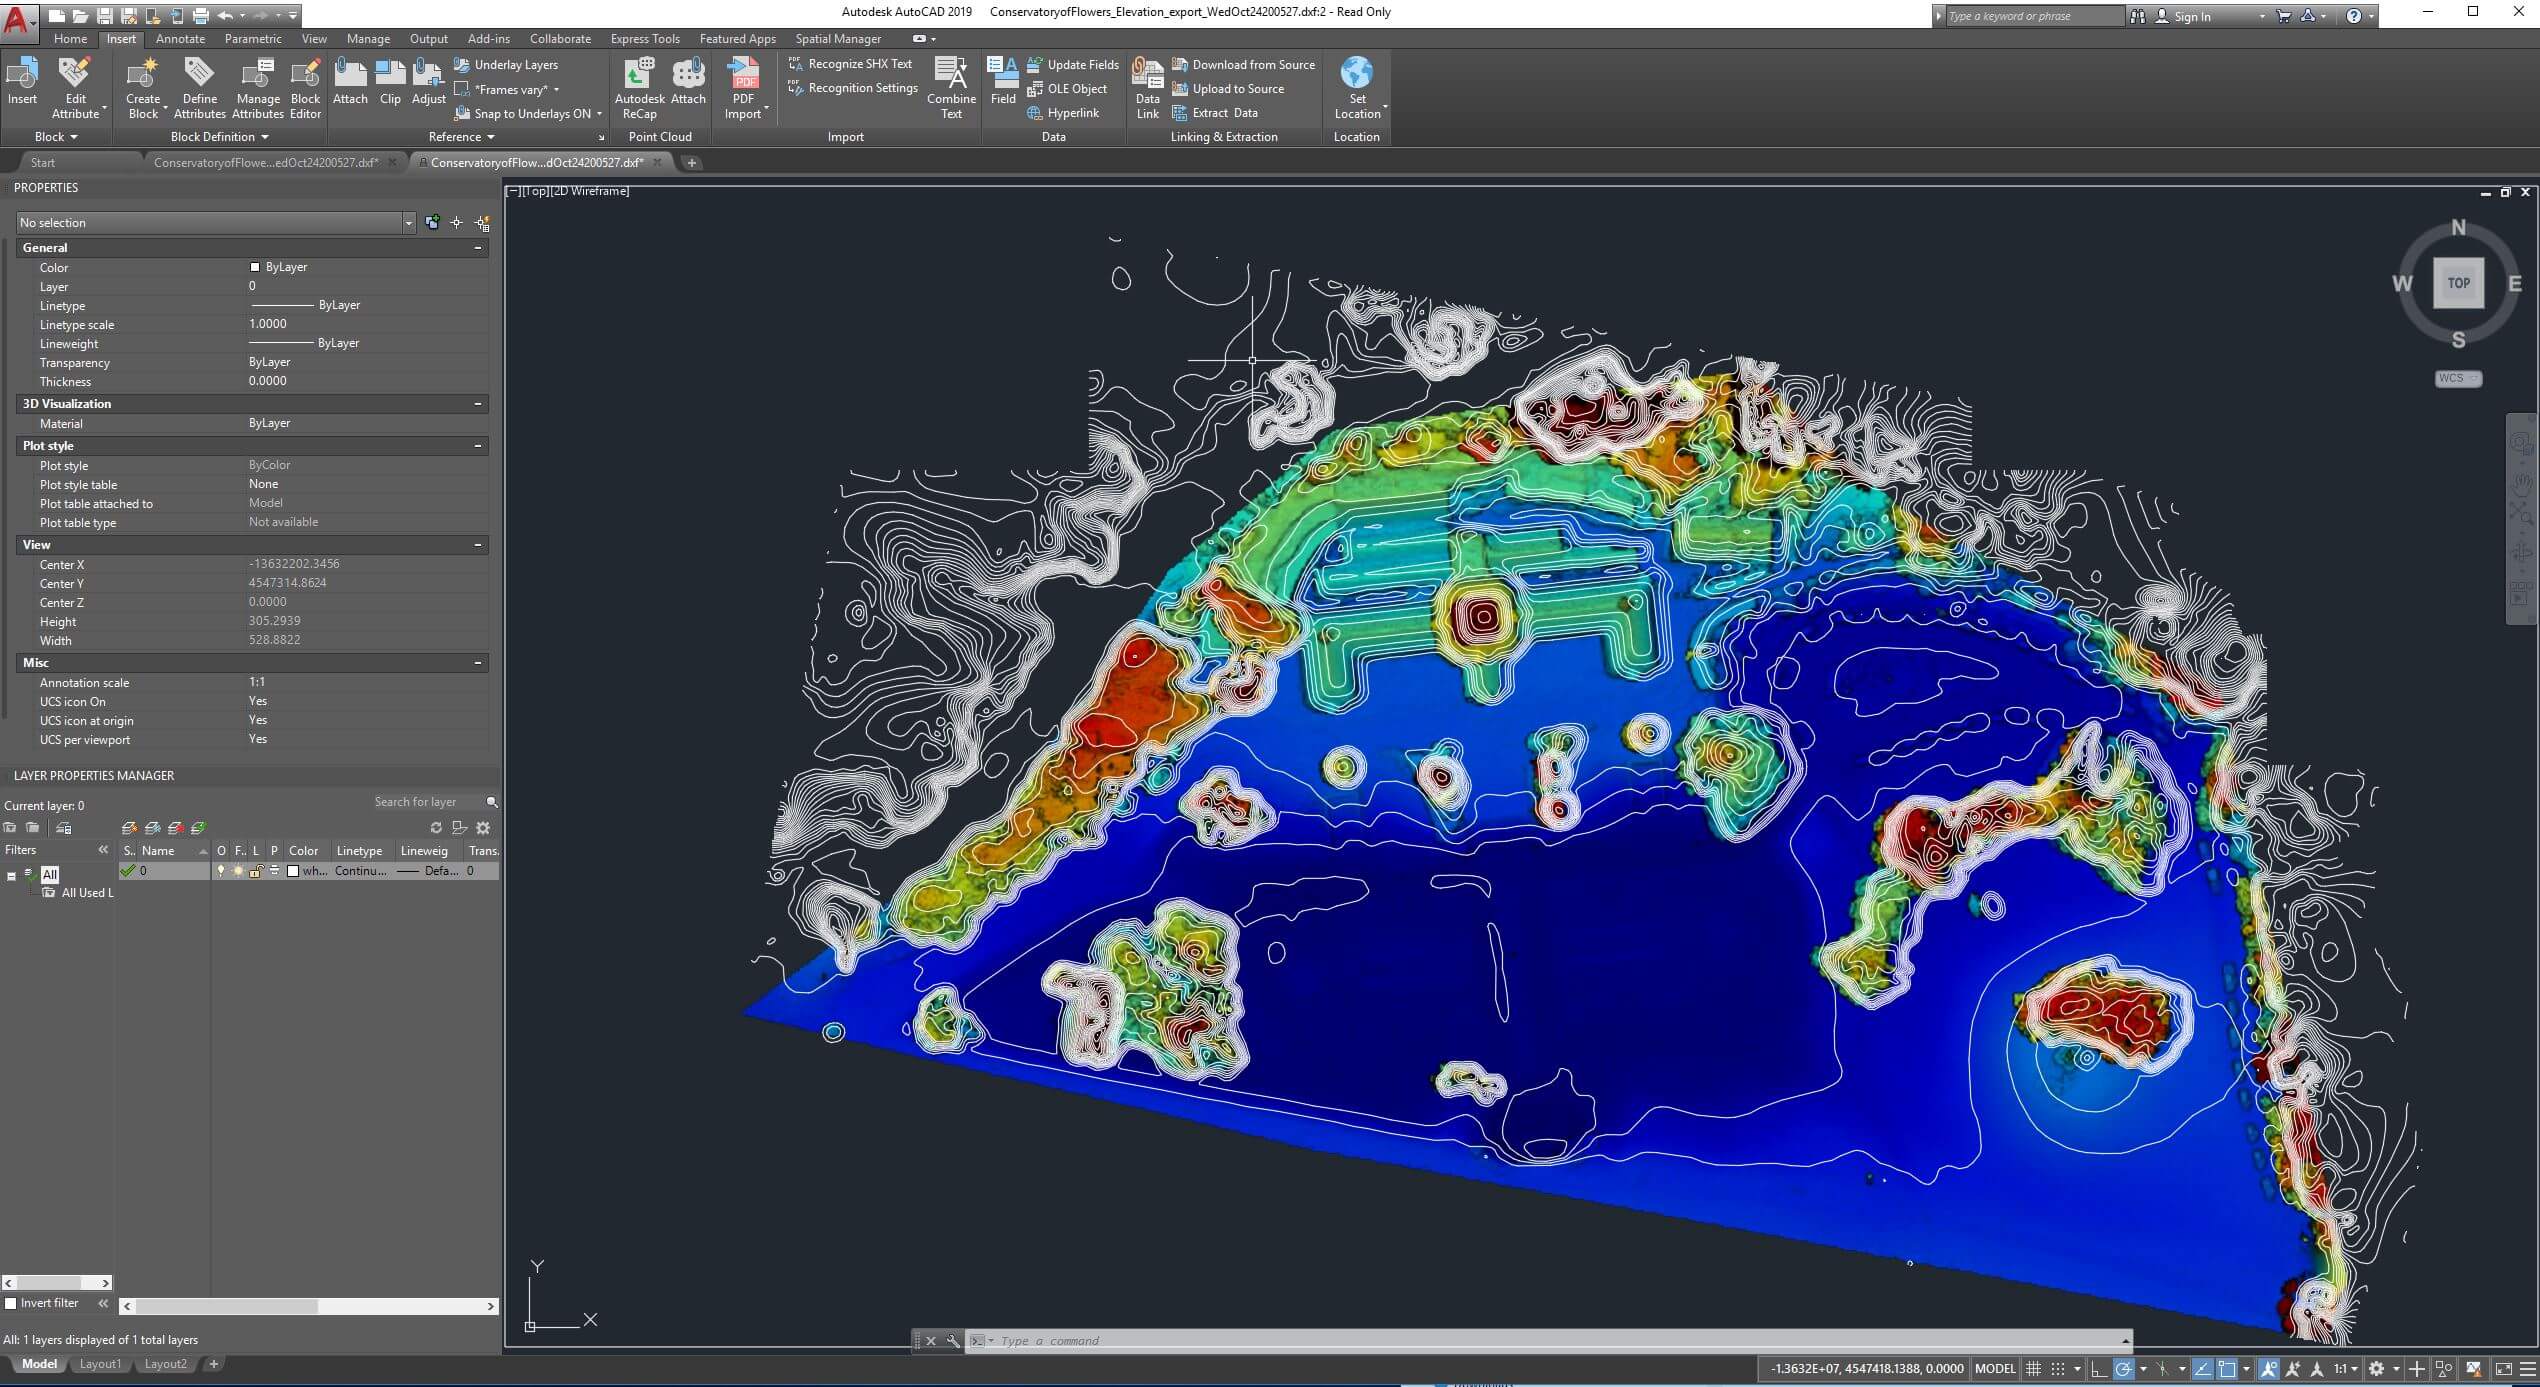
Overlay the DXF file on the TIFF file
After importing the TIFF file to your preferred location, adjust the files' settings to correctly display the DXF file on top of the TIFF image:
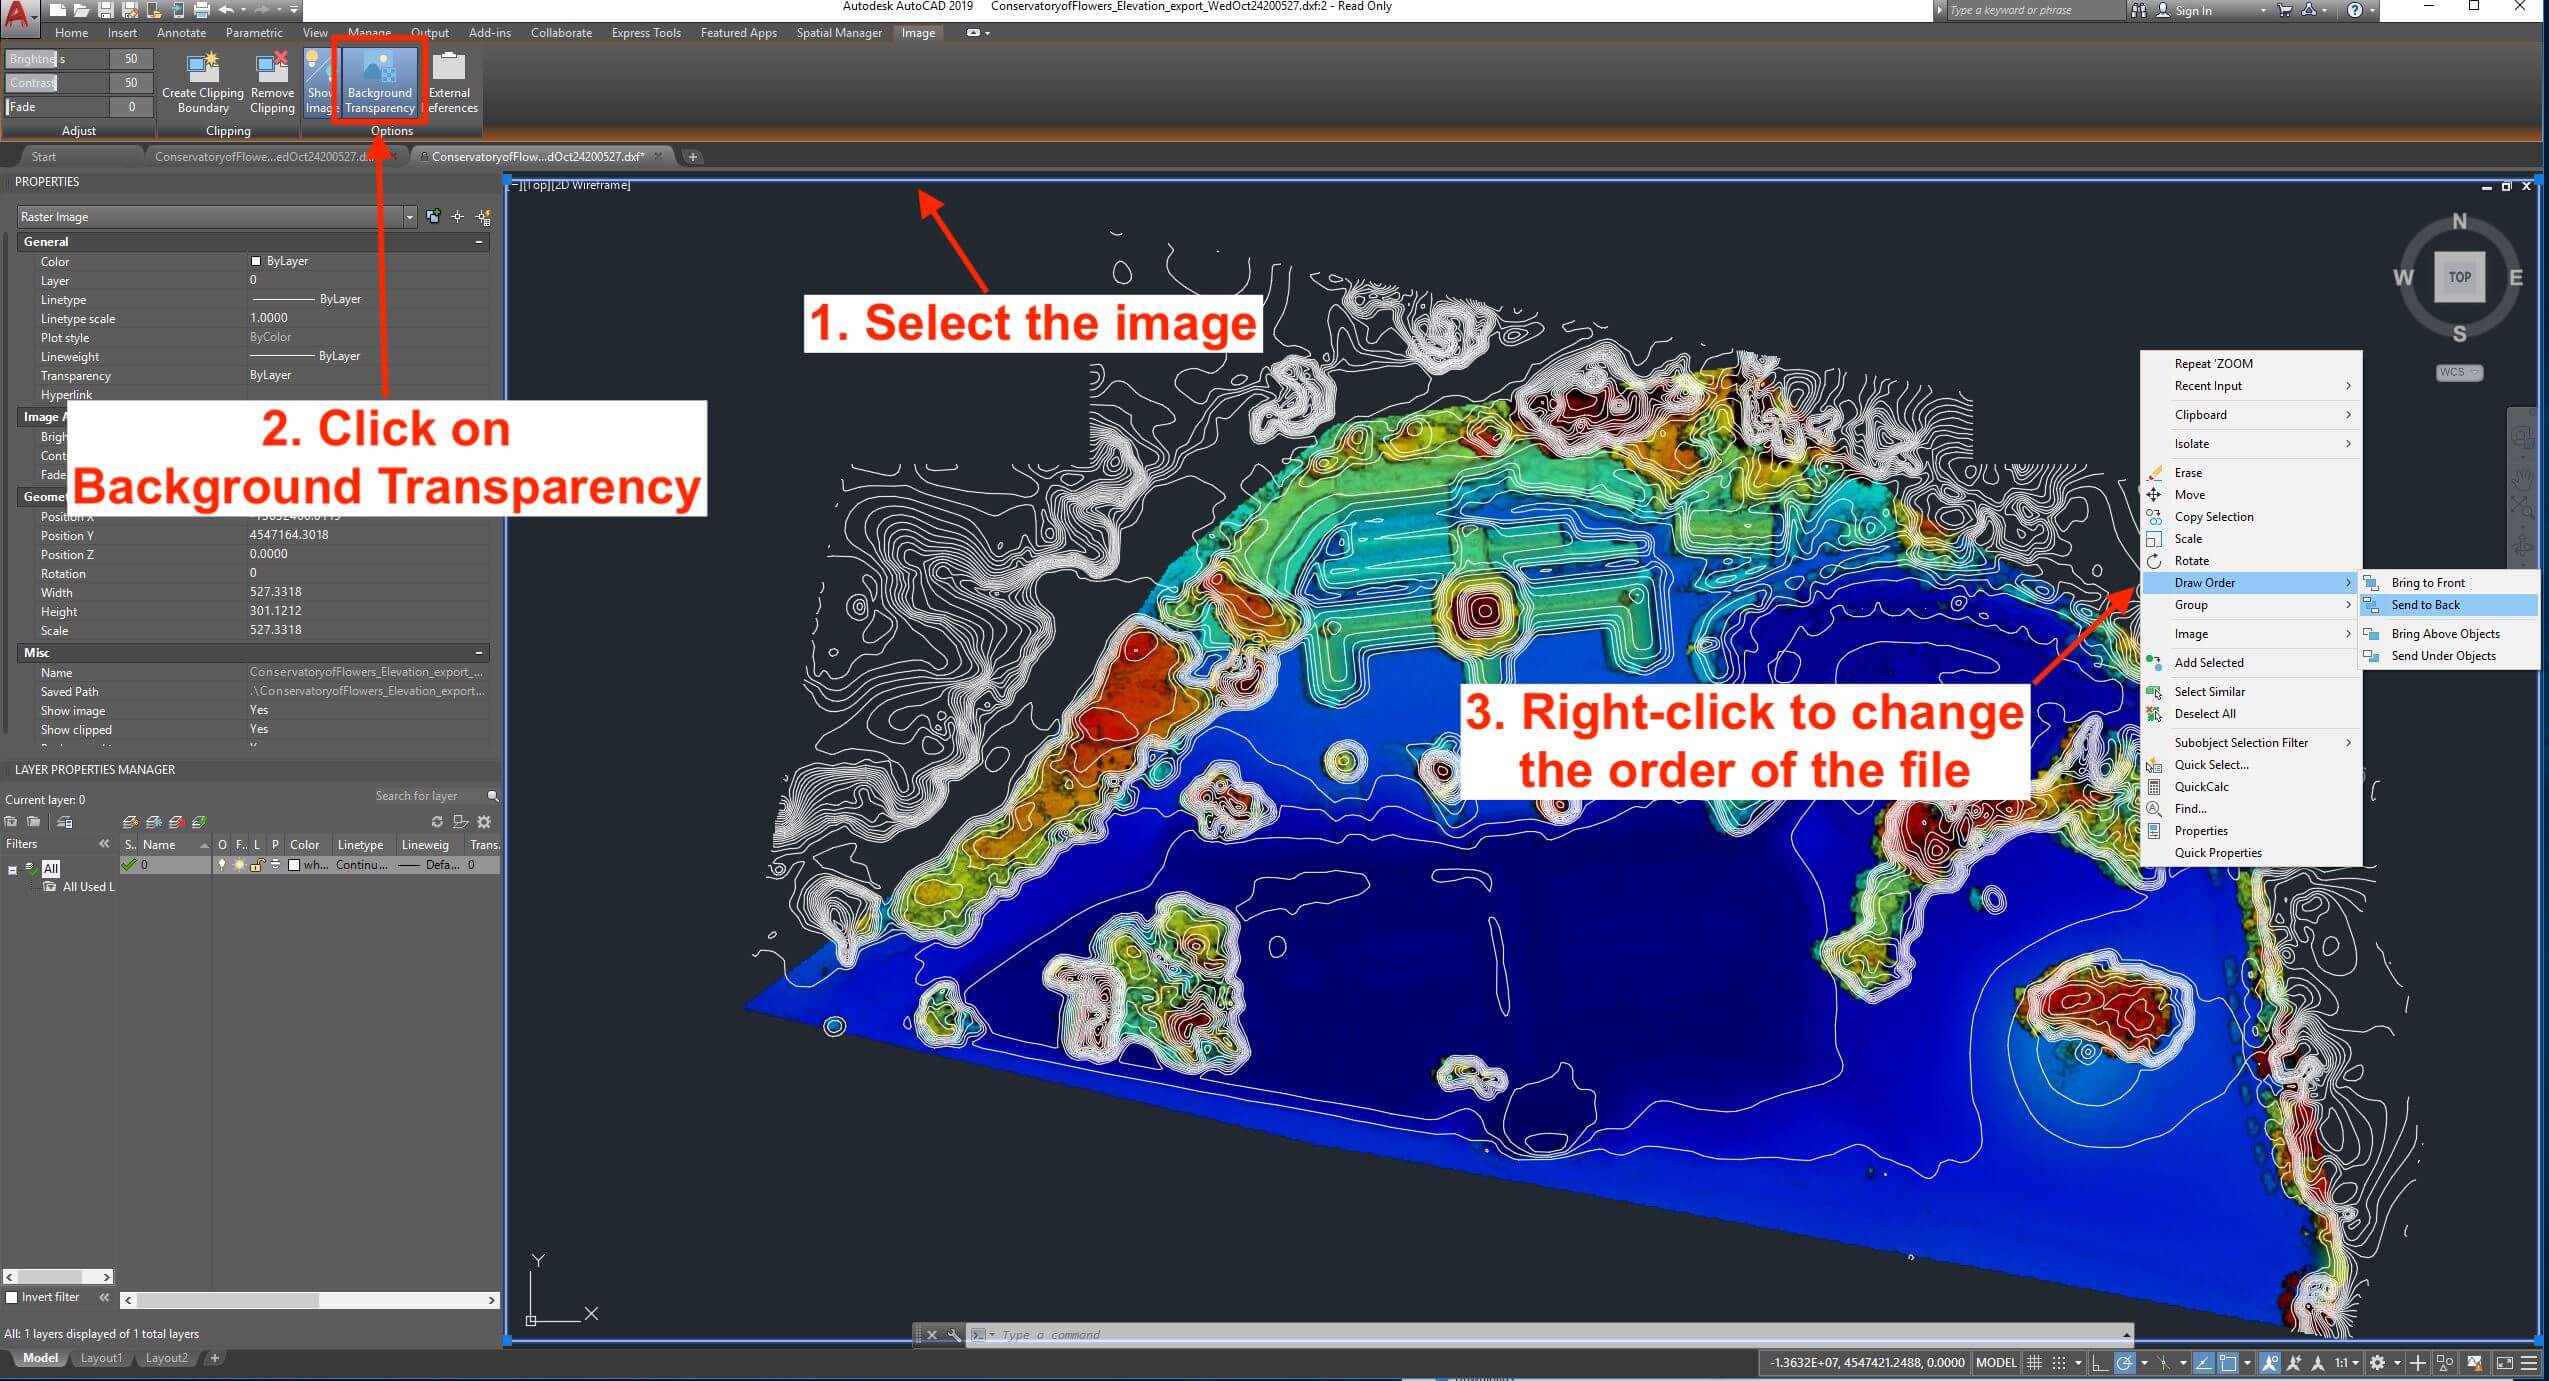
Select the TIFF image. The Image tab will activate.
Click on Background Transparency to change the image's background.
With the TIFF image still selected, right-click on the image.
Hover over Draw Order.
-
Select Send to Back.
This is how your overlaid map should look in AutoCAD:
If you want to save this drawing as a DWG file, go to File > Save As > Drawing.
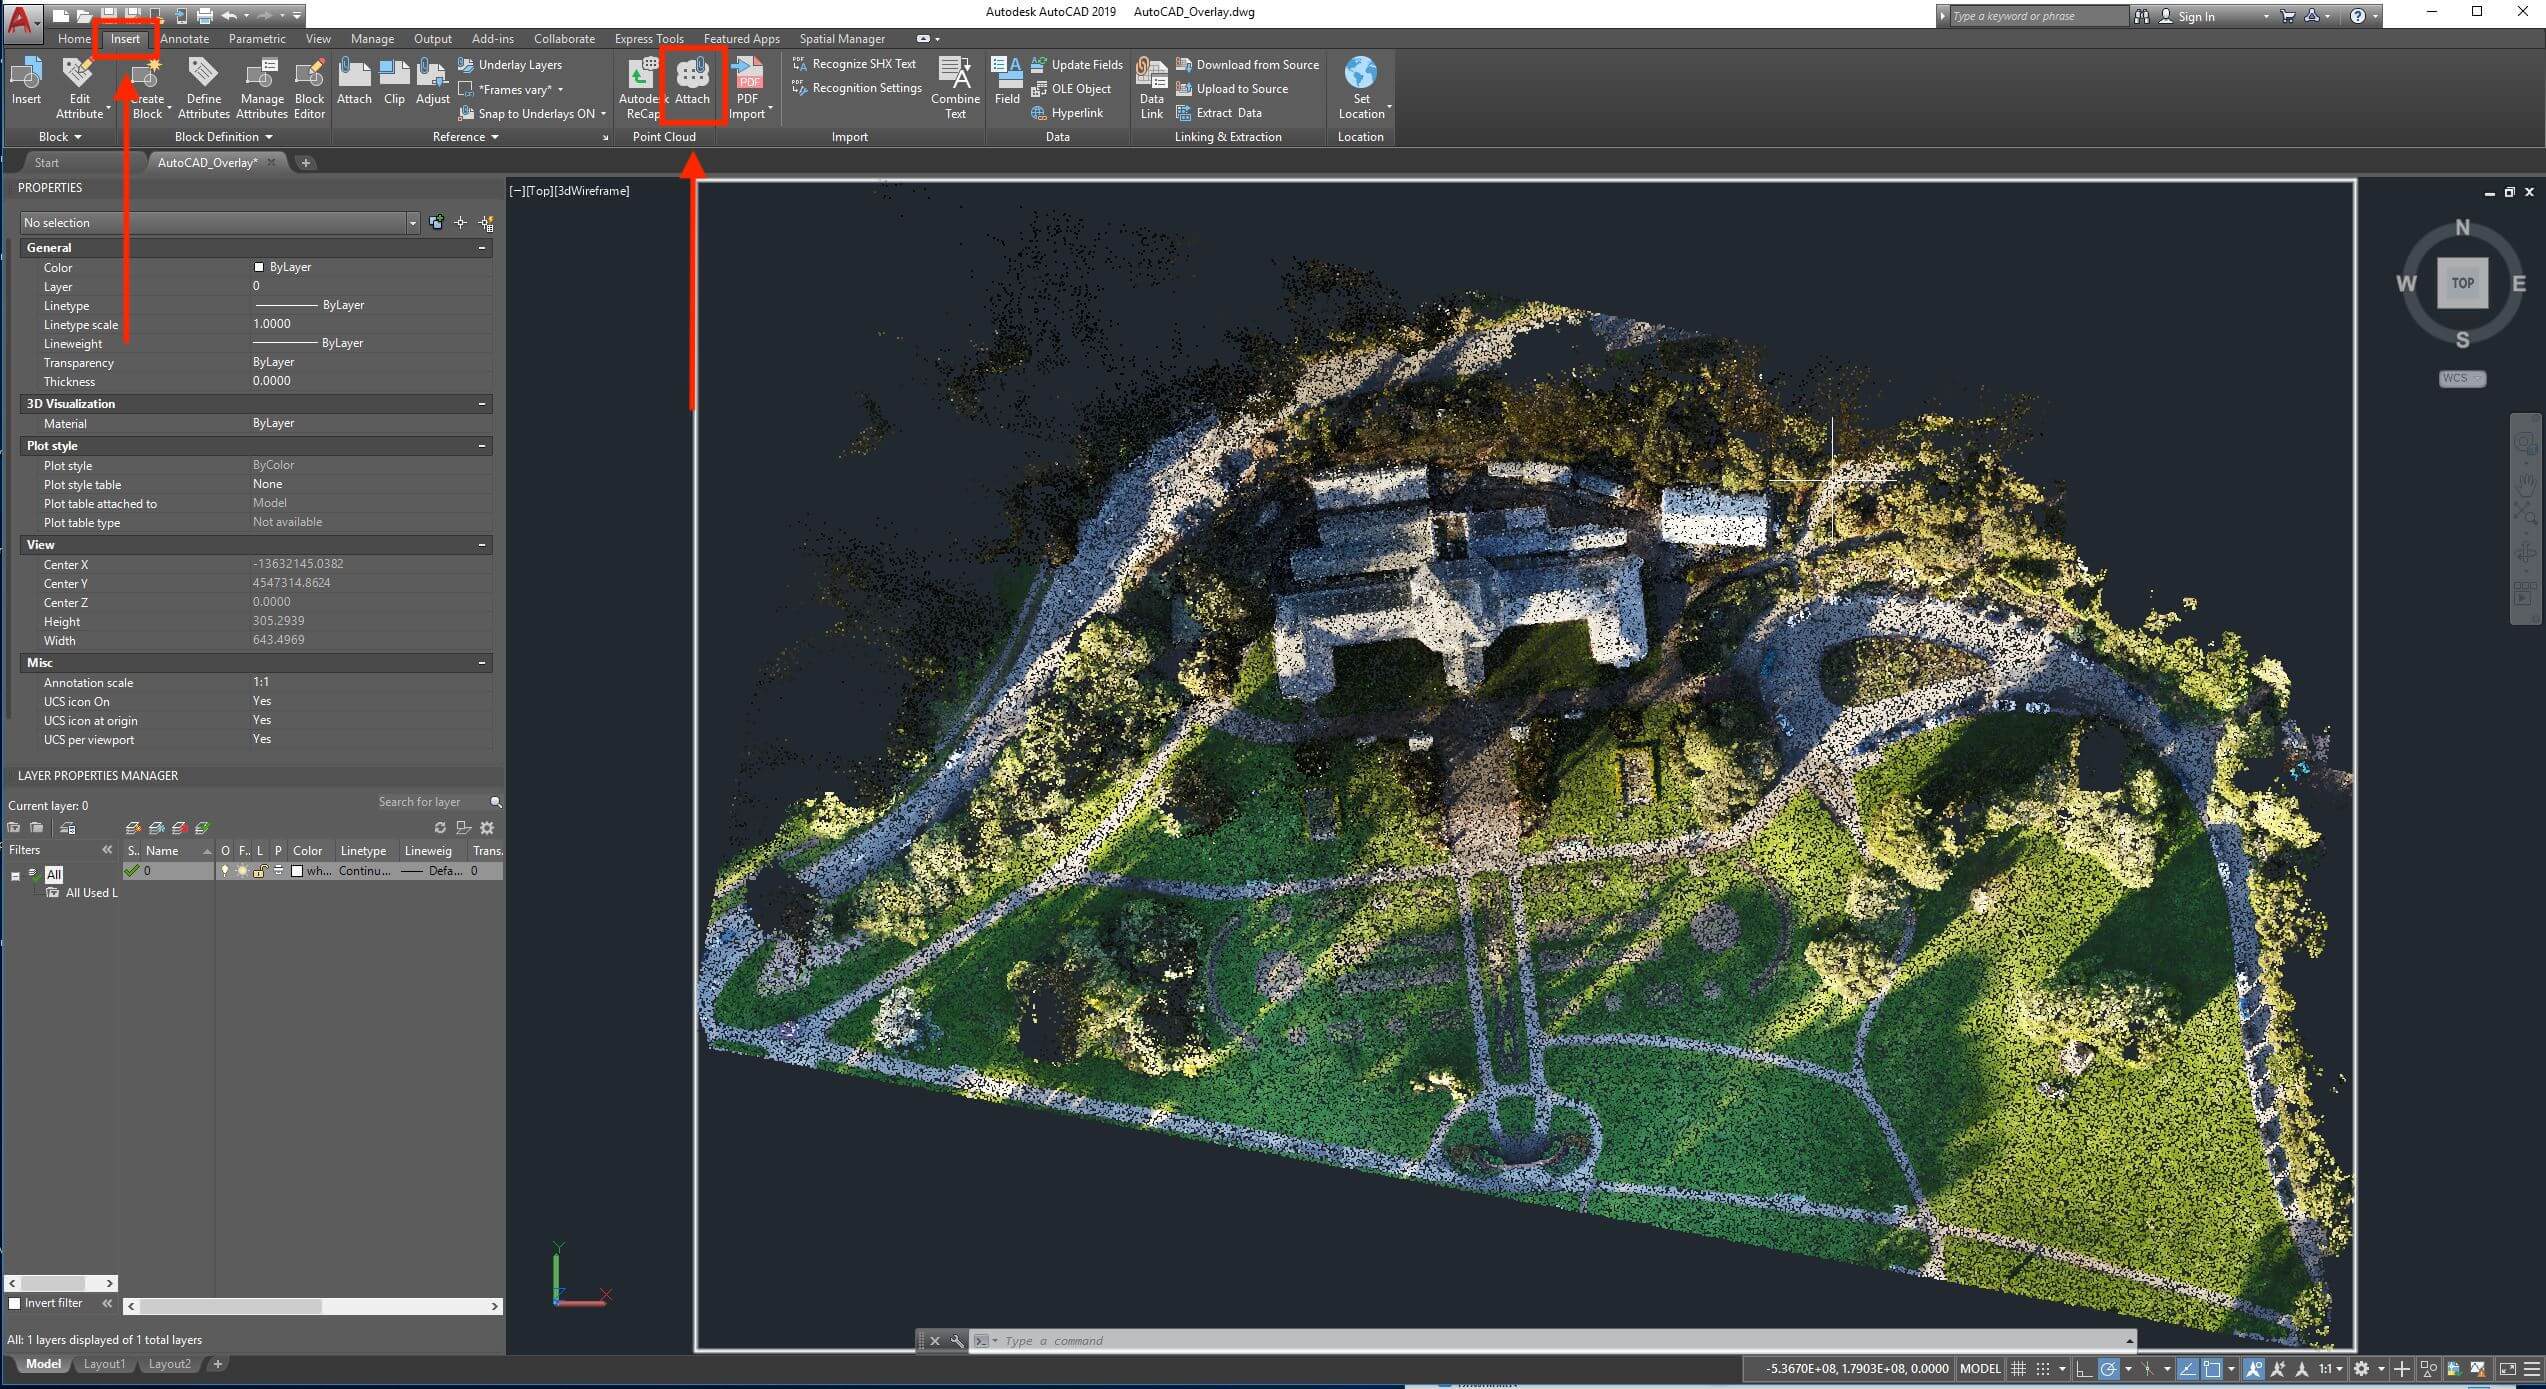
View the point cloud file
AutoCAD is compatible with RCP (*.rcp) or RCS (*.rcs) point cloud formats. To learn how to convert the LAS file exported from DroneDeploy to RCP using Recap, visit our Importing Point Cloud into Recap. guide.
Once you have the RCP file:
Go to the Insert tab.
-
Click the Attach button located in the Point Cloud section.
V2.2