Contour file exports, located in the Elevation toolbox, are available to all customers subscribed to Individual, Advanced, Teams, or Enterprise plans. These tools provide users with elevation data that they can export and display in GIS software for further analysis.
This guide explains how to export DXF and SHP contour files from DroneDeploy and import them into ArcGIS. You will also learn how to overlay the contour files on a GeoTIFF to create a bold, data-rich display for stakeholders.
Export contour files and the elevation map from DroneDeploy
To begin, download the elevation map and the contour files from DroneDeploy. When exporting the files (GeoTIFF, SHP, DXF), ensure that you select the same Map Projection for all of them.
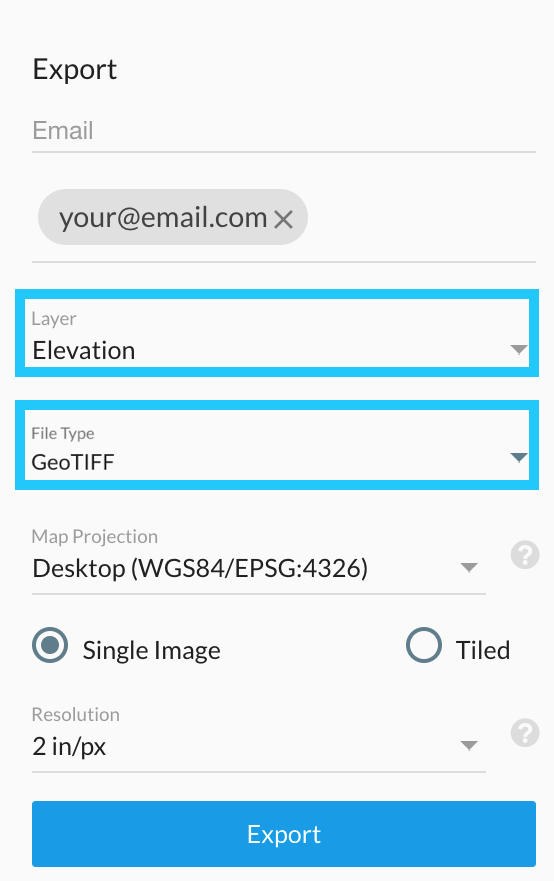
Here are the files to export using the Web Mercator Projection:
-
The elevation map using the GeoTIFF file format.
-
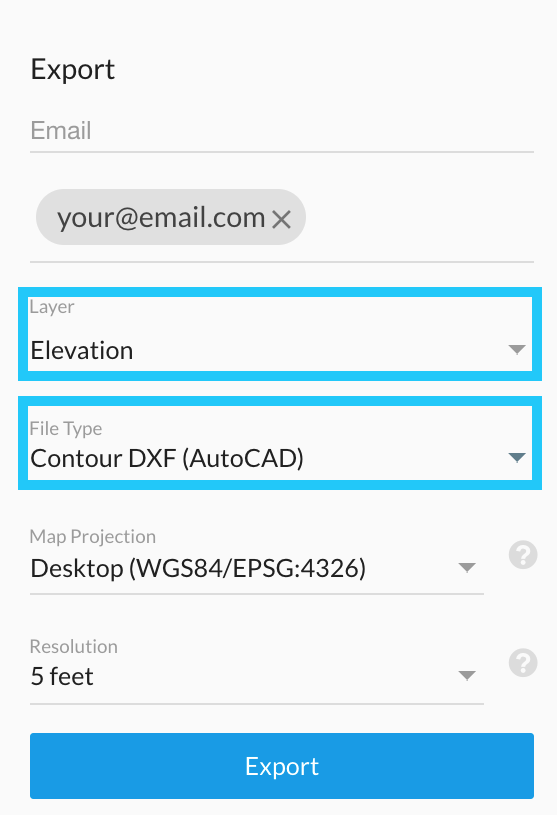
The contour file as a DXF file.
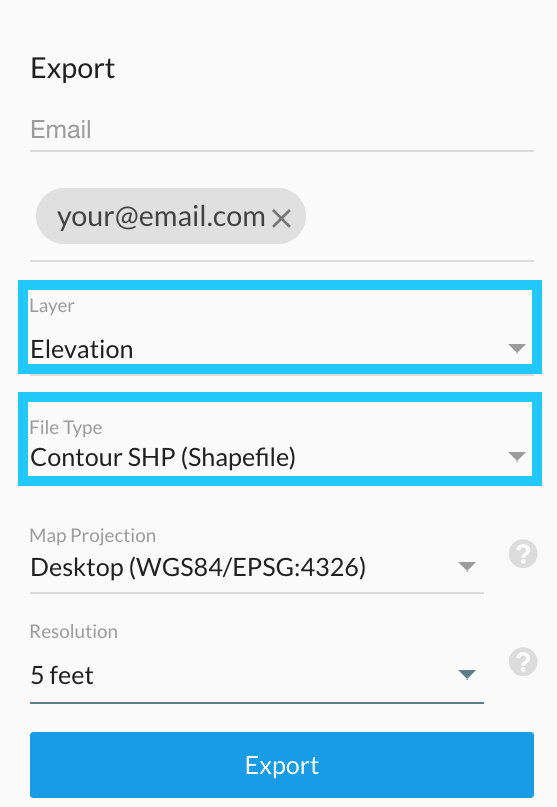
The contour file as an SHP file.
Notes regarding the export parameters 1. This example uses the Web Mercator Projection (EPSG:3857), but you can use the Map Projection that best suits your needs. 2. You can export the elevation map using GeoTIFF as the Data Type, or you can choose to export it using the Raw Elevation Values option if it is available on your plan.
After the data has been exported and downloaded to your computer, use ArcGIS to work with the files.
Change the spatial reference system using ArcCatalog
To overlay the contour files (SHP or DXF) on top of the GeoTIFF file, confirm that all of them have the same Spatial Reference within ArcGIS. Open ArcCatalog and reproject the coordinate systems if you find a discrepancy within the coordinate system of the three files.
Open ArcCatalog and select the file path of the exported files.
-
Check the coordinate system of the SHP file: Open the folder that contains the SHP file. Right-click on it and select Properties.

In the Shapefile Properties window, check the current coordinate system. This file uses WGS_1984_Web_Mercator_Auxiliary_Sphere with the EPSG code 3857.

-
Check and assign the coordinate system for the DXF file:
Open the folder that contains the DXF file. Right-click on it and select Properties.

In the CAD Feature Dataset Properties window, go to the General tab.
-
If the Spatial Reference is Unknown, assign the same coordinate reference system as the SHP file.

Click the Edit button to change the coordinate system.
-
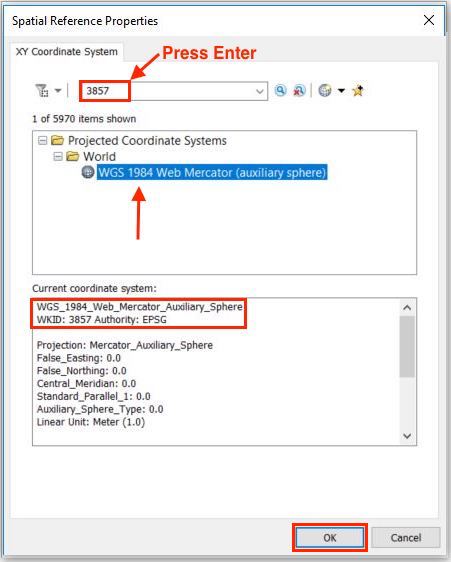
In the search bar in the Spatial Reference Properties window, type 3857 and press Enter.

Click on the coordinate system that appears to select it and click OK.
-
The Spatial Reference System for the DXF file now uses WGS_1984_Web_Mercator_Auxiliary_Sphere (EPSG code 3857). Click OK to apply the changes.

-
Check and correct the coordinate system for the GeoTIFF file:
-
Open the folder that contains the TIFF file. Right-click on it and select Properties.

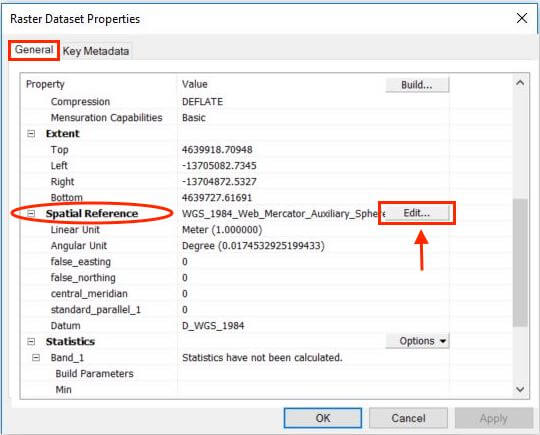
In the Raster Dataset Properties window, go to the General tab.
-
Scroll down to the Spatial Reference information and click Edit to check the coordinate reference system.
-
If the coordinate system is WGS_1984_Web_Mercator_Auxiliary_Sphere but is missing an EPSG code, type 3857 in the search bar.

-
Click on the coordinate system that appears to select it and click OK.
In the Raster Dataset Properties window, click OK again to apply the changes.
-
All files now use the same coordinate reference system and are ready to be imported into ArcMap.
Import the GeoTIFF into ArcMap
Open ArcMap and start a new project.
-
Click the Add Data icon to import the files.

-
Add the Elevation Map by selecting the TIFF file path and clicking Add.

If the Elevation Map renders incorrectly, follow the steps in the Displaying Elevation Data in ArcGIS documentation. Once the TIFF file rendering is corrected, you will see a visual representation of your map. 
Now, overlay the contour files on top of the Elevation Map. You can choose to import either the SHP or the DXF file, as both are vectorial information that can be imported into ArcMap.
Overlay the SHP file
Click the Add Data icon.
-
Go to the SHP file location and click Add.
You will see the SHP file overlaid with the Elevation Map. 
Overlay the DXF file
Click the Add Data icon.
-
Go to the DXF file location and click Add.

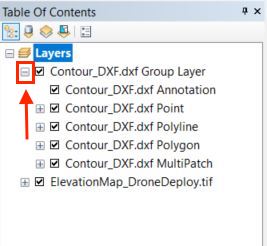
DXF files in ArcGIS are represented by five CAD feature classes: Annotation, Point, Polyline, Polygon, and MultiPatch. To display and overlay the contour lines on the Elevation Map, you must choose only the Polyline feature within the DXF file.
In the Table of Contents window, expand the DXF layer to see the components of the CAD file.
Uncheck all of the components except the Polyline.
You have now successfully overlaid the DXF file on top of the Elevation Map. 
ArcGIS documentation
For further information regarding the use of ArcGIS, review the ArcGIS Desktop documentation.
V2.2