Part of putting your drone to work is having the right data for analysis. DroneDeploy allows you to export your data quickly from the cloud to your desktop for integration with third-party software.
This guide covers how to import the GeoTIFF, contours DXF, and point cloud files exported from DroneDeploy into Revit. Additionally, you will learn how to overlay the DXF file on top of the GeoTIFF, resulting in a bold, data-rich display to share with your stakeholders.
Availability: Who has access?
This workflow requires data files that are available for all paid DroneDeploy Aerial subscriptions.
GeoTIFF (elevation)
DXF (contours)
LAS (point cloud)
How to export data from DroneDeploy
Select the map you wish to export from the DroneDeploy dashboard. Follow the steps described in our Exporting Your Data guide for a full walkthrough of the export process.
For this guide, we downloaded the elevation GeoTIFF, the contours DXF file, and the point cloud LAS file.
Data export formats: Please visit our [Data Export Formats] support documentation to check the file formats that are available to export on your DroneDeploy subscription.
How to import data into Revit
Once you have saved your data to your computer and extracted the data from the zipped files, open Revit.
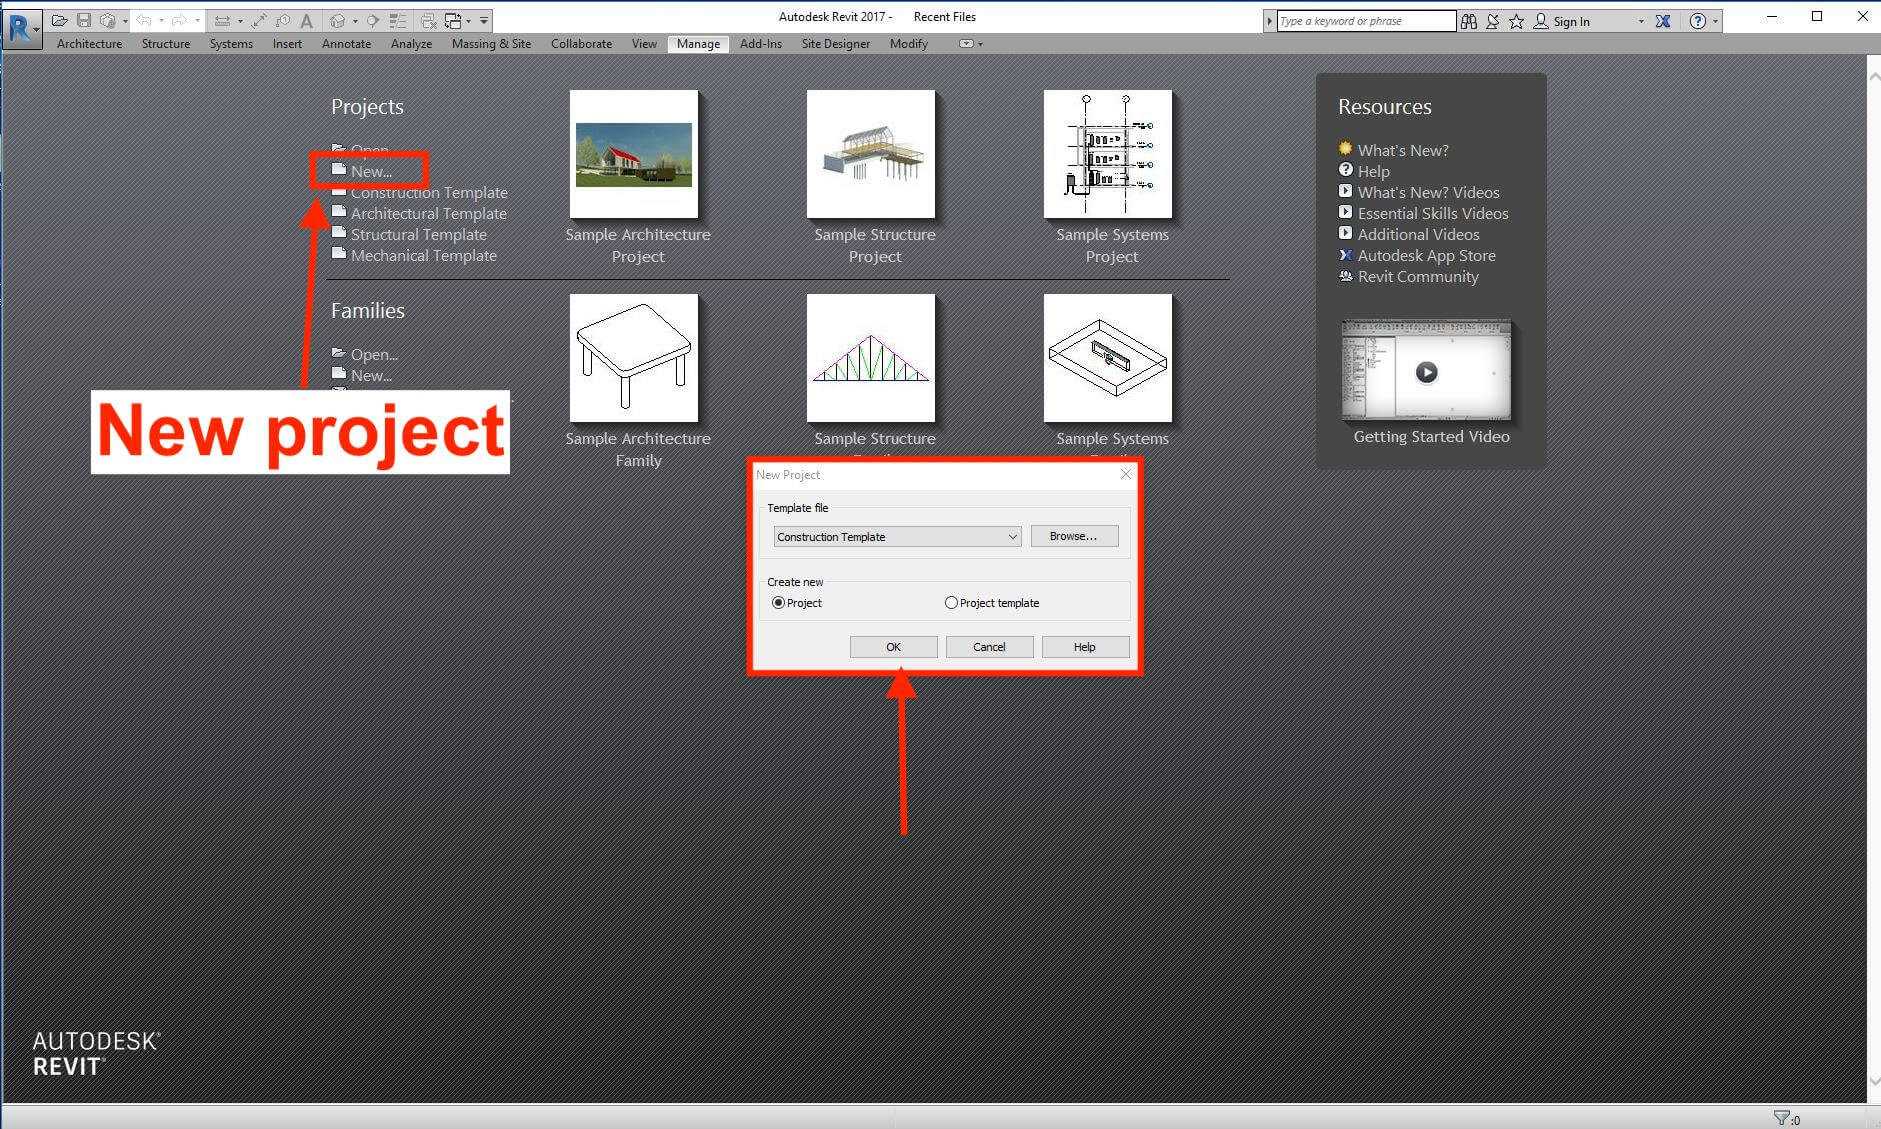
The first step is to create a new project. Click on New under the Projects section to create a new project template.
Import the DXF contour file
To select and open the DXF file, navigate to the Insert tab and click on the Import CAD option.
Make sure to select the correct Import Units and the Positioning. In this case, we will leave it with the default values (Auto-Detect).
-
Click Open to confirm.
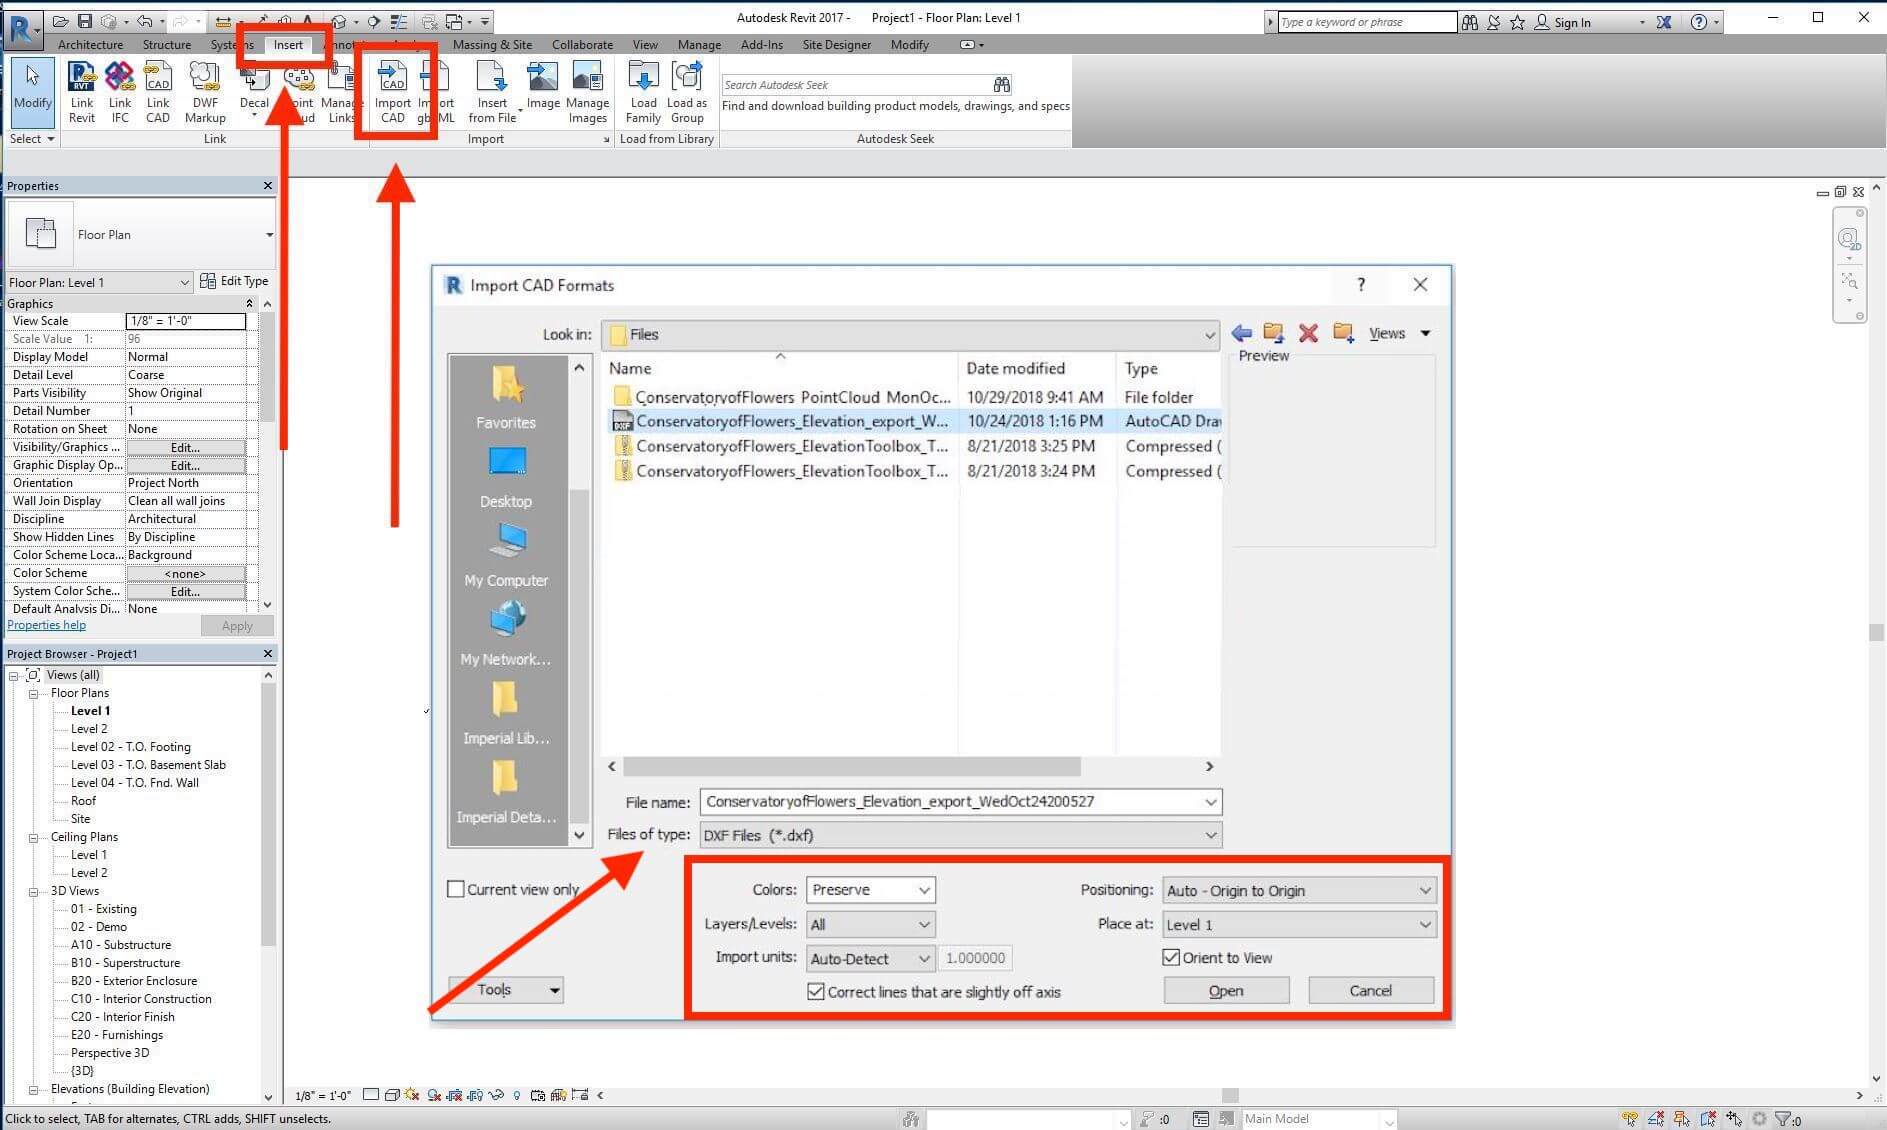
Note: To select the DXF file, make sure to select the DXF (*.dxf) option in the Files of Type box.
Import the TIFF file
Now that you have opened the DXF file, you can continue importing the GeoTIFF file.
Go to the Insert tab.
-
Select the Image option within the Import section.
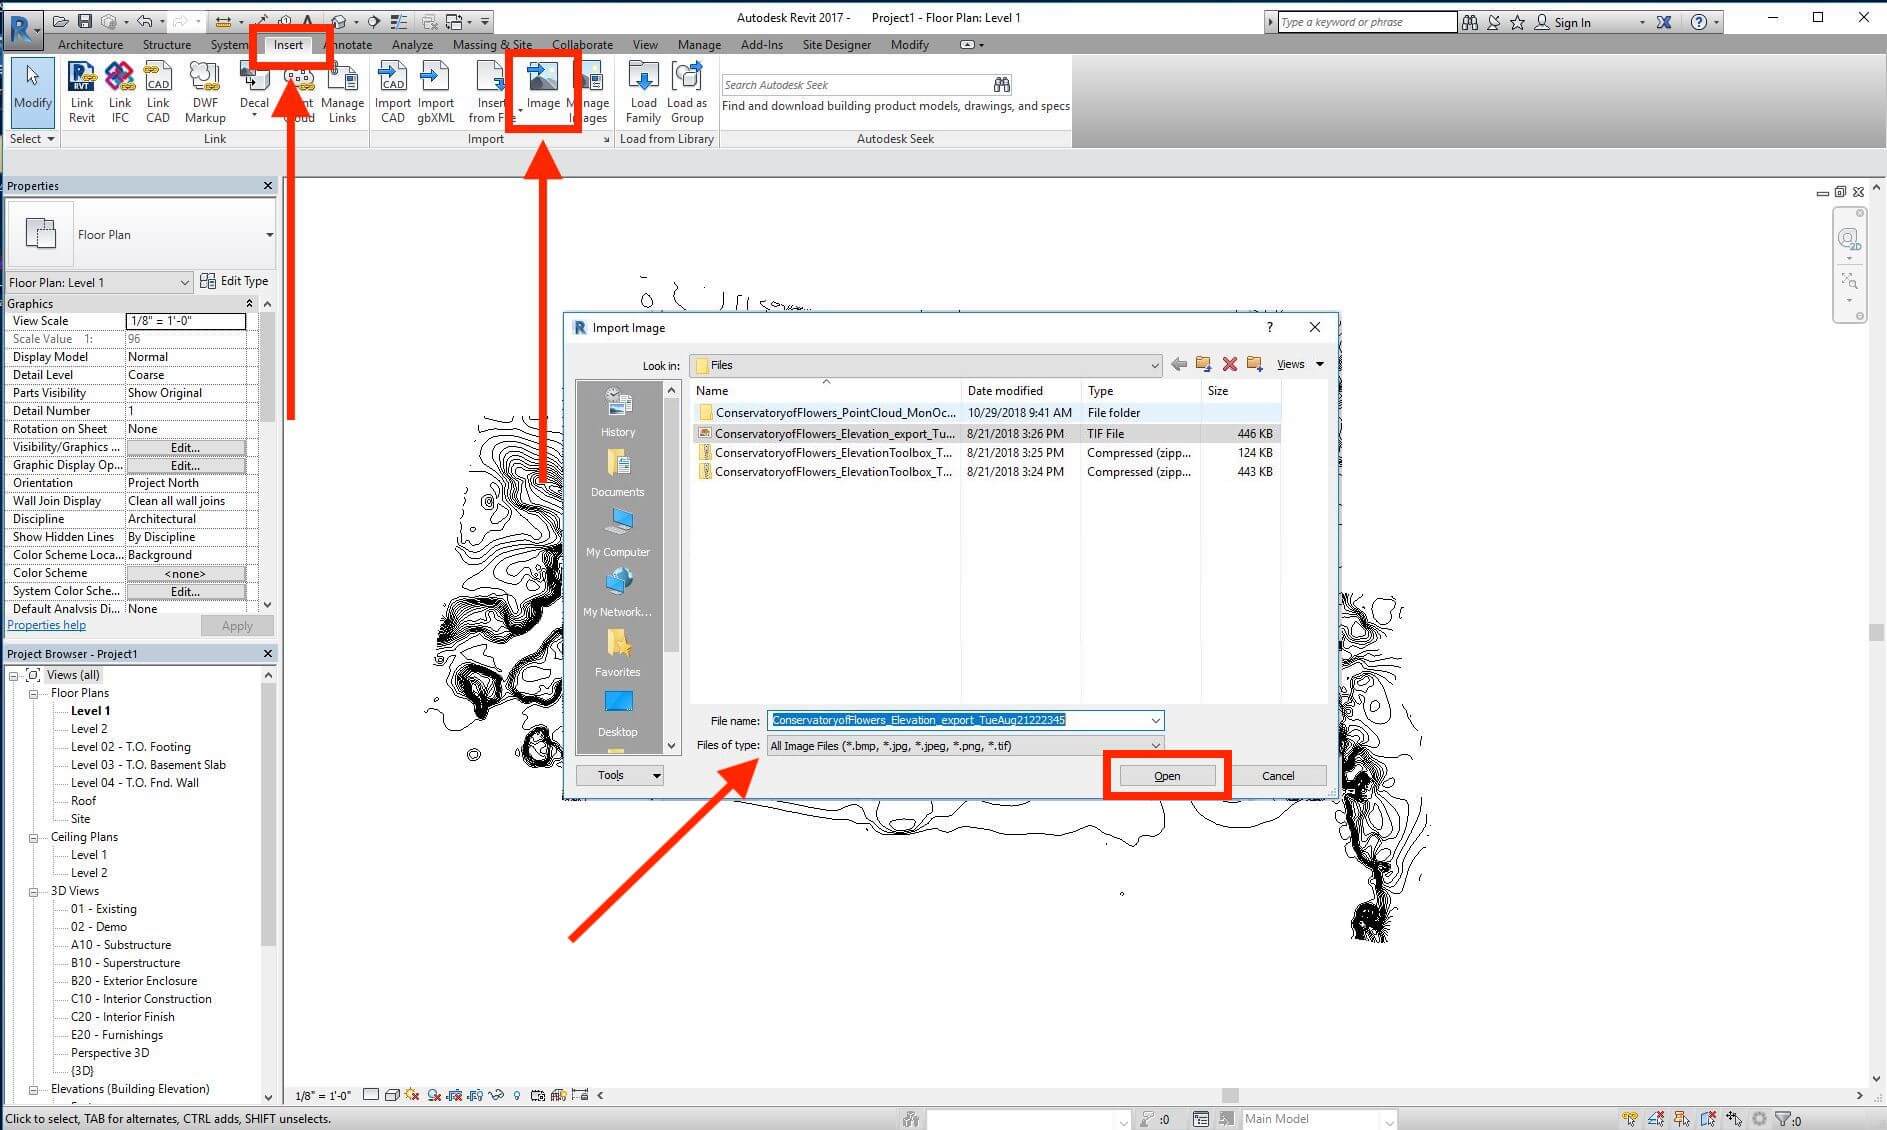
Note: To select the TIFF file, make sure to select "All Images Files" option in the Files of Type box.
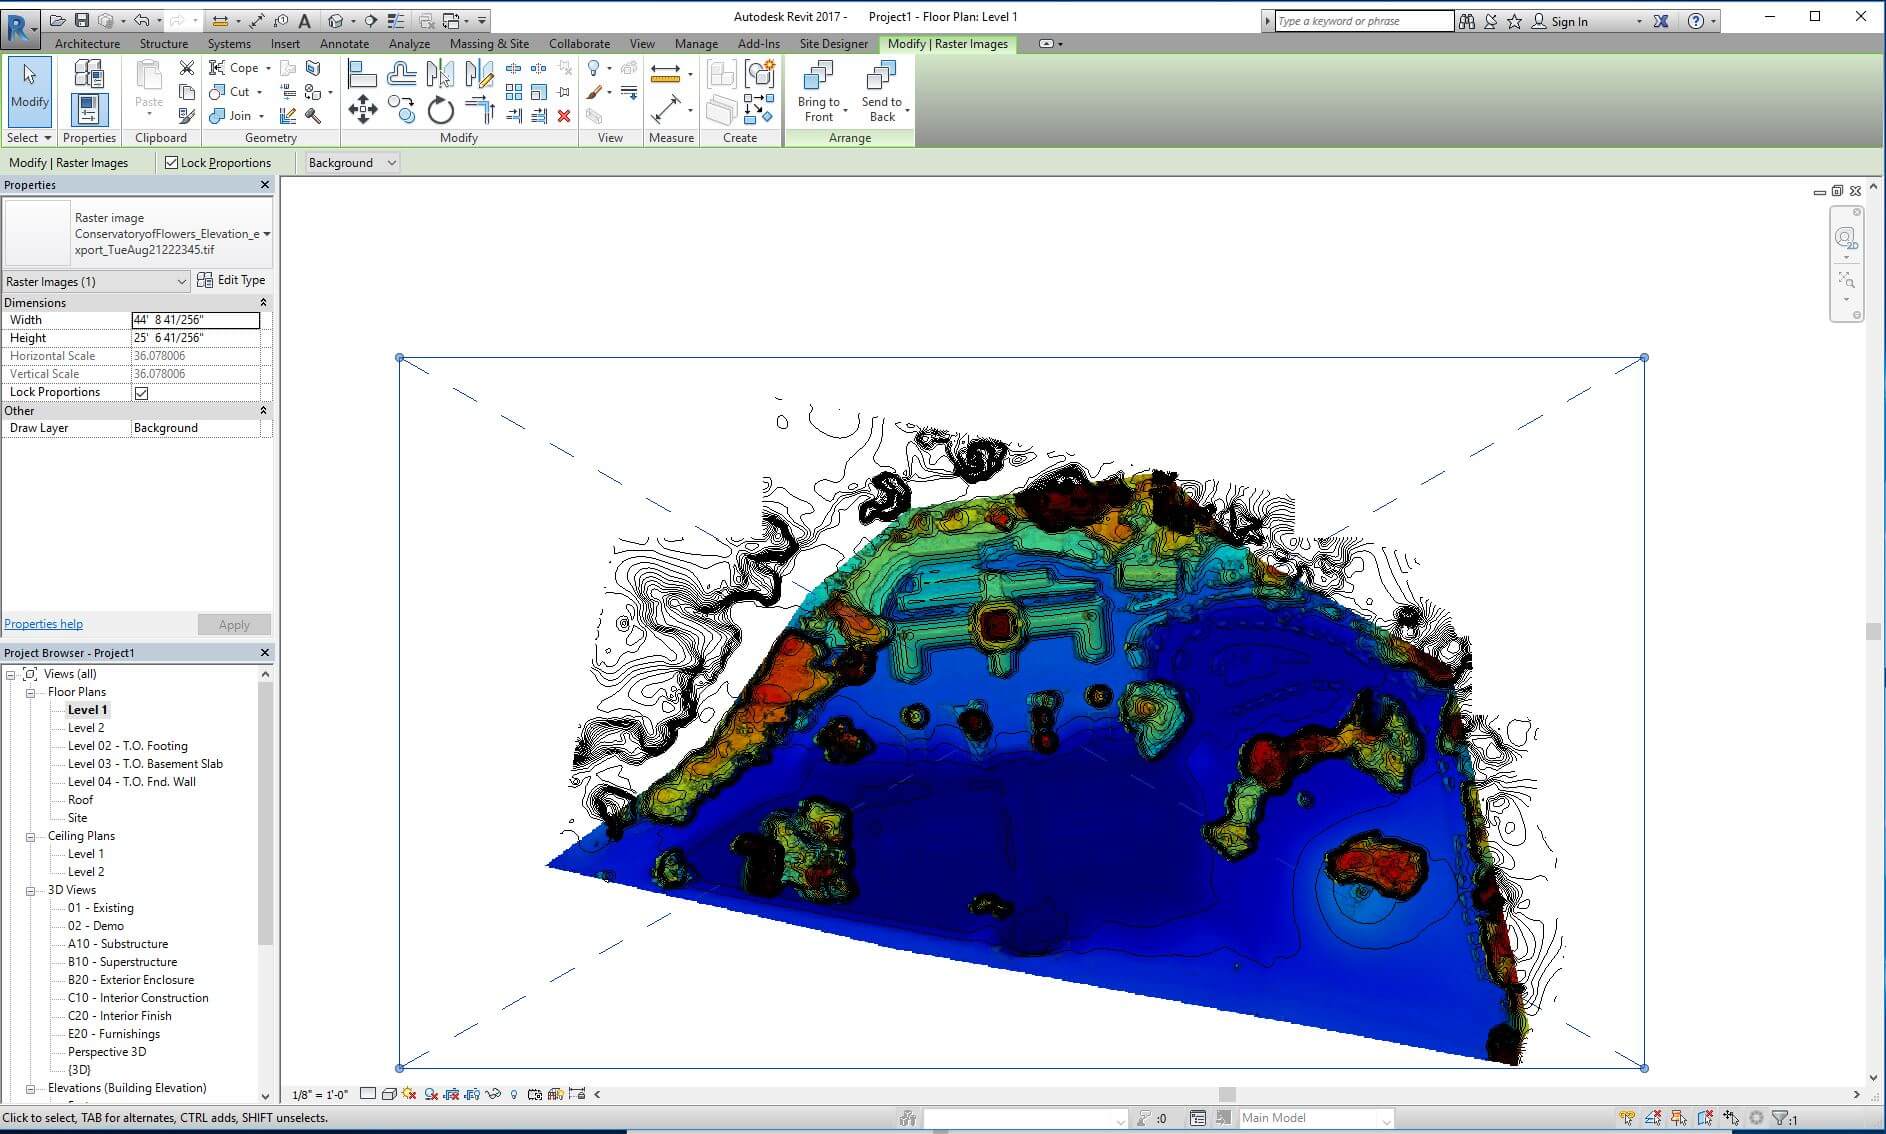
Coordinate system note: The raster within Revit does not take into account any coordinate system. You must scale and adjust this manually to line up with the DXF file.
This is how your overlaid map should look like in Revit:
If you would like to save this drawing as a DWG file format, go to File and select Save As then Drawing.
Troubleshooting
A commonly-seen error when importing a DXF into Revit is: 'None of the created elements are visible in Floor Plan: Level 1 View. You may want to check the active view, its Parameters, and Visibility settings, as well as any Plan Regions and their settings.' You can troubleshoot this problem by viewing this Autodesk Support article, or by contacting Autodesk support.
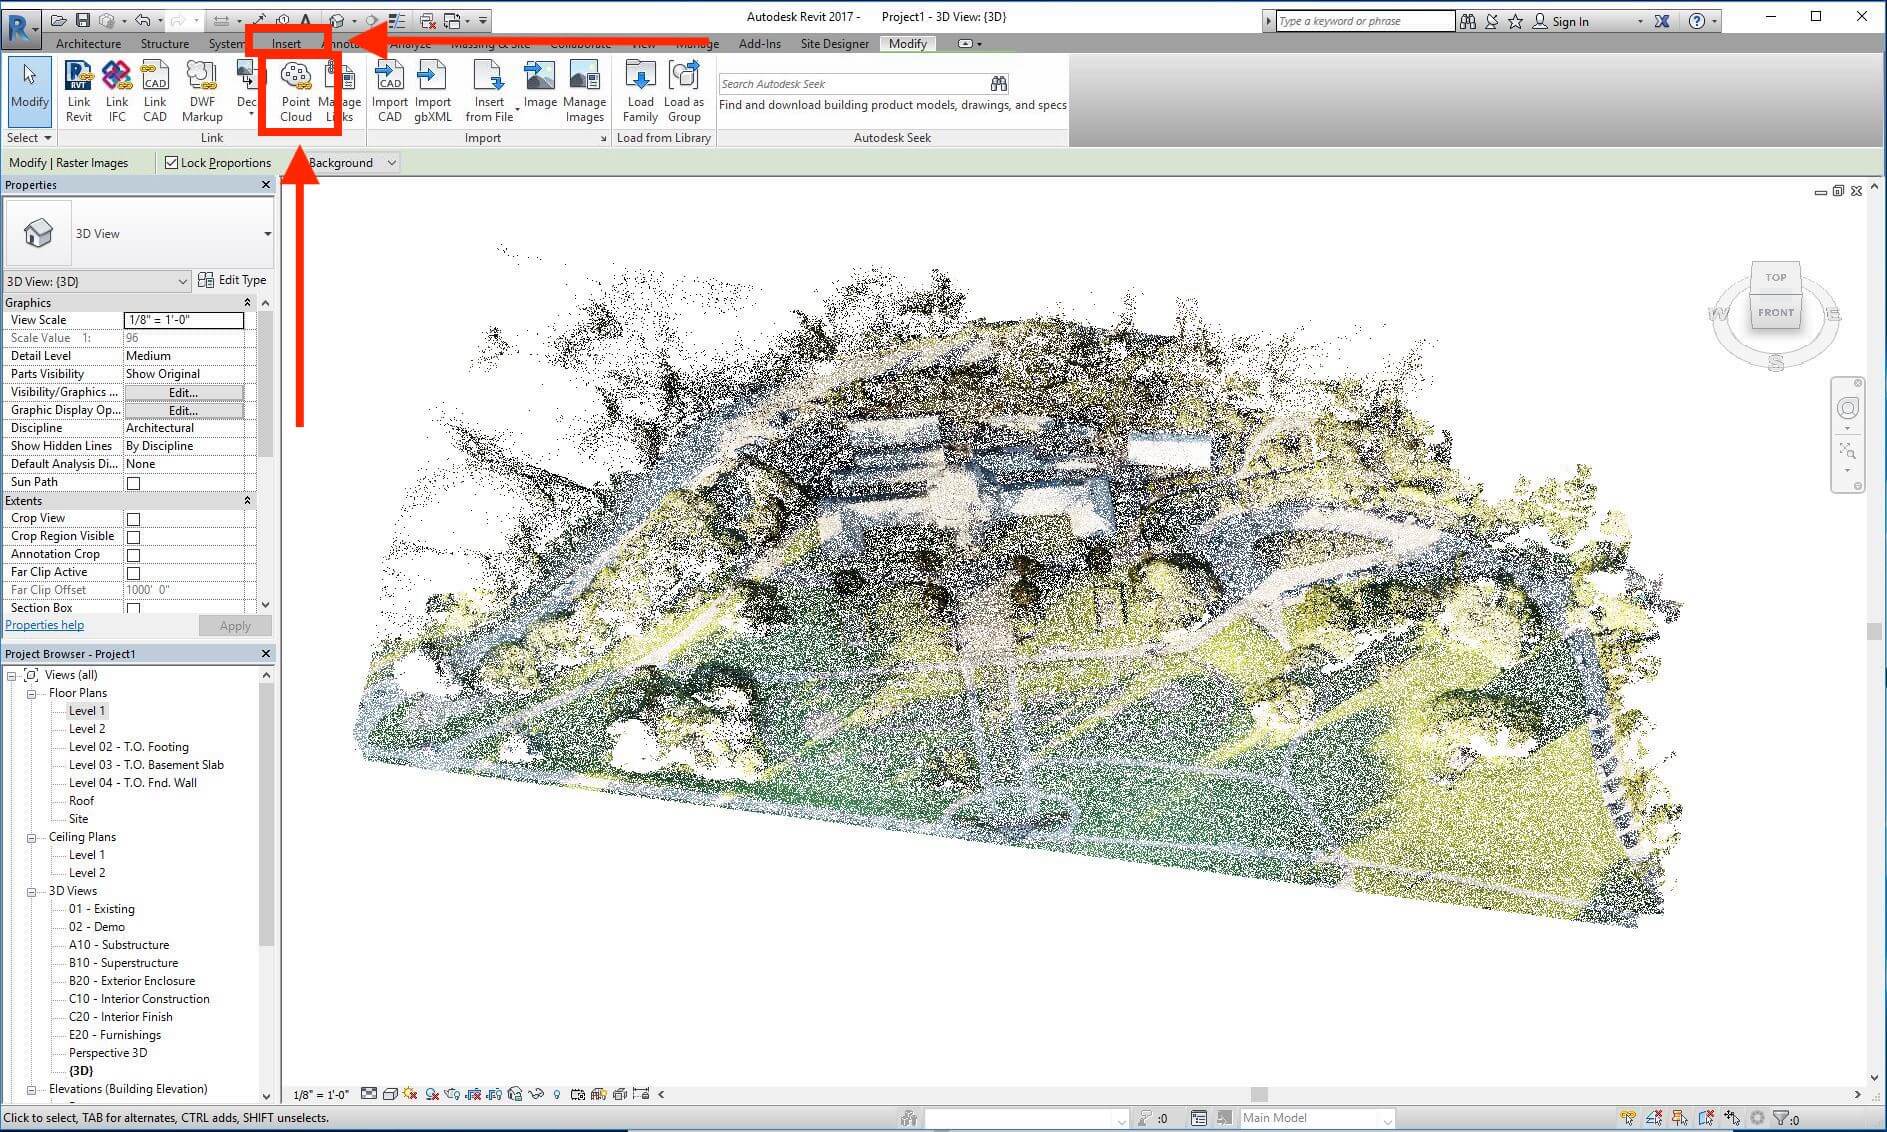
View the point cloud file
AutoCAD is compatible with RCP (.rcp) or RCS (.rcs) point cloud formats. To learn how to convert the LAS file exported from DroneDeploy to RCP using Recap, please visit our guide Importing Point Cloud into Recap.
Once you have the RCP file, within Revit go to the Insert tab and click the Point Cloud button located in the Link section:
Key features/details
The ability to import these files allows you to:
Integrate high-resolution GeoTIFF orthomosaics directly into your building models.
Overlay DXF contour lines to visualize site topography within your existing Revit designs.
Bring your LAS point cloud data into Revit (after conversion to RCP) to perform detailed measurements and clash detection against your building models.
Limitations
The primary limitation of this workflow is the Revit raster import functionality:
The raster (GeoTIFF) does not take into account any coordinate system upon import. You must manually scale and adjust it to align with the DXF file.
FAQs
Q: Does Revit automatically align the GeoTIFF and DXF files?
A: No. The DXF file (a CAD file) maintains its coordinates, but the GeoTIFF (a raster image) must be manually scaled and positioned after import to align with the DXF contours.
Q: Can I import the LAS point cloud file directly into Revit?
A: No. Revit requires the point cloud to be in RCP (.rcp) or RCS (.rcs) format. You must first convert the LAS file using Autodesk Recap or a similar third-party tool.
V2.2