Overview
The LAS (Lidar Data Exchange) point cloud data deliverable is available for all customers subscribed to the Individual, Advanced, Teams, and Enterprise Plans. Users can utilize this file in several GIS (Geographic Information System) software packages, such as ArcGIS.
This guide explains how to export the point cloud as an LAS file from DroneDeploy and then import it into ArcGIS.
Reference: To import the LAS file into AutoCAD Civil 3D, please review our guide here.
Export and download the LAS file from DroneDeploy
Follow these steps to generate and download the LAS file:
Select the map you wish to import from the DroneDeploy dashboard.
-
Select Export in the bottom left.

Choose Point Cloud as your layer and Lidar data exchange (.las) as the file type. 4. Enter any additional email addresses to receive the exported map.

Choose a Map Projection. DroneDeploy supports most EPSG codes listed on www.spatialreference.org.
Choose a Resolution. The default resolution is the maximum number of points; however, you can choose to lower this resolution to create smaller file sizes.
Click Export to submit your request.
After a few minutes, the requested data will be in your email's inbox.
Key features/details
The LAS file contains your 3D point cloud data. You can utilize this data in GIS software such as ArcGIS for advanced spatial analysis.
Limitations
DroneDeploy does not currently export all common metadata fields.
Export resolution is limited to the current project's processing parameters.
Import the point cloud file into ArcScene
To import the LAS file into ArcGIS, you first need to create a LAS Dataset file (.lasd). A LAS Dataset allows you to store a reference to one or more LAS files, making it easy to read them in their native format. Please review more information regarding the LAS Dataset in ArcGIS here.
Open ArcScene, which allows you to work in a 3D environment, and start a new project.
-
Open the ArcToolbox window by clicking on the ArcToolbox window icon on the standard toolbar.

Within ArcToolbox, go to Data Management Tools > LAS Dataset and select Create LAS Dataset.

In the Create LAS Dataset window, Click on Input Files to choose the LAS file path.
Also, choose a location to store the LAS Dataset (.lasd) that you are about to create by clicking on Output LAS Dataset File.
It is highly recommended that you check the Compute Statistics box.
Once all the parameters are completed, click OK.

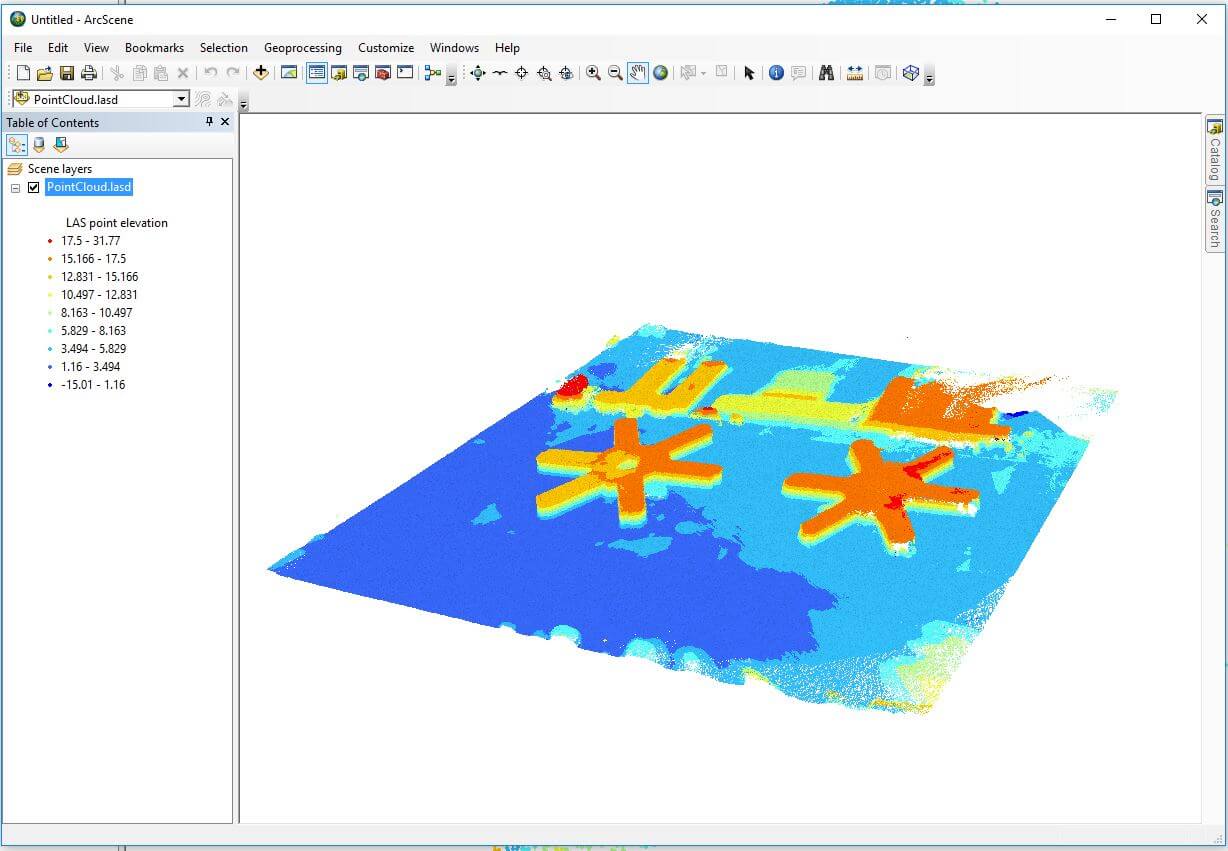
The .lasd file will be added automatically to your workspace. If the file is not visible, click on the Add Data icon to import the point cloud file. 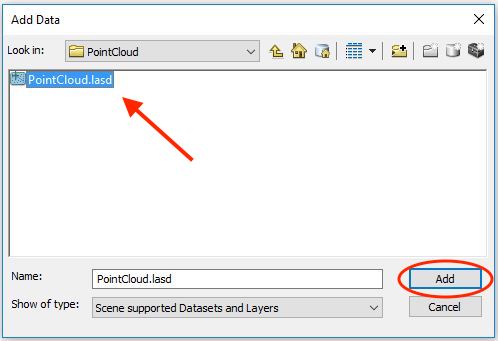
Simply select the file path to the .lasd file and select OK. The .lasd file should be displayed on your workspace.
Symbolize your point cloud
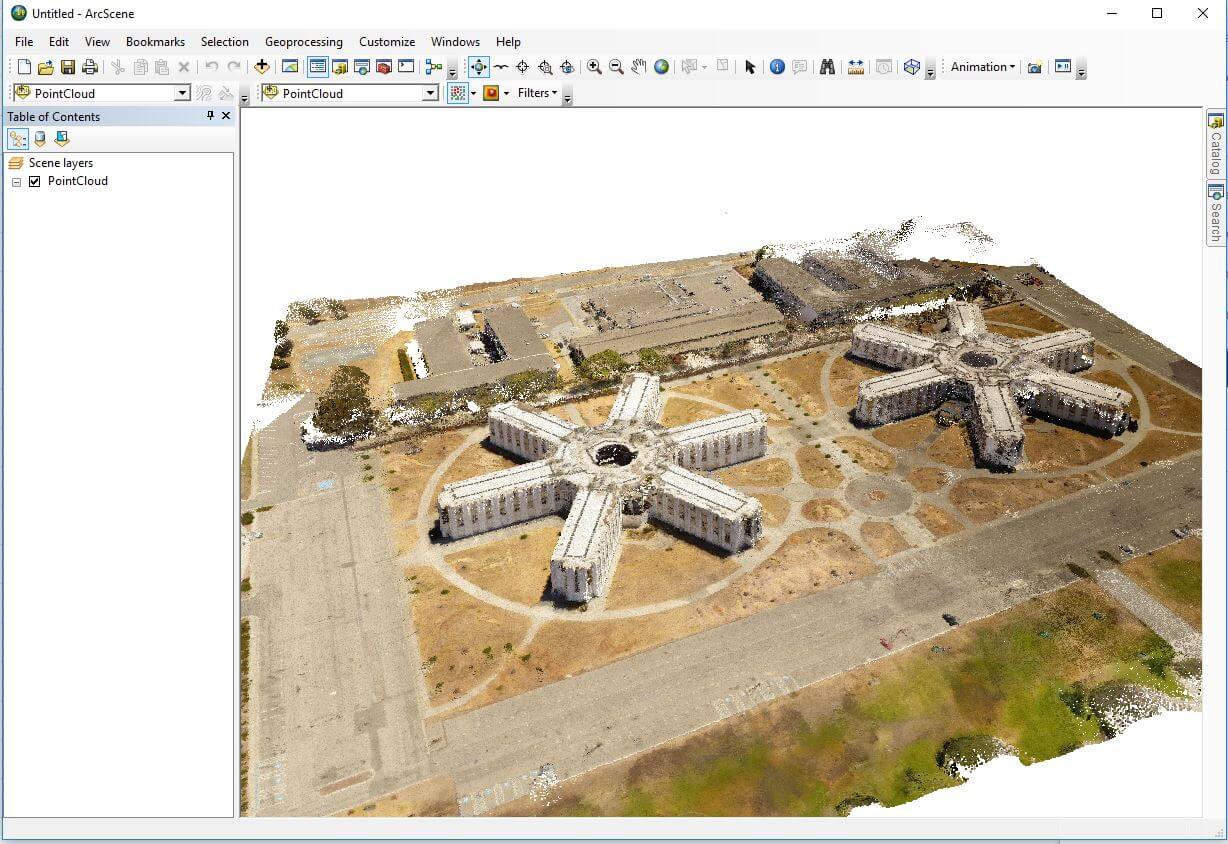
You can render or color the point cloud using the LAS Dataset menu.
To activate this menu, right-click somewhere on the gray toolbar and select LAS Dataset.

The LAS Dataset menu will be added to your workspace and will look like this:

-
You can symbolize your point cloud as you wish. In this example, we use the RGB option to give the point cloud a natural coloring.

You have successfully displayed your LAS file in ArcGIS.
ArcGIS documentation
For further information regarding the use of ArcGIS, please review the ArcGIS Desktop documentation here.
V2.2