Part of putting your drone to work is having the right data for analysis. DroneDeploy allows you to export your data quickly from the cloud to your desktop for integration with third-party software.
This guide covers how to import the point cloud exported from DroneDeploy into Autodesk Recap to generate the RCP file that is compatible with AutoCAD, AutoCAD Civil 3D and Revit.
Export Data from DroneDeploy
Select the map you want to export from the DroneDeploy dashboard and follow the steps described in our Exporting Your Data guide for a full walkthrough of the export process.
For this guide, we use the LAS point cloud, but note that the same steps work for the XYZ point cloud.
Data Export Formats: Visit our Data Export Formats support documentation to check the file formats that are available to export on your DroneDeploy subscription.
Importing Data into Recap
Once you have your data saved to your computer and extracted from the zipped file, proceed to open Autodesk Recap.
-
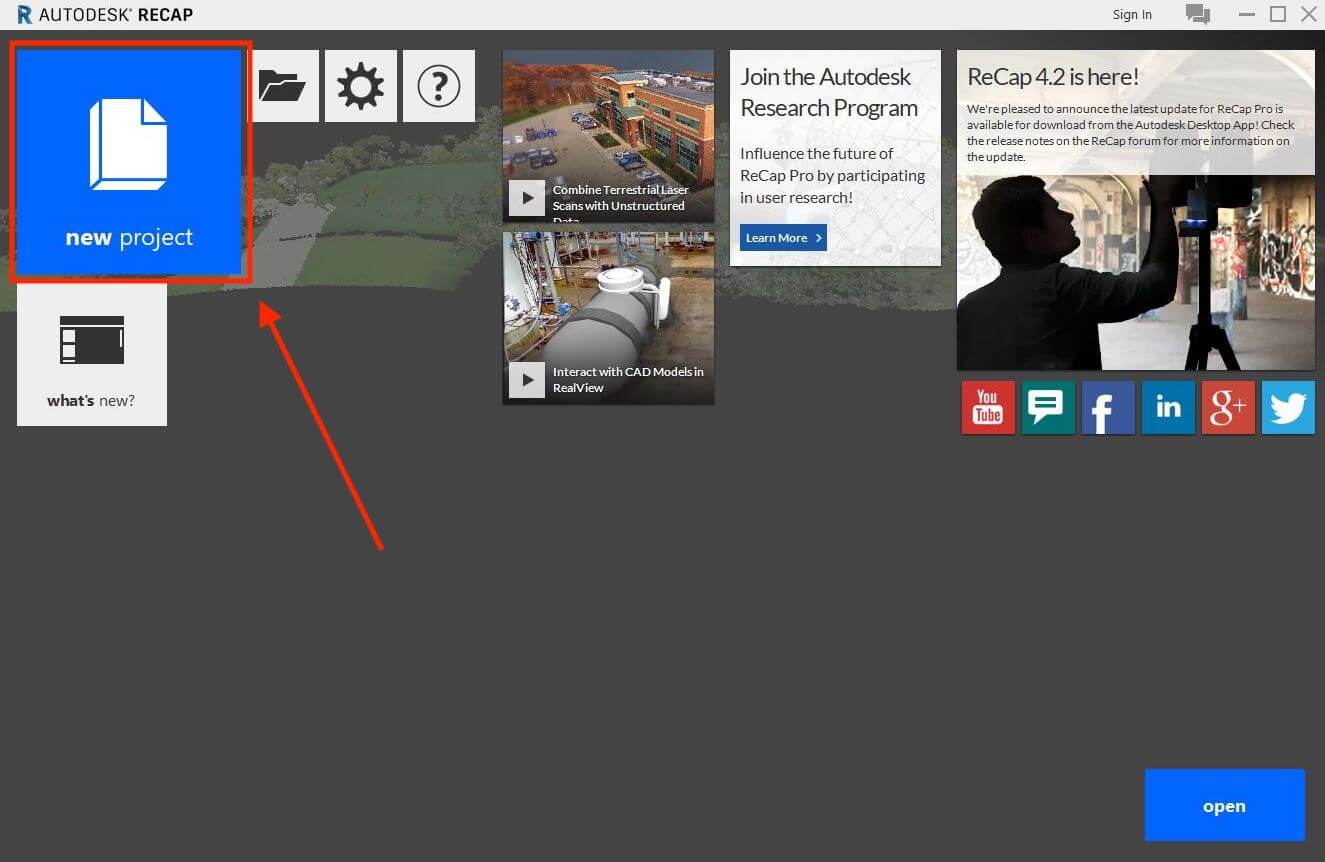
Click on New project.
-
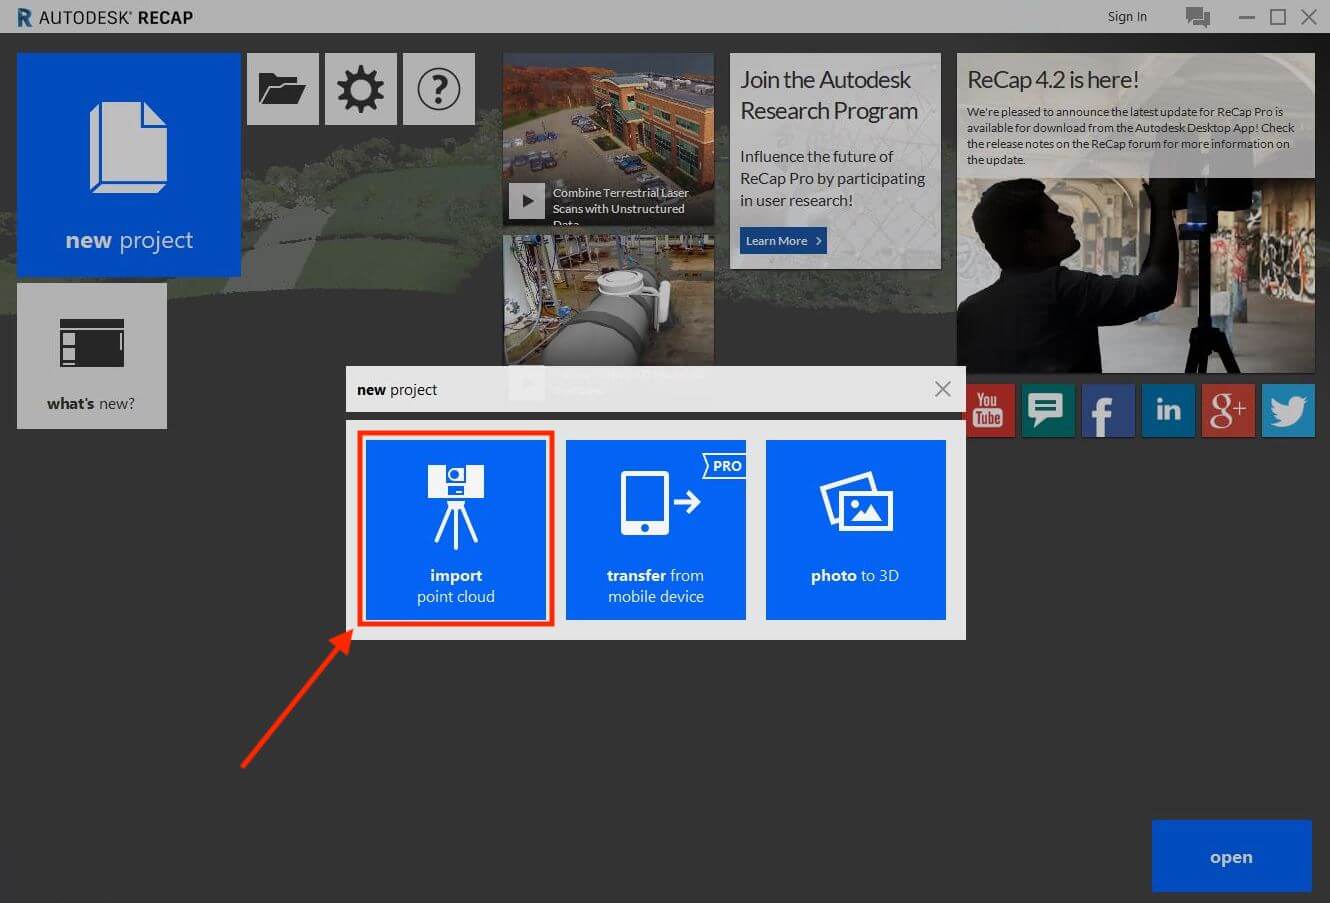
Select Import point cloud.
-
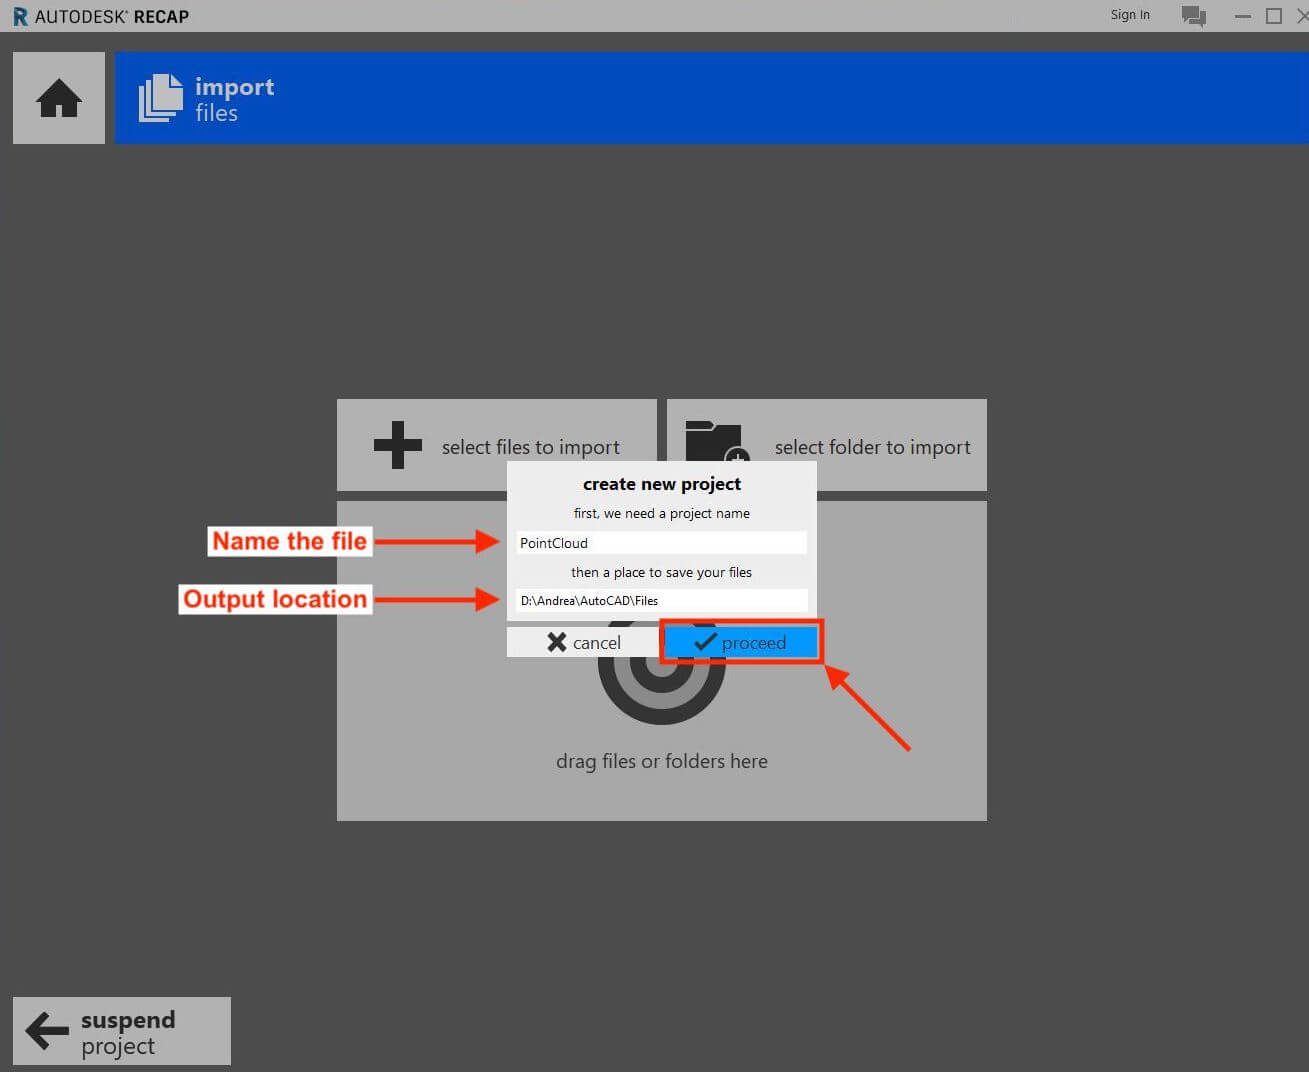
Name the file and select the output location. Confirm by selecting Proceed.
-
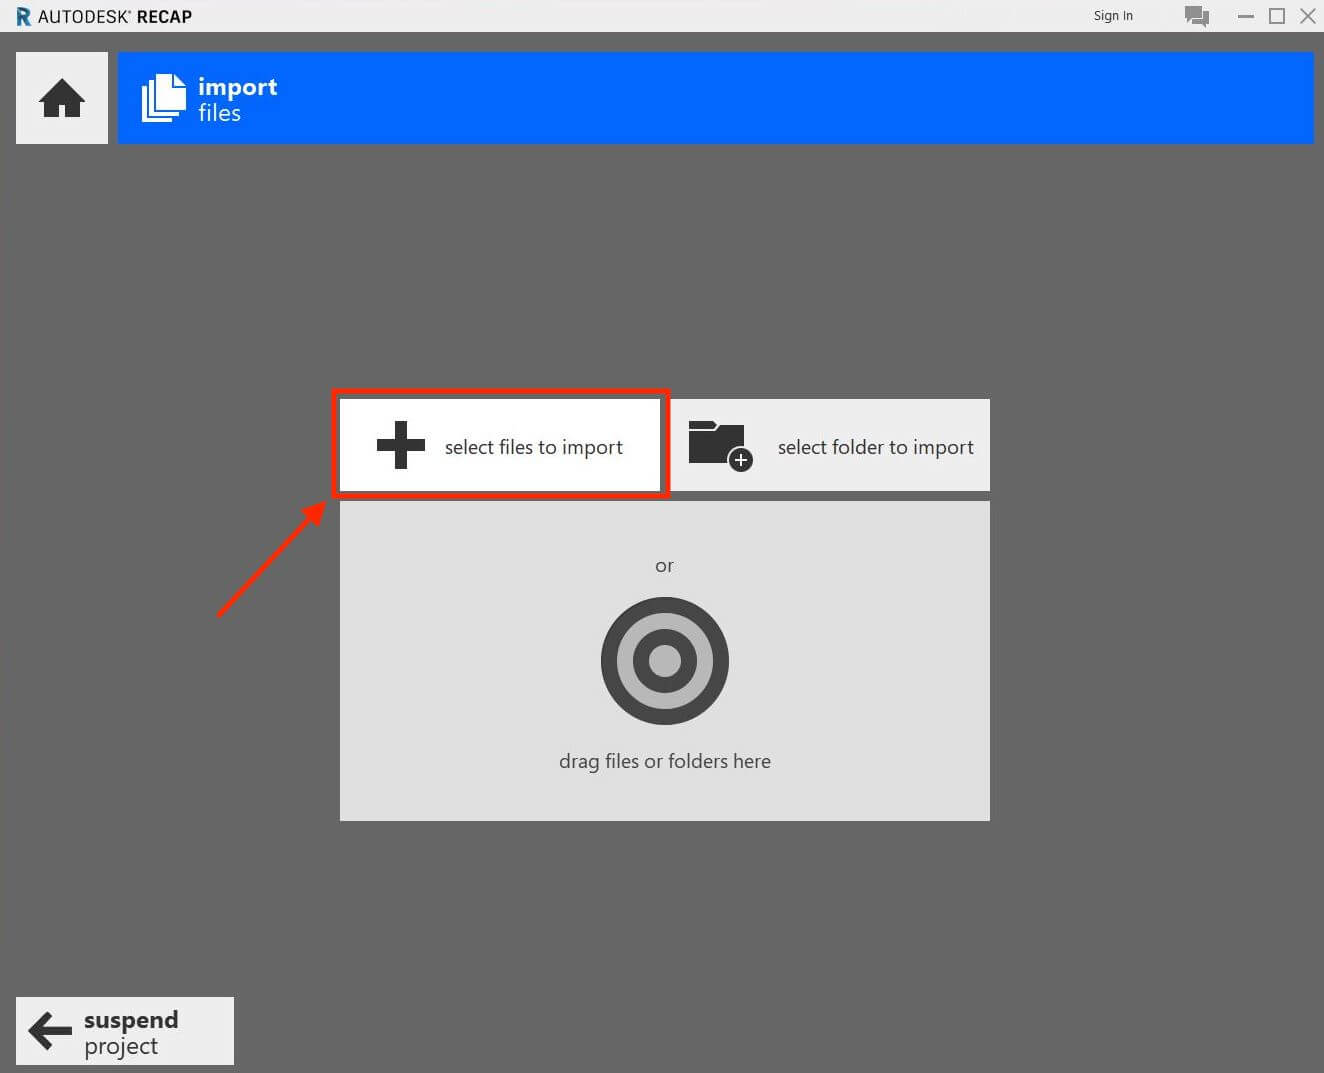
Click on Select files to import to open the LAS file downloaded from DroneDeploy.
-
Once you select and open the file, confirm by clicking on Import files.

-
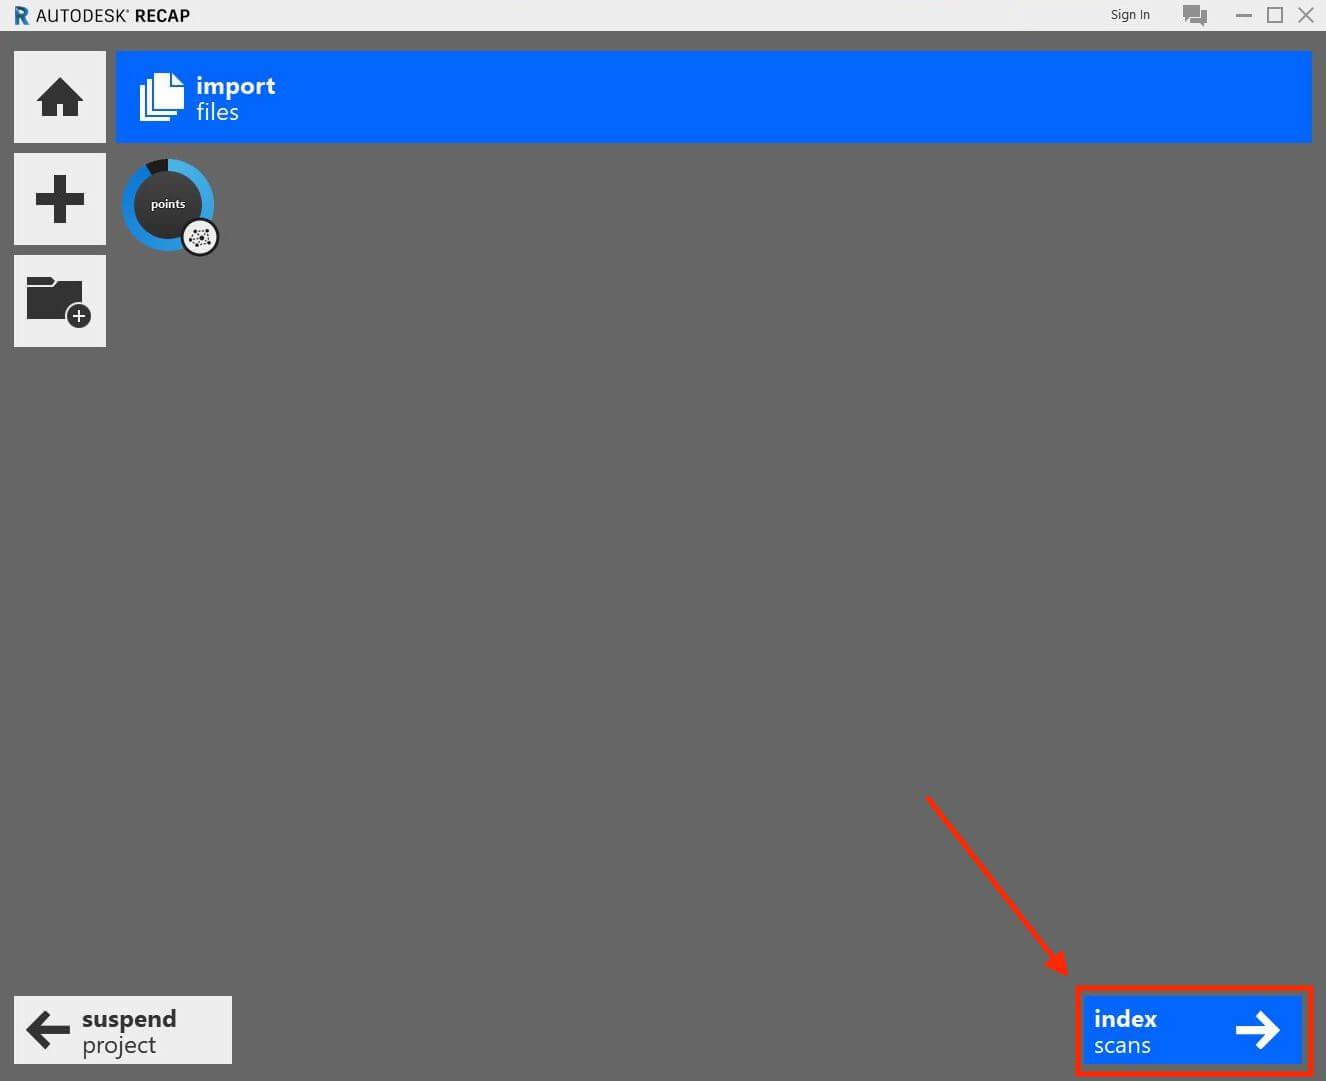
Click Index scans to start the transformation.
-
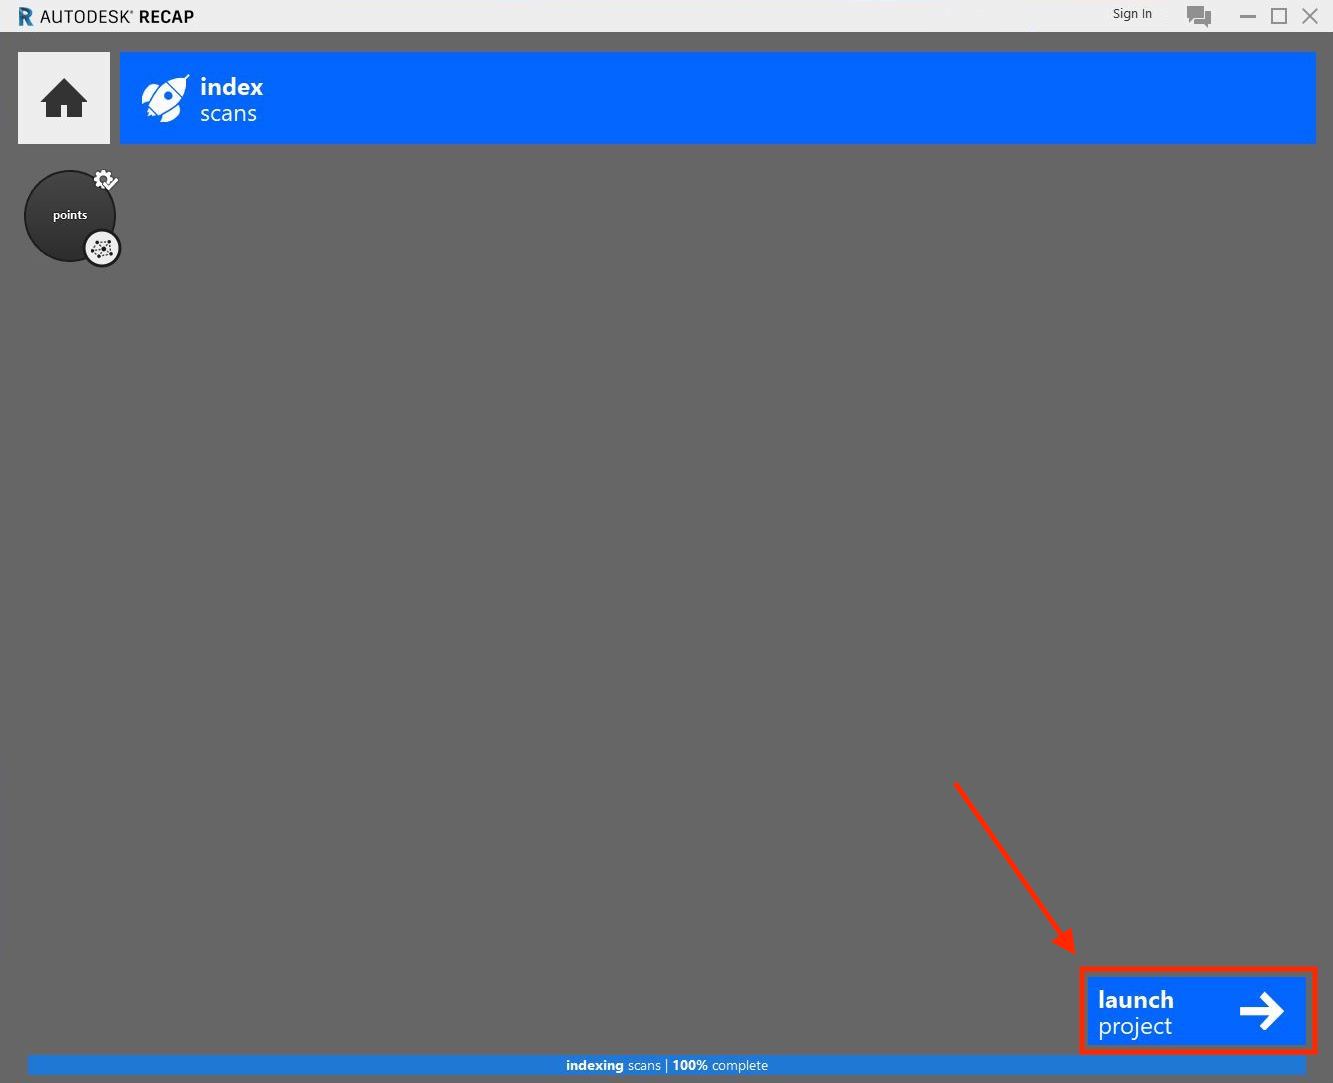
Once the indexing is complete, click Launch project to open the RCP (.rcp) file.
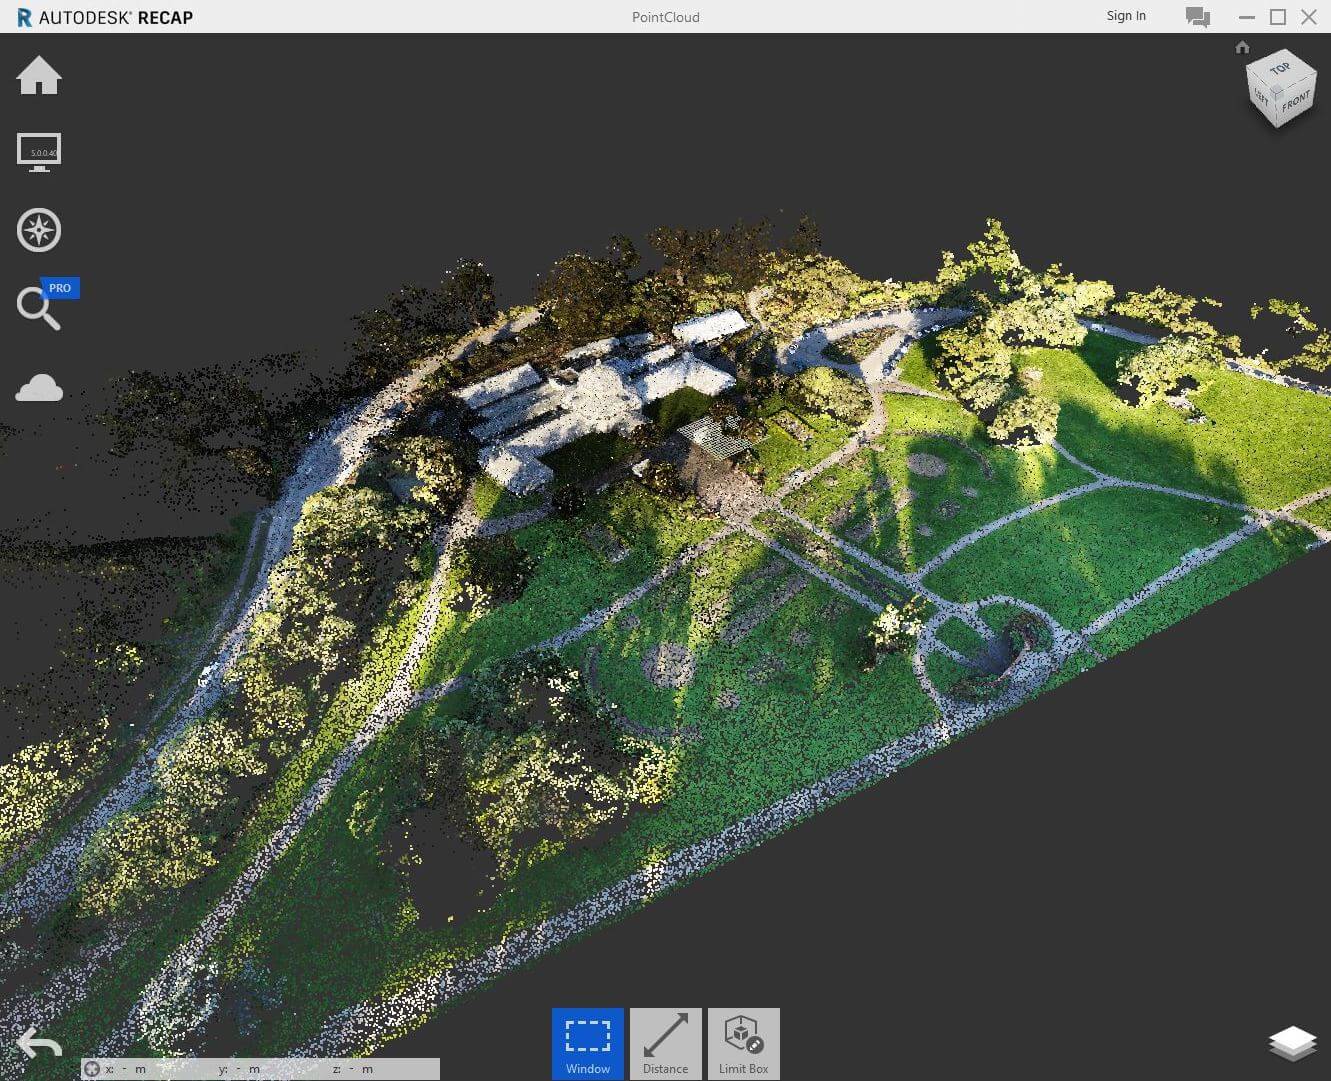
Now that you have the RCP file, you can use it to import this point cloud format into AutoCAD, AutoCAD Civil 3D and Revit for further analyzing and data sharing with your stakeholders.
V2.2