Navigating Projects in DroneDeploy

Have more questions? Submit a request

The DroneDeploy interface streamlines your data organization experience by grouping all flight plans, maps, media, and reports associated with a location into one project. This makes it easier to find the data you’re looking for, re-fly the same location and share complete reality capture through one project.

Create a New Project

You can create your first project by clicking the "New Project" button.

Then search for your project's location.

Center the map beneath the icon and click the "Create project here" button.

And finally, give your project a name.

Once you create a site, you will be taken to flight planning so that you can plan your first flight for that project. If you already have a dataset to upload, you may also go straight to the upload tab to create your first map.

Quick Upload

If you're simply uploading orthomosaic data, without GCPs*, you can use the Upload icon to start a new project. Using this option will automatically create a project at the location of the imagery, using the EXIF data of the photos.

Screen_Shot_2021-10-18_at_9.17.37_PM.png


GCP Upload*
If you're looking to upload GCPs, it's best you create a project at the address or coordinate of the site first, then upload imagery. Our quick upload button will not offer you the option to add GCPs at the time of upload.

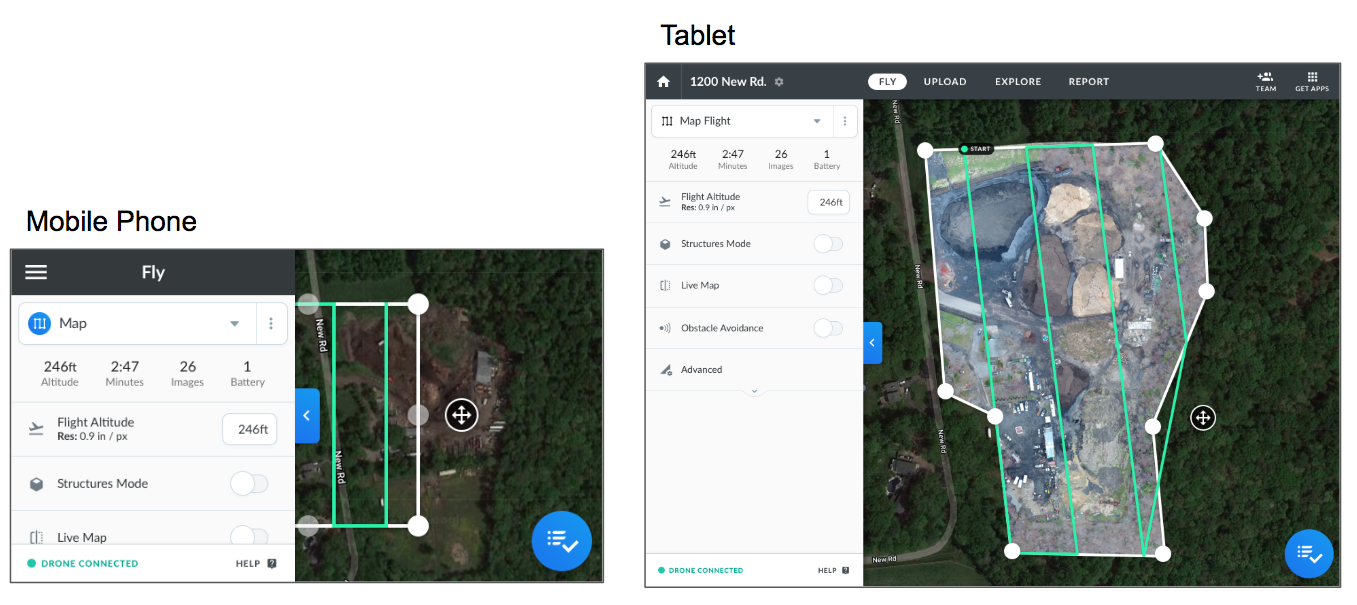
Once you have created your project, you can plan your flight on either desktop or mobile. To get to flight planning from mobile, just click on your project from the dashboard. Since you have not yet added a map, you will go straight to the “Fly” tab to plan your flight.

Once you have an existing map, you will go to the “Explore” tab to see the latest data. If you want to change between different viewing modes on your project on mobile phone, use the menu icon to go to your Project menu.

Flight Planning & Flight

Flight planning will work very similarly to the way it has worked, except that the flight plan will exist within the context of a project, rather than as a standalone object on the dashboard. One of the benefits of the new project interface is that it makes it very easy to re-fly the project using the same flight plan, over and over again. Just connect your drone, return to the “Fly” tab, and go through your flight checks and take off.

By default, each project will have one editable flight plan associated with it that you can re-fly over and over again for consistent results. This means that that any changes you make to your flight plan will be saved to the flight plan for the site.

Create a New Flight Template

If you would like to use several different type of flight plans for your project -- for example you want to create a basic map of the whole project, a smaller 3D model of a particular structure, and a set of progress photos -- you can also create and save multiple flight templates for your project, all of which can be re-flown.

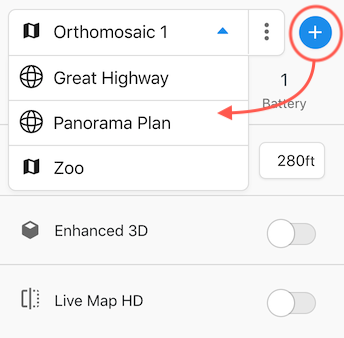
To create a new flight template, select thee plus button Then select the type *of flight template you want to create and adjust your flight geometry and settings.

Once you've created multiple flight templates, you'll be able to find them in the flight template selector.

Some flight features will not be available for Beta
Please note that for mobile upload of images after flight will not be available during Beta for the new Projects interface.

Upload Data to a Site

Once you have flown your first flight, you can go to your project on desktop then go to the “Upload” tab. Find the pending upload that corresponds to the flight you completed and click it.

If you want to upload images from a flight that you didn’t fly with DroneDeploy or from a Progress Photos flight that you planned using the option on the dashboard, click the “New Upload” button.

Once you get to the image selection screen, all of the existing upload options you’re familiar with should be available, including ground control point processing. Even though progress photos flight planning is not yet support as part of the Alpha, you can still upload progress photos to create a progress photo report.

You will receive an email telling you when your map has finished processing.

Explore Your Map

To return to your project, just click on your project from the dashboard and you will go straight to your new map on the “Explore” tab. All map tools should work as usual, except that some apps may not be available. If you have multiple maps in your project, you can explore them using the calendar date picker or the forward and back arrows.

Sharing

When it comes to sharing, you have two choices. You can either share a link to a specific map, by clicking the “Share” button,

or you can invite a collaborator to edit the whole project by clicking the “Team” button.

If you invite an existing DroneDeploy user to the project, they will see it on their dashboard and be able to view and edit all data associated with it.

Shared projects will display as folders for users that do not have the Beta enabled
Please note that shared users will see the project displayed as a folder, rather than as a project, unless they, too, have the Projects interface enabled.
Projects in folders can be shared by sharing the project or the folder
You may also share a project by placing it within a folder and sharing the folder. You may want to do this is you to share data with a team that oversees multiple projects. When you share a folder that contains projects, the team associated with the folder will be able to see all items within the folder. If there are additional team members that are associated with a specific project but do NOT have access to the folder, they will see the project on their dashboard and will not see the folder or other items within it.

Reporting

Customers like you have asked for better reporting capabilities so that they can deliver polished insights to their stakeholders. This is an area where we’ve been making significant improvements and plan to make more in the future, and so we’ve decided to make reporting more prominent in the new Projects interface.

From the Reports tab, you can navigate to Annotation or Progress Photo reports and use the
date picker to explore different reports from different dates. You can also share a link to a report or print it.

Exporting

Exporting map data works just the same way it does in the current DroneDeploy interface, but the button to access it is now at the bottom of the page. Clicking the Export button will open a view help you choose export options to export the map from that date.

Access Help

On most screens, you can find help located at the bottom of the sidebar. The help options will be tailored to be relevant to what you’re looking at.

Organize Existing Data

Organizing your data into folders and projects is a great way to ensure you're data is where you need it when you need it. 

From your main dashboard, you have the option to access individual projects and folders and see recently viewed projects in the Quick Access section at the top.

Screen_Shot_2021-11-02_at_2.13.56_PM.png


If you want to move an existing project into a folder on your dashboard, you can do so by clicking the three-dot menu and selecting ‘Move to Folder': 

Screen_Shot_2021-11-02_at_2.15.00_PM.png

You can also move individual maps out of one project and into another! This can be helpful if a dataset was uploaded to an incorrect project or if you simply want to rearrange your data. You must be an Admin or the owner of the map in order to move it from one project to another. 

To move a map from one project to another, navigate to the project containing your map and select 'Map Details':

Screen_Shot_2021-11-02_at_2.19.09_PM.png

From there, scroll to the bottom of the map details menu and select "Move Map to Project":

Screen_Shot_2021-11-02_at_2.19.28_PM.png

Then, select the project you want this map to move into: 

Screen_Shot_2021-11-02_at_2.19.44_PM.png

Only move plans that are in the same location as your project
Please note that projects are intended to help you manage maps associated with the same project in the same location. While we won’t stop you from moving maps into the same project that are very far away from each other, we recommend against it.

We look forward to hearing your feedback, as your input is vital to helping us find issues. Please help us improve by filling out this feedback form.

Articles in this section

Was this article helpful?
0 out of 1 found this helpful