DroneDeploy now has the functionality to group Organization users into groups for ease of management and sharing within teams. This is due to the fact that very rarely do people at companies work alone or work on projects that no one else will ever see. Being able to organize users in teams offers another more natural way to think about sharing and collaborating with others.
As Organizations become larger with hundreds or thousands of users, admins can’t keep track of who every single user is or what teams or departments they work with and they need the ability to report out on a team, business unit, or division usage of reporting. Reporting this info allows admins to bill specific department usage of DroneDeploy or to report on which business units are utilizing DroneDeploy the most.
Using Groups
To use the Groups functionality you will need to select the Hamburger icon located in the top left corner of the dashboard. These will be the three horizontal lines parallel to one another which will expand the Left-hand menu. Once the menu has been expanded you will need to select the Organization option.
Creating Groups & Adding Users:
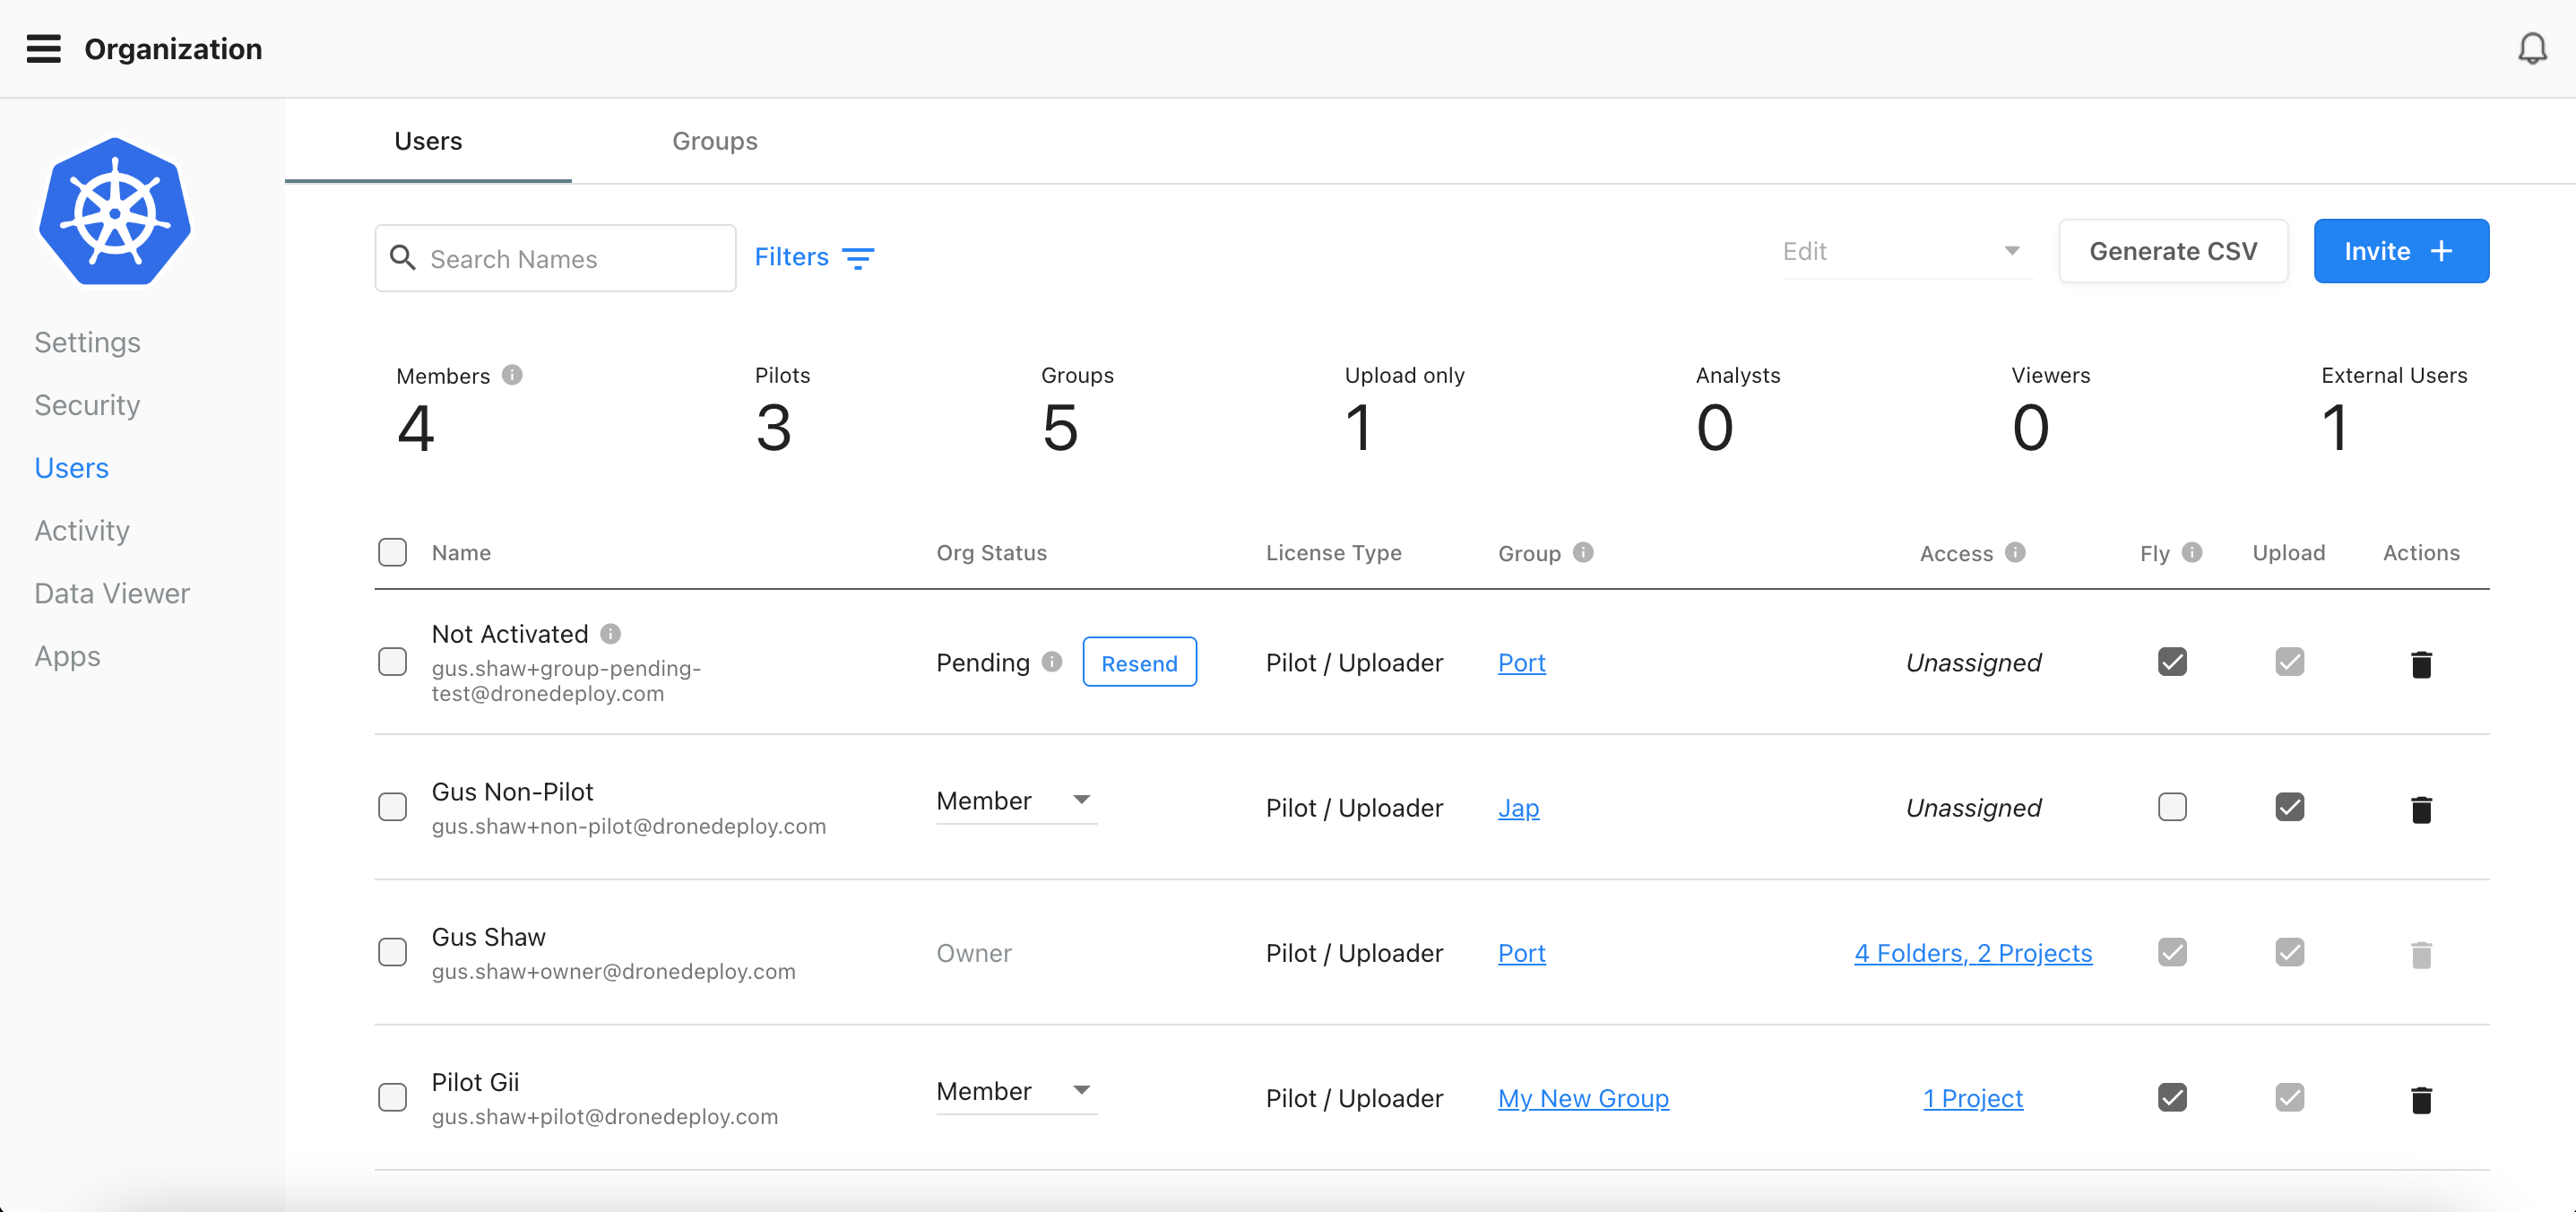
- Select the "Users" option on the left-hand menu and proceed to select Groups:
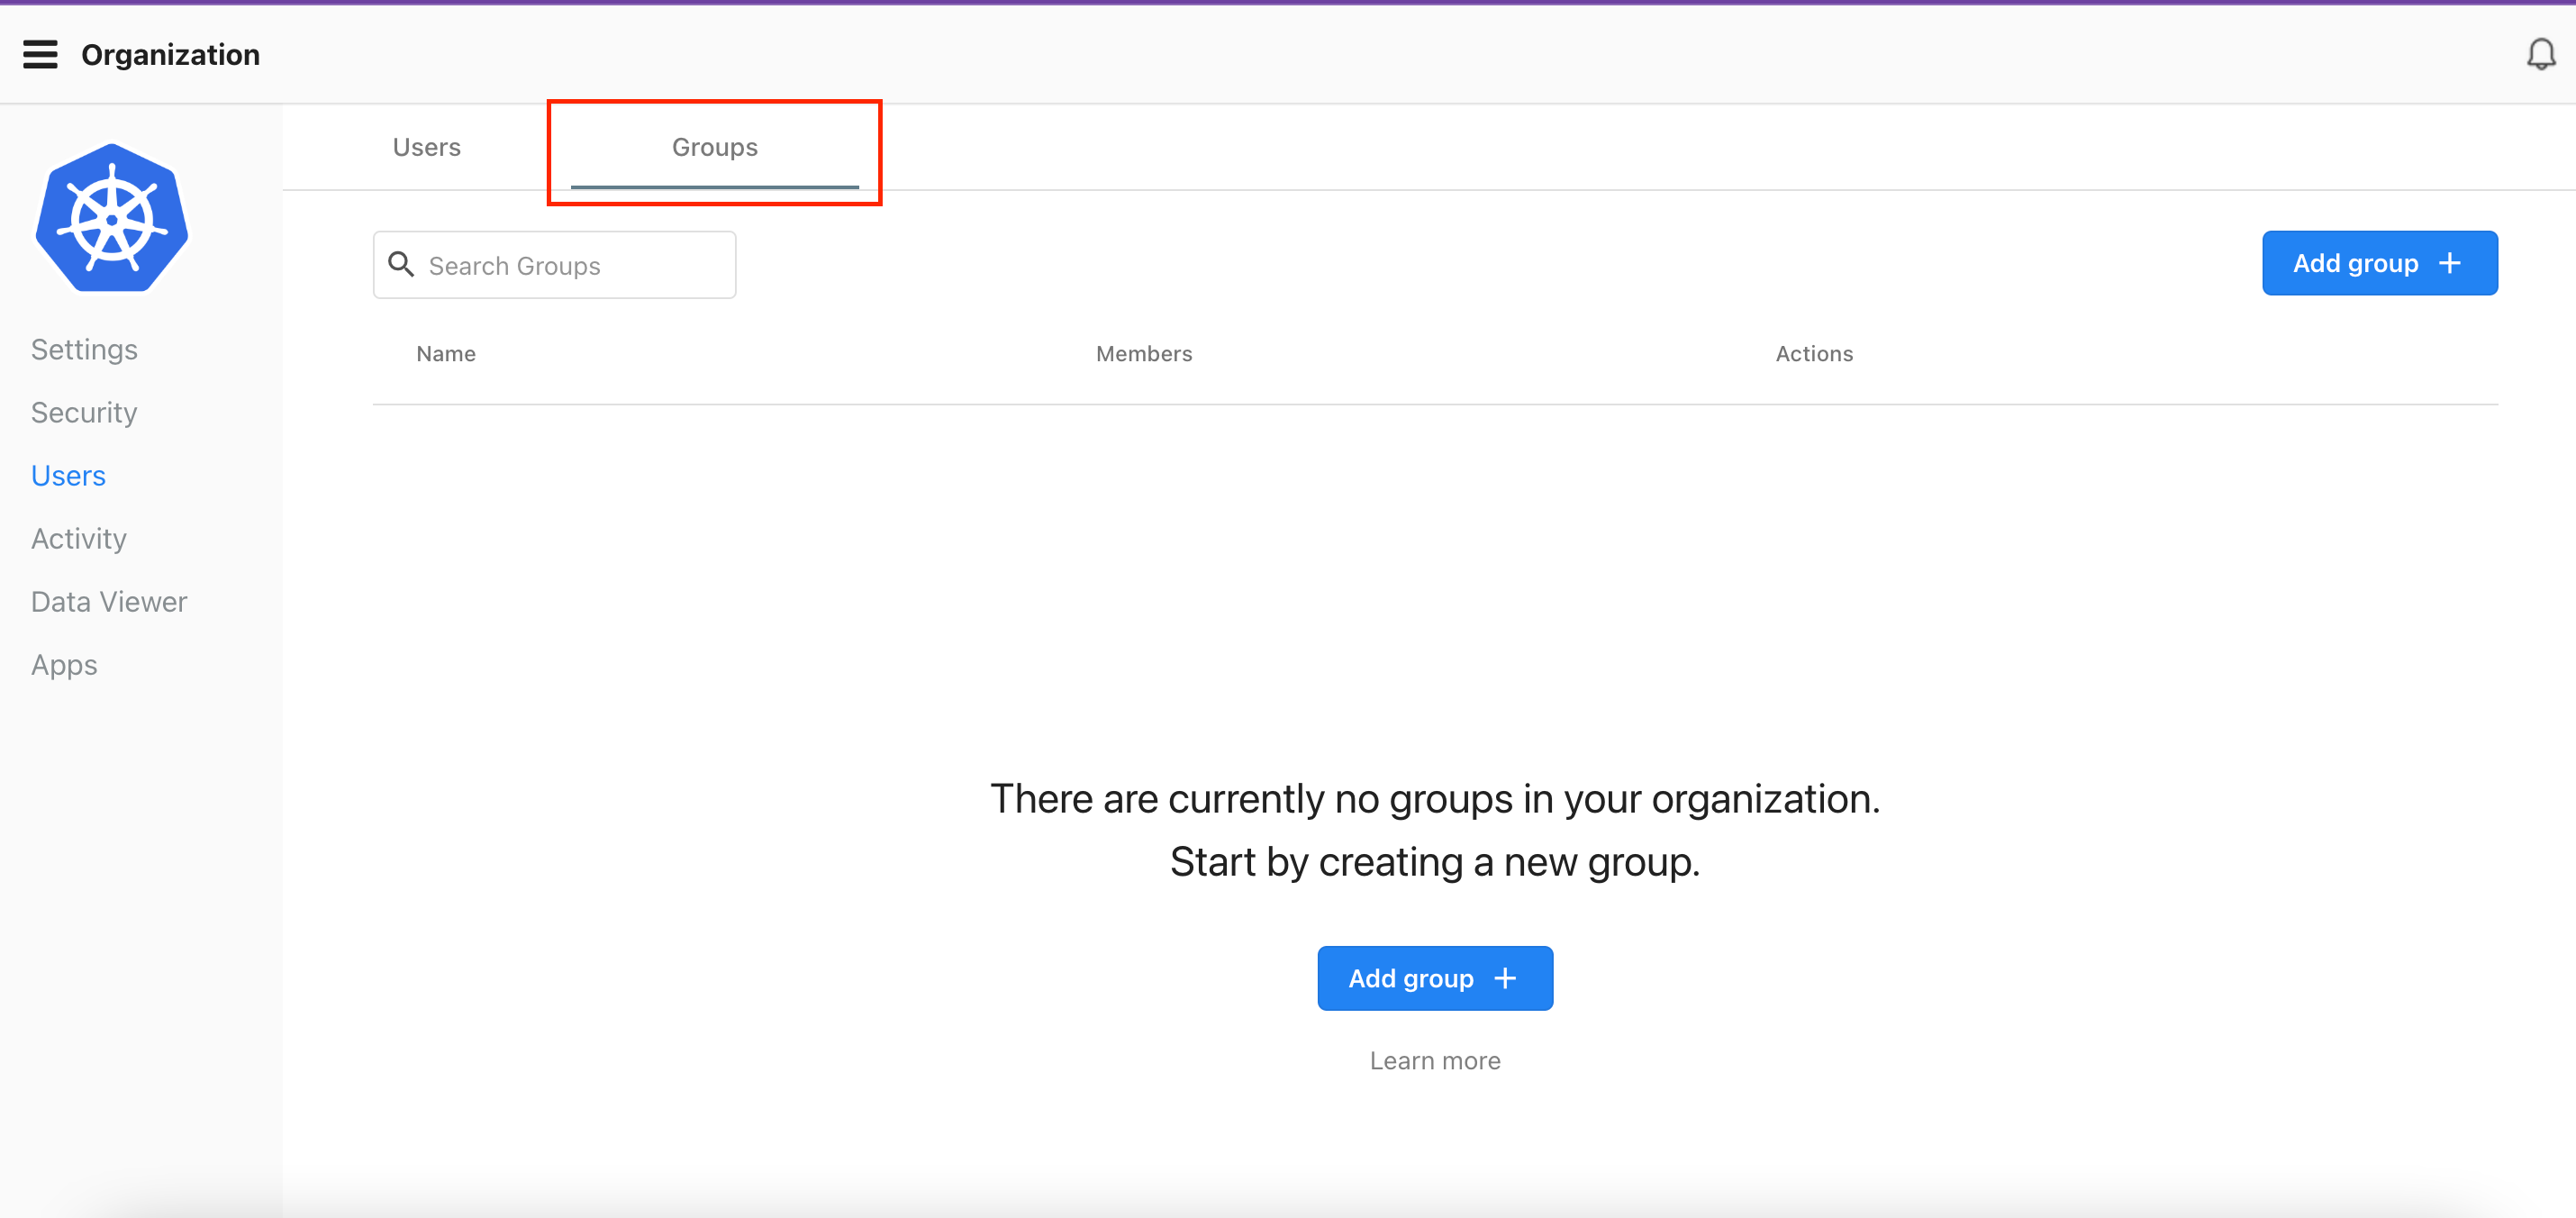
Select the "Groups" tab opposite "Users" to view the groups' page:
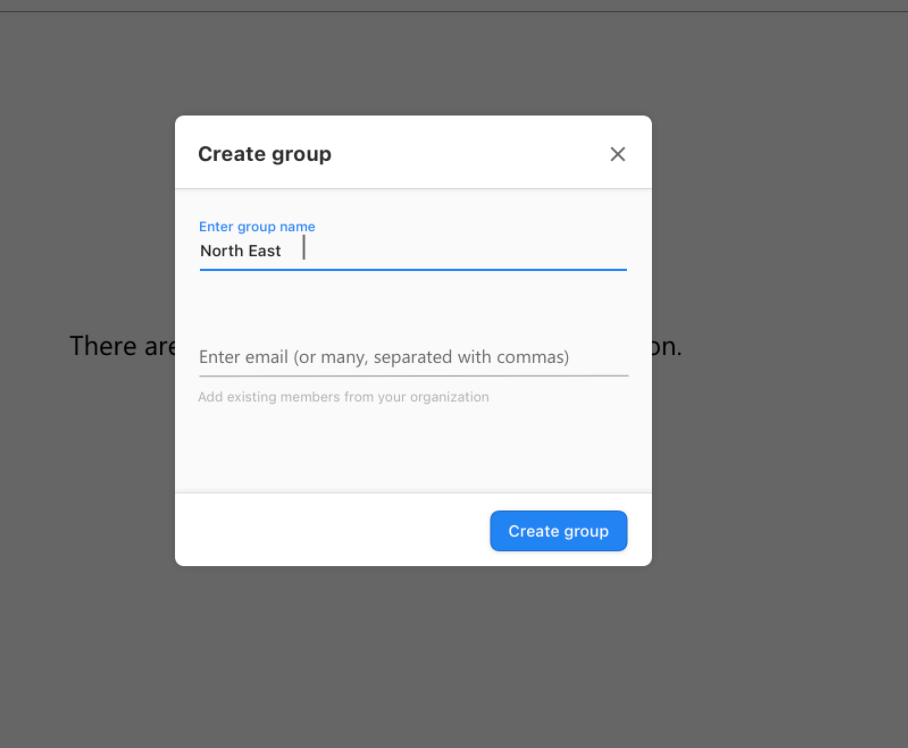
- Select "Add Group" to begin creating groups within the Org and enter the preferred name of the group that will be created, once completed proceed to enter the email address of all the users that should be added to the Group:
Step-by-Step Video: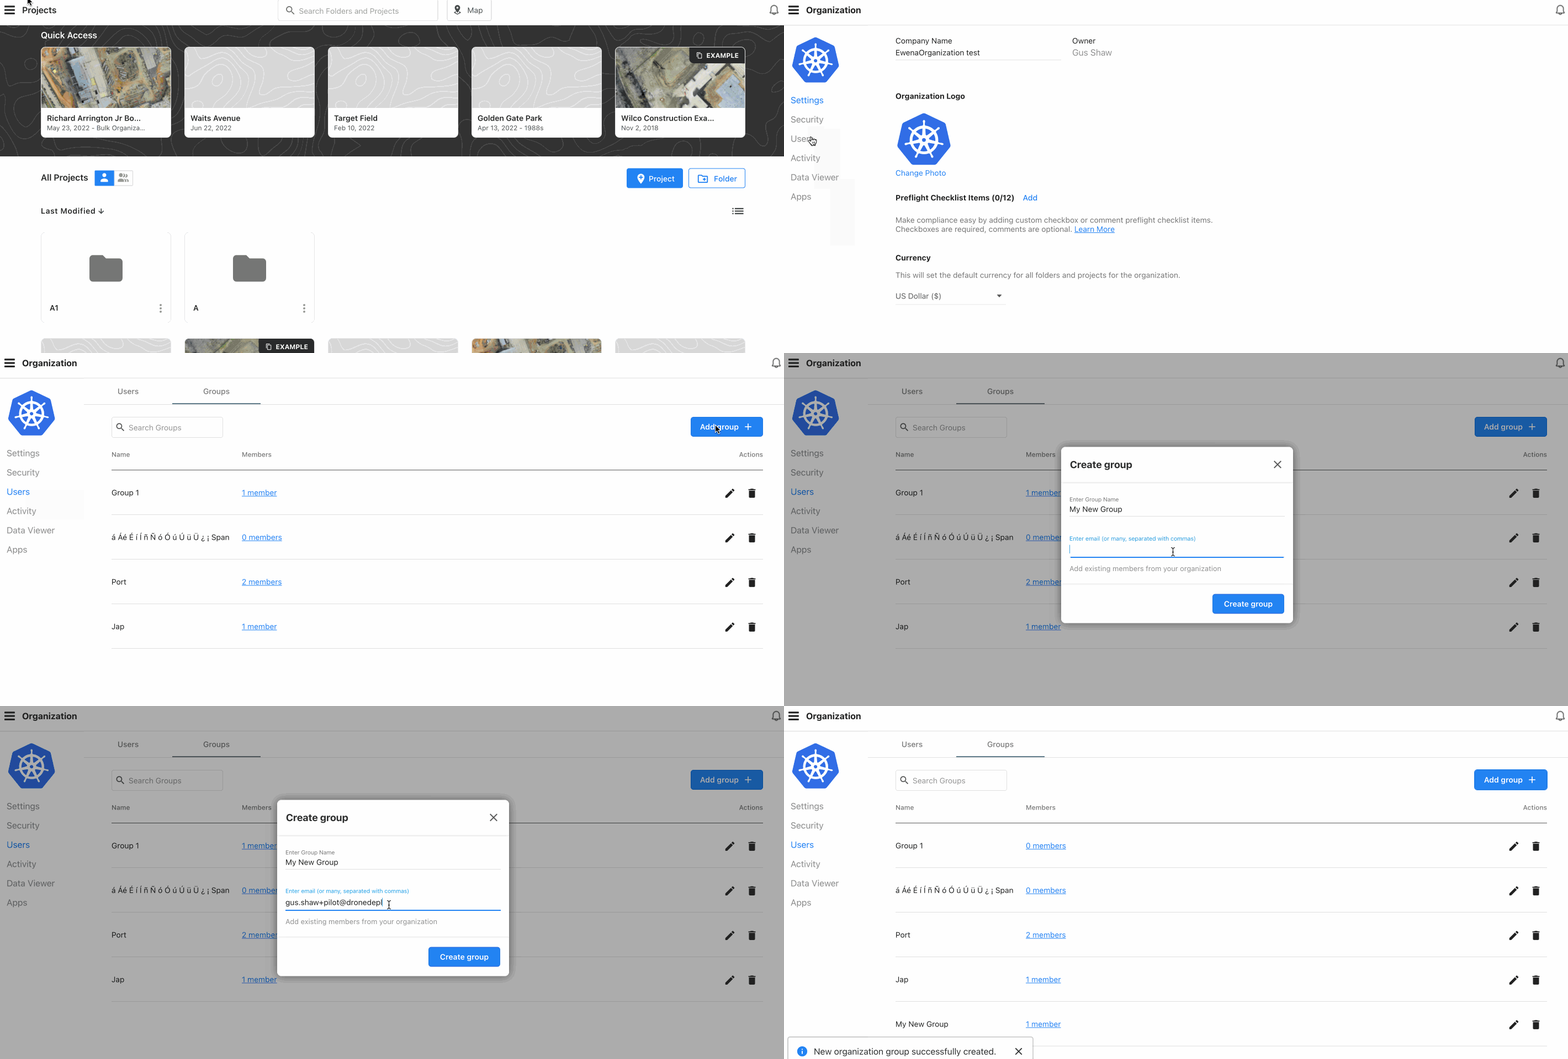
Group Management
To Edit/Change group settings you will need to select the group you would like to make changes to that can be found on the "Groups" page within the Organization settings.
Editing Groups
- Navigate to the Groups Page and select the pen icon found on the far right of the screen opposite the group name underneath the "Actions" column.

- Select the field you would like to edit. From this view, you can only change the Group name or delete users that were added to the group.

Deleting Groups
Select the trash can icon found under the actions column of the Groups page to delete any created groups. This will delete the entire group but not the users added to the group. Users within a deleted group will remain within the Org as they would if they were not added to a Group.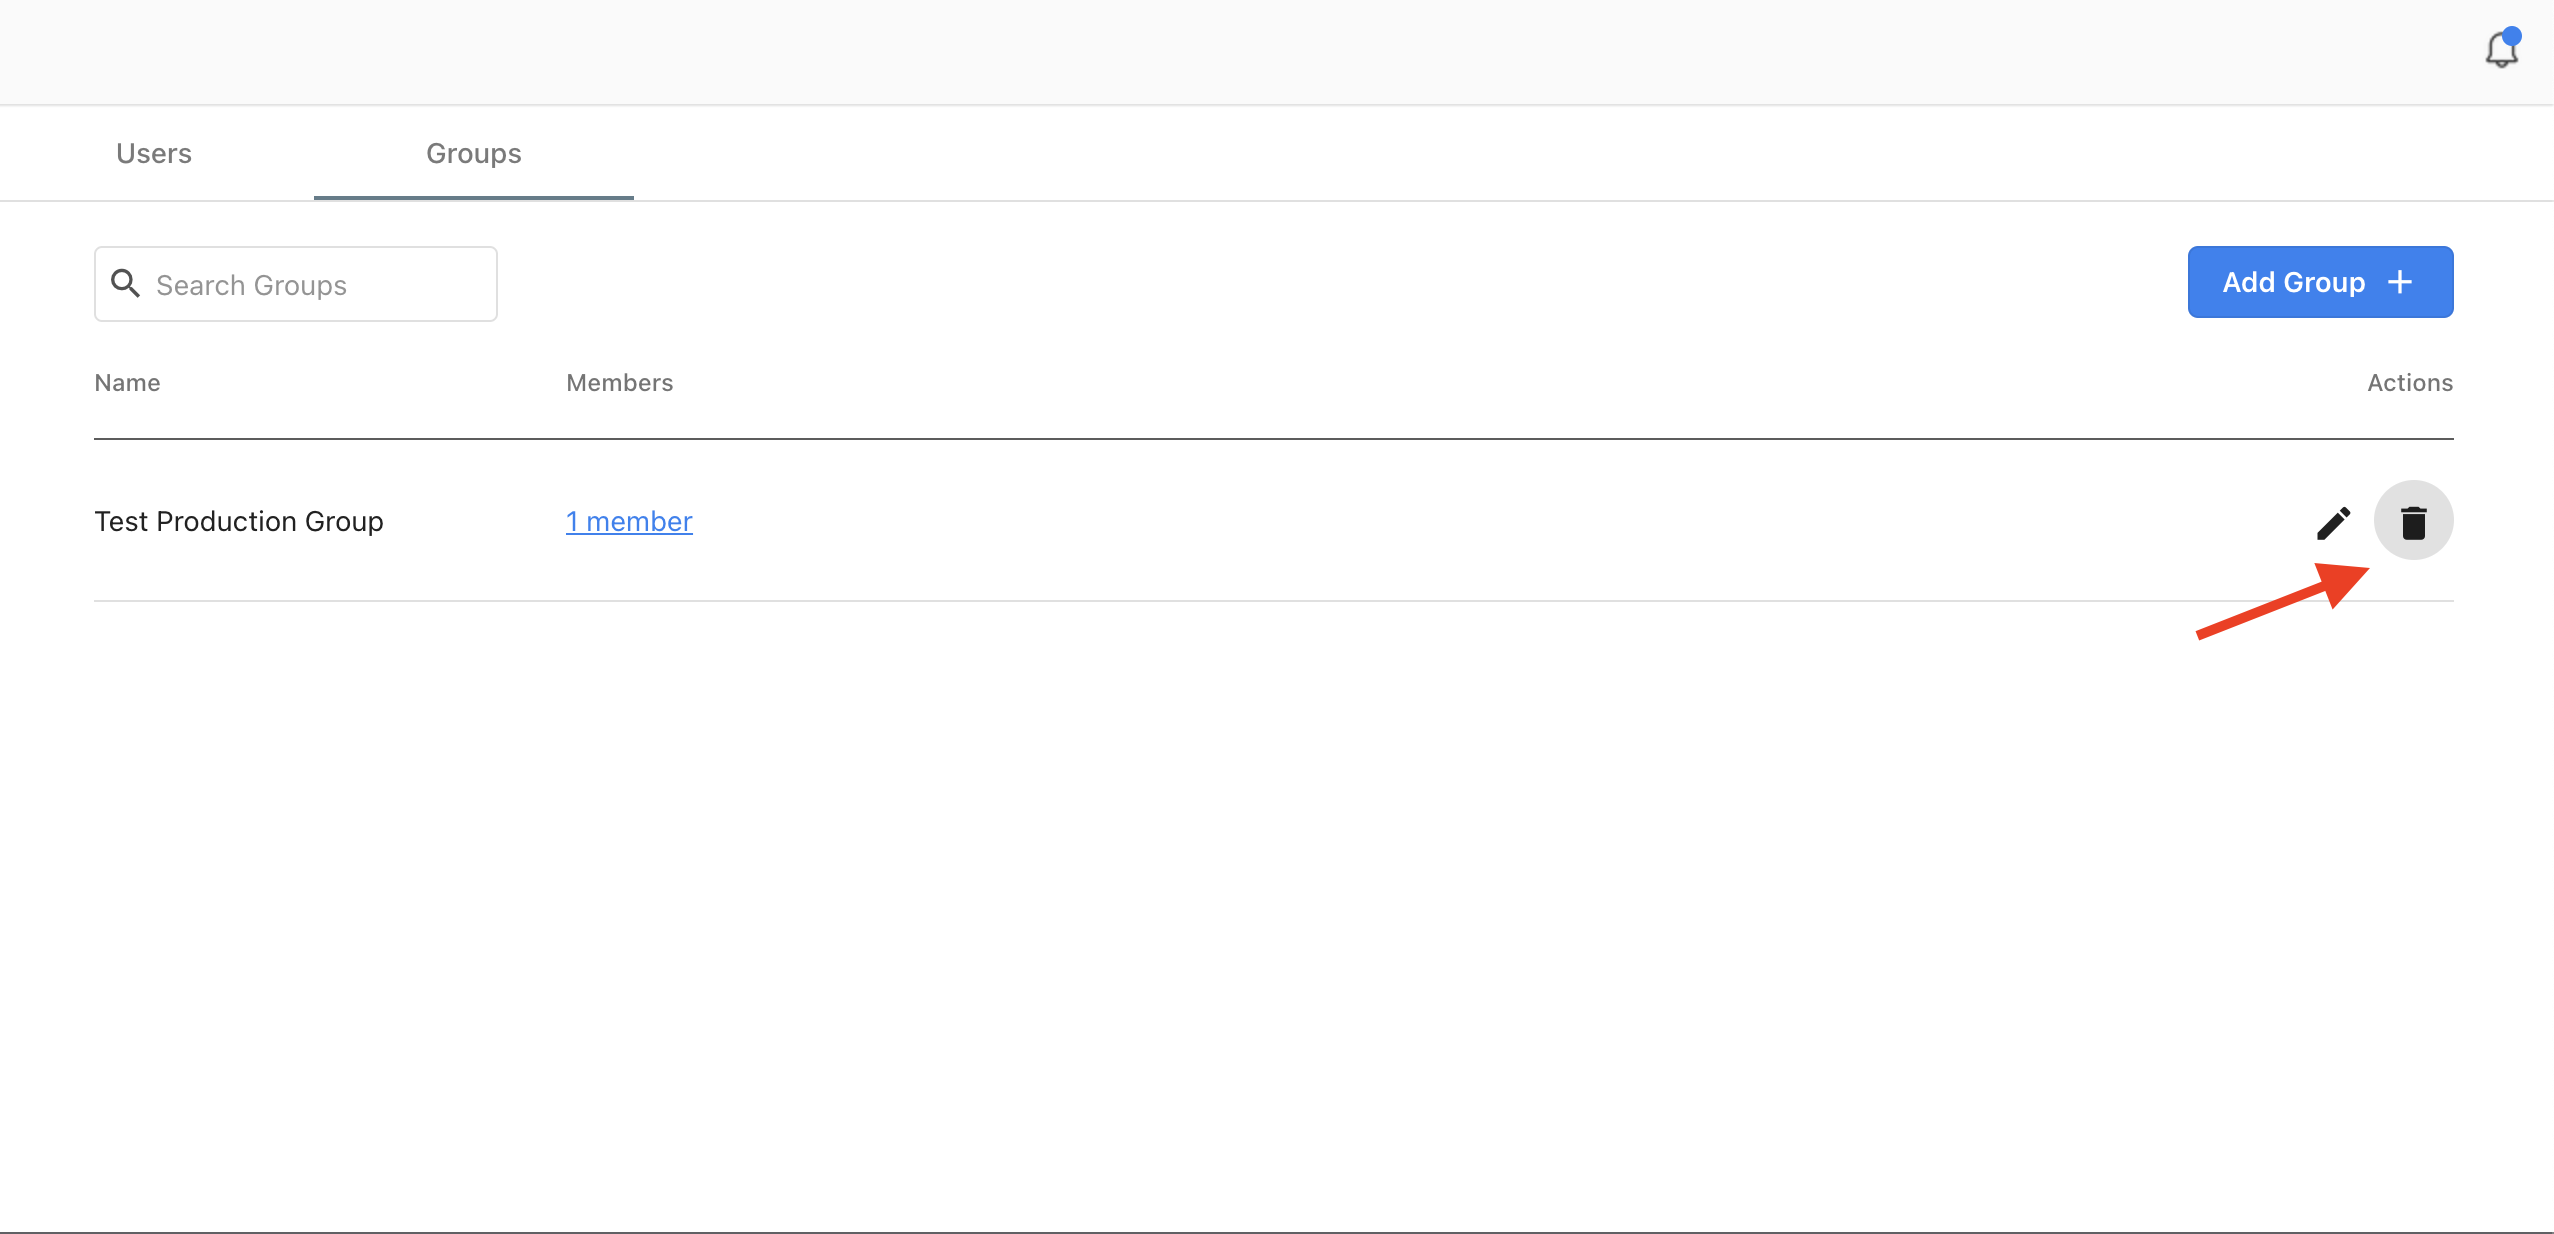

Adding Users to Groups
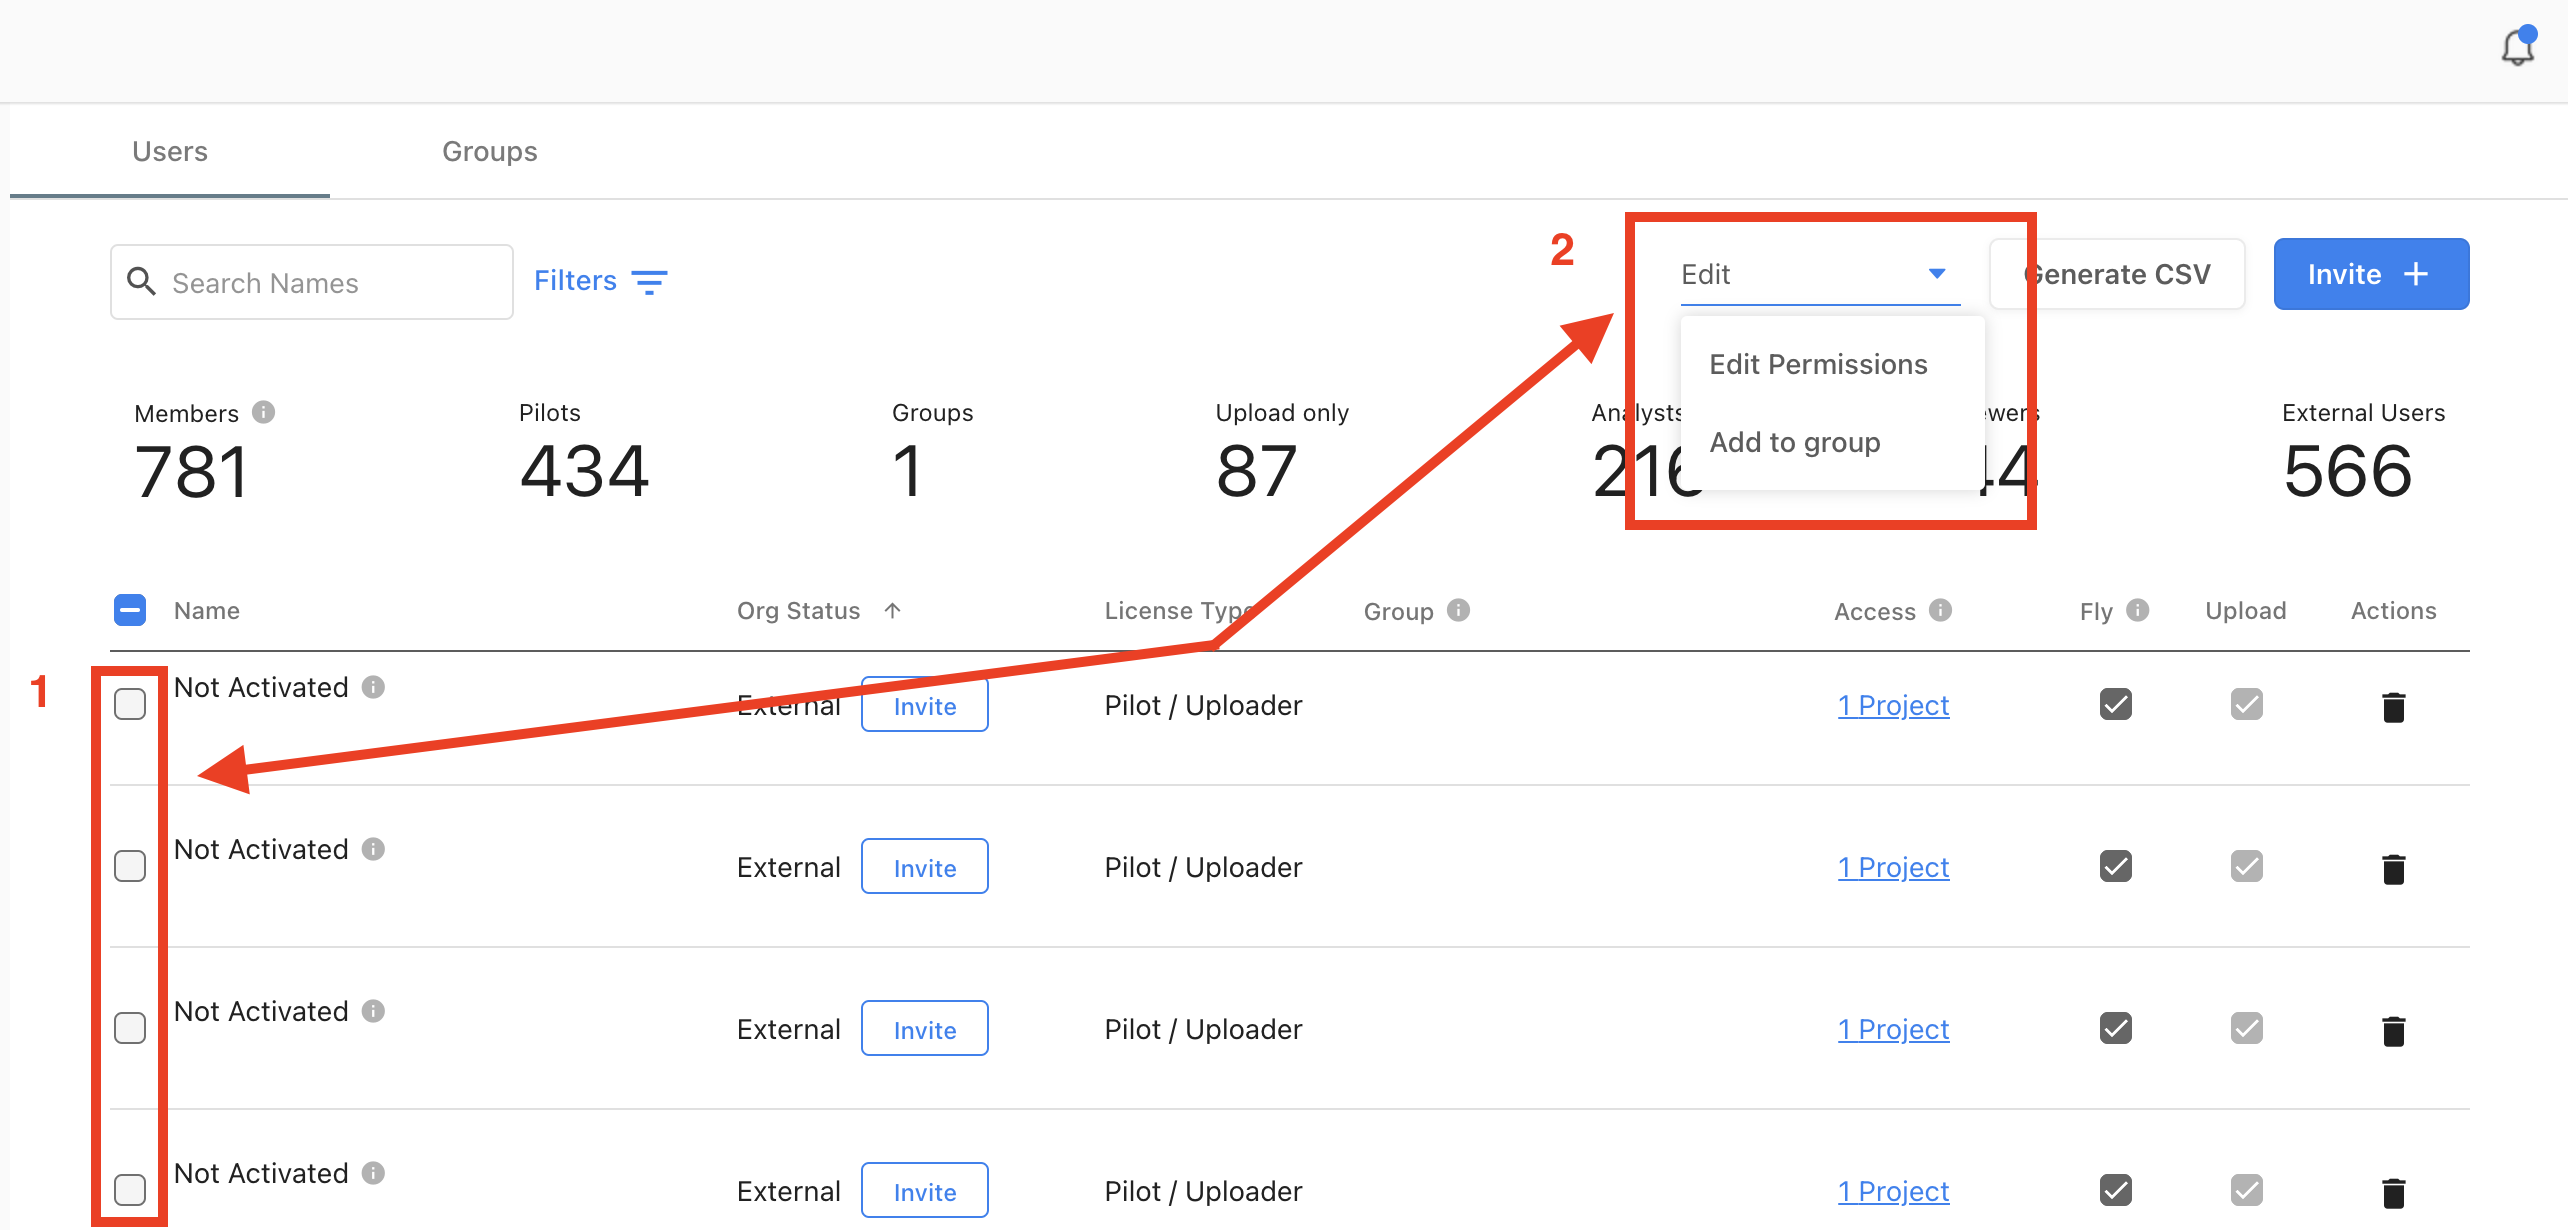
- Select the "Users" option within the Organization page and ensure you are on the Org Users page. Select the checkbox next to all the users that you would like to add to the groups.
- Select the Edit drop-down option found in the top right of the User page and select "Add to Group" to add all the users to specific Groups.
- Select the "Group Name" drop-down option to select the group you would like to add the users to. From this view you are also given the option to type any additional user email addresses you would like to add to the group.
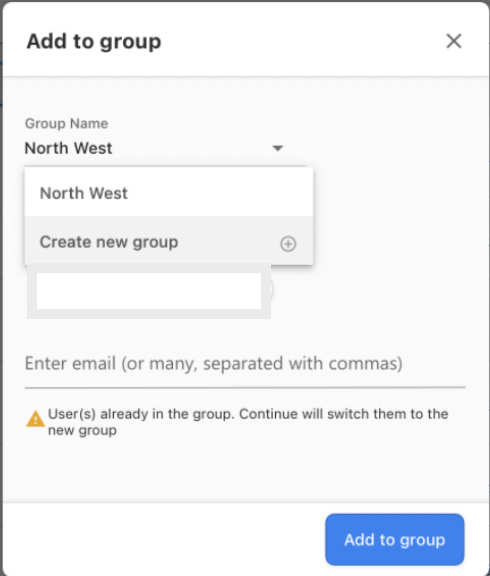
The selected users would now have been added to your selected group.
The Groups functionality is available to only the Enterprise subscription tier. For any issues encountered while using groups please reach out to Support@dronedeploy.com for further assistance.