Auto Exports can be set on a project-level basis. This will save your entire team from manually requesting standard exports after each and every map has completed processing. This allows your team to have actionable data as quickly as possible!
Navigate to Auto Exports for a Project
Once you configure an Auto Export for a project, each and every time a new map completes processing within that project, an export under your chosen settings will automatically trigger without any further action needed.
To create a new Auto Export, select the 'Export' menu in the bottom left-hand side of your screen:
Next, click on the 'AUTO' tab:
After that, click on the arrow to the right of 'Auto Exports'.
Creating a New Auto Export
You'll then be ready to prepare a new Auto Export configuration by choosing 'Create New':
Next, you'll choose your export parameters. This is the same window used for manual exports.
You can add email addresses to the first text box if you would like them to receive an email when the export has completed. You can select your Layer, File Type, Projection, Single vs Tiled Image, and your Resolution
Press 'Next' when you are ready to proceed with your export destination:
Choose Auto Export Destination
Currently, you can choose between the below main Auto Export Destinations. Click on any of the following links to navigate to the specific instructions for your integration:
- Local Download to your Computer
- Plangrid
- OneDrive / OneDrive for Business
- Procore
- S3
- Bim360
- Box
- Egnyte
- Google drive
- Azure
Organization Level Auto-Exports
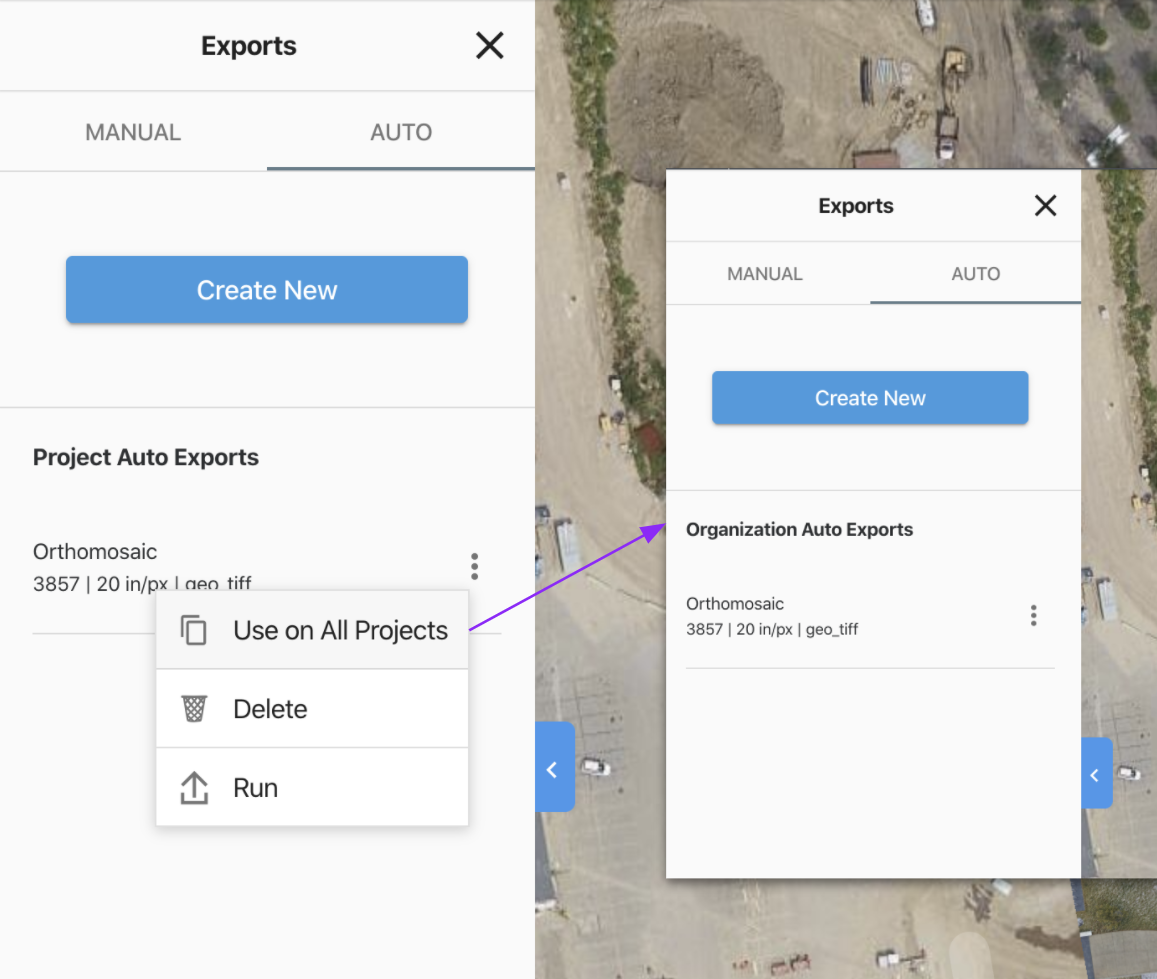
Enterprise customers are able to "promote" project Auto Exports to be used for every project in their account.
For example, if you need a Geotiff export of every map you produce, for archival storage, or to run a machine learning model against, you may want to ensure every map your team creates appears in a particular folder in OneDrive or Amazon AWS.
Promote your Auto Export by clicking the : menu, then "Use on all projects":

FAQs
What size limitations do the integrations have?
File & Size Support for Integrations
Can I update an Auto-Export?
No, you need to delete the auto-export and re-create it, if you need to update the file type, size or destination.