The new Interior view within DroneDeploy equips Construction, Property Management, and Energy customers with the ability to organize their interior Walks and Levels alongside maps and models on multi-level sites within DroneDeploy.
Overview
Creating levels and uploading corresponding drawings allows for seamless navigation from exterior maps and models to ground-based captures across multiple levels of a building interior.
Create a level
Levels are added to a project from the Interior view. If you are accessing this view for the first time, the system prompts you to upload a drawing, which then initiates the level creation process.
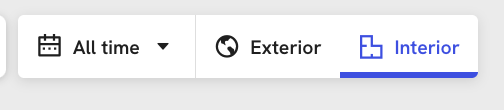
Click the Interior tab at the top right of the Explore page.
Click + Upload drawing.
Enter a name for the level. DroneDeploy defaults to the drawing filename, but you can edit this in the alignment screen.
Complete the drawing alignment.
Bulk Level Uploads
You can upload multiple levels at one time by selecting them in the upload window. Multi-select your drawings, and rename them in the upload window:
Aligning your drawing
Once your drawing has been uploaded, you’ll be automatically taken to the alignment screen. Here, you can choose which Level you want to add the Drawing to (it will default to the Level or map you viewed last), and choose your alignment points.
- Choose to align it to an overlay/orthomap on the Interior or Exterior.
2. Place drawing on another overlay or orthomap.
Once you have completed the alignment, you'll see a processing notice when the drawing has been uploaded. This is expected and you will have a low-resolution placeholder available!
Once alignment is complete, a processing notice appears. A low-resolution placeholder is available while the high-resolution drawing processes.
Set a base floor plan
If you upload multiple overlays to a single level (such as MEP or HVAC plans), you can choose a Base Floor Plan. This is the default layer visible when you select that level.
Open the Overlays tab in the left panel.
Locate the desired drawing.
Select the option to set as the base plan. The current Base Floor Plan displays a grey flag icon.
Manage levels
Once you add a level to a project, a level selector appears next to the Interior tab.
Navigate: Click the level selector to open the level manager and jump to any level.
Reorder or Edit: Click Manage Levels to reorder, delete, or edit level names.
Permissions: Only admins and editors can edit, reorder, or delete levels.
[!IMPORTANT] Deleting a level does not delete the data on that level. Drawings, Walks, Media, and Field Notes return to the Exterior map view.
Add media to levels
You can upload Walks, Panos, Photos, and Videos to any level.
Select the desired level from the level selector.
Click Upload next to Media in the left panel.
Follow the prompts in the Smart Uploader to complete your upload.
How to Manage Levels
Once a Level exists in a project, a Level selector appears at the top next to the Interior tab.
Click the Level selector to open the Level manager.
Use the Manage Levels button to reorder, delete or edit Levels.
To change a Level name or order, select the specific Level and enter the new details.
Organize with folders
Use folders to group related levels and keep your project organized.
Click the New Folder button.
Type the name for the folder.
Click Save. A confirmation prompt appears in the bottom left corner when the folder is ready.
Editing Scale on Levels
DroneDeploy uses the scale of the Level to place Walks accurately. While the system estimates this internally, users can update the scale for higher precision.
Open the interior level panel by clicking on the current Level.
Select the three-dot menu and choose Set Scale.
Use the crosshair tool to select a known reference distance on the map.
Enter the measurement.
FAQs
Q: I have existing Walks in DroneDeploy—how can I use Levels?
A: Migrate existing Walks to Levels without re-uploading. Select Edit Location from the sidebar to access the Alignment page and select a Level.
Q: Will an existing Drawing be added to a Level?
A: No. Re-upload the existing Drawing to add it to a new Level.
Q: Can multiple Walks be added to the same Level?
A: Yes. Users can add multiple Walks to a Drawing on a single Level.
Q: Can multiple Drawings be added to a Level?
A: Yes. This is useful for having both architectural plans and demo drawings available for reference.
Q: What if my Walk covers multiple levels?
A: For best results, keep capture limited to one Level. As a workaround, reflect the capture area in the Level name and include Drawings from all walked areas on that Level.
Q: What if my project has multiple buildings?
A: Use the folder structure to organize Walks by "Phases" or "Buildings."
v2.2